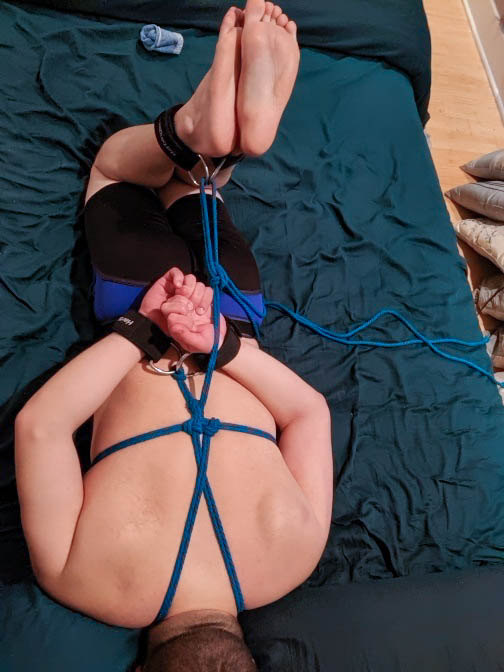
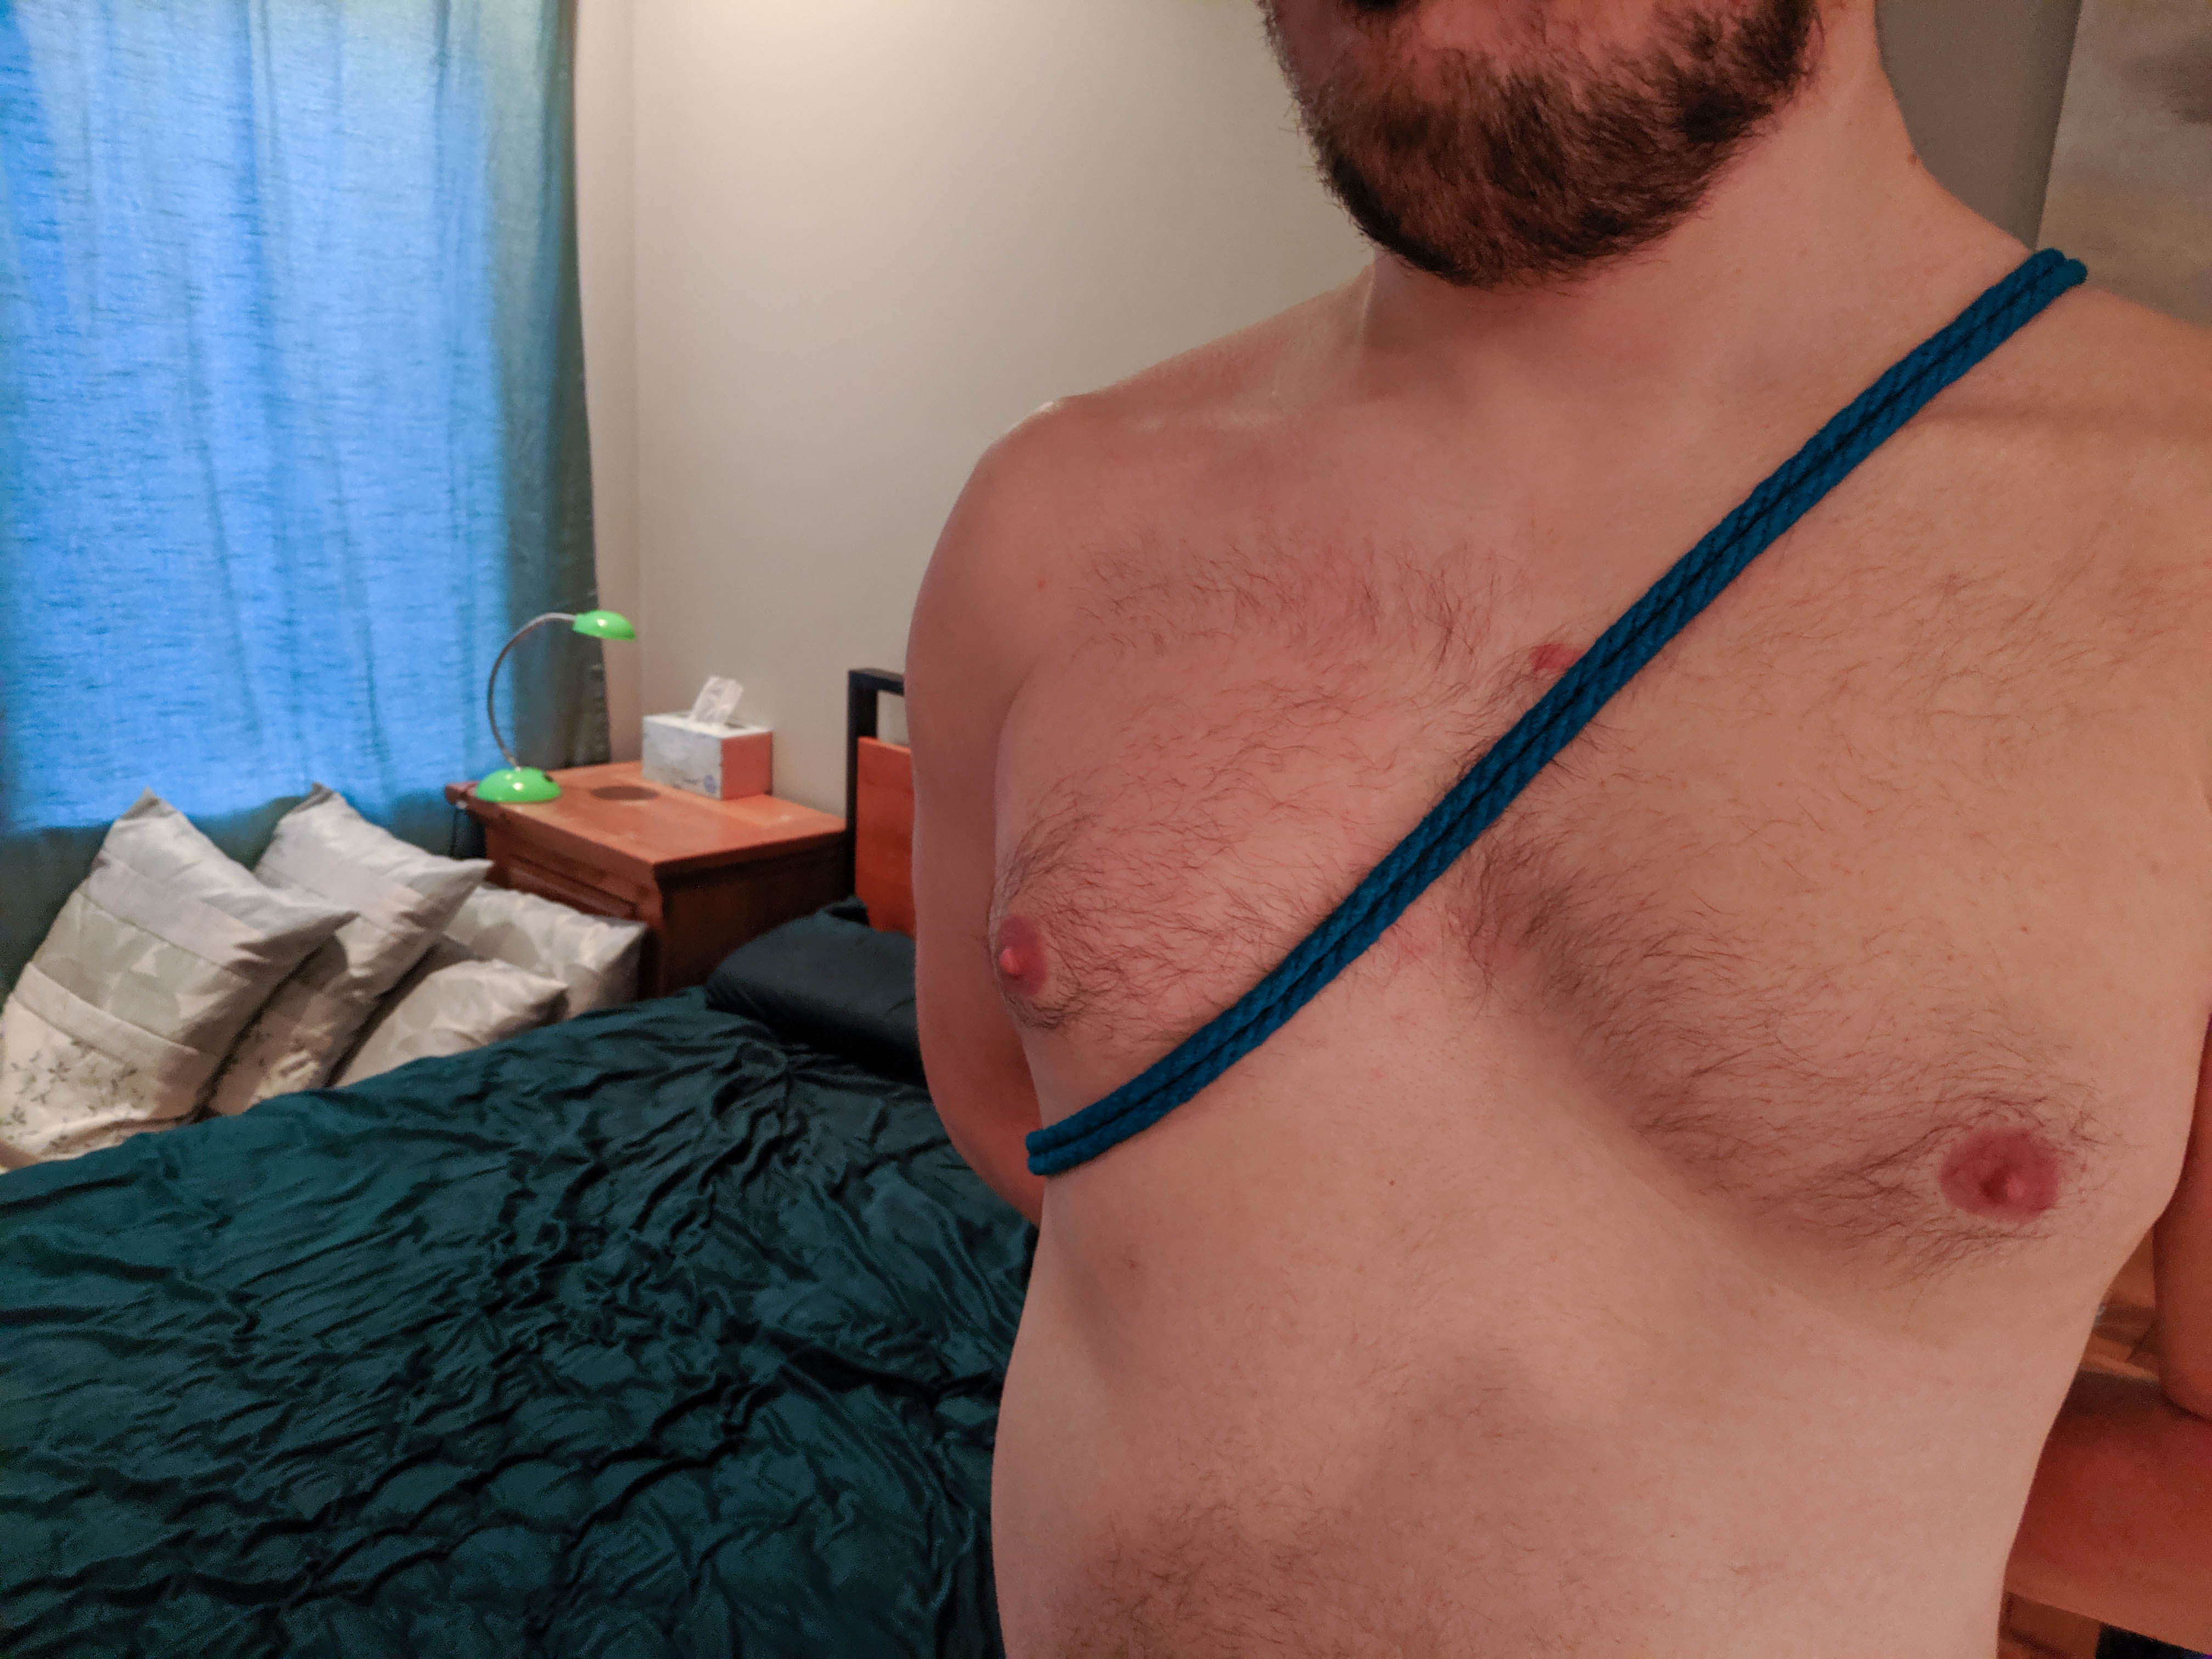
Pictured above: Model TGU1145 (fetlife | recon) with chest harness
last updated Feb '20
What you will need:
- Safety sheers (Don't have them yet? They're not expensive! Link)
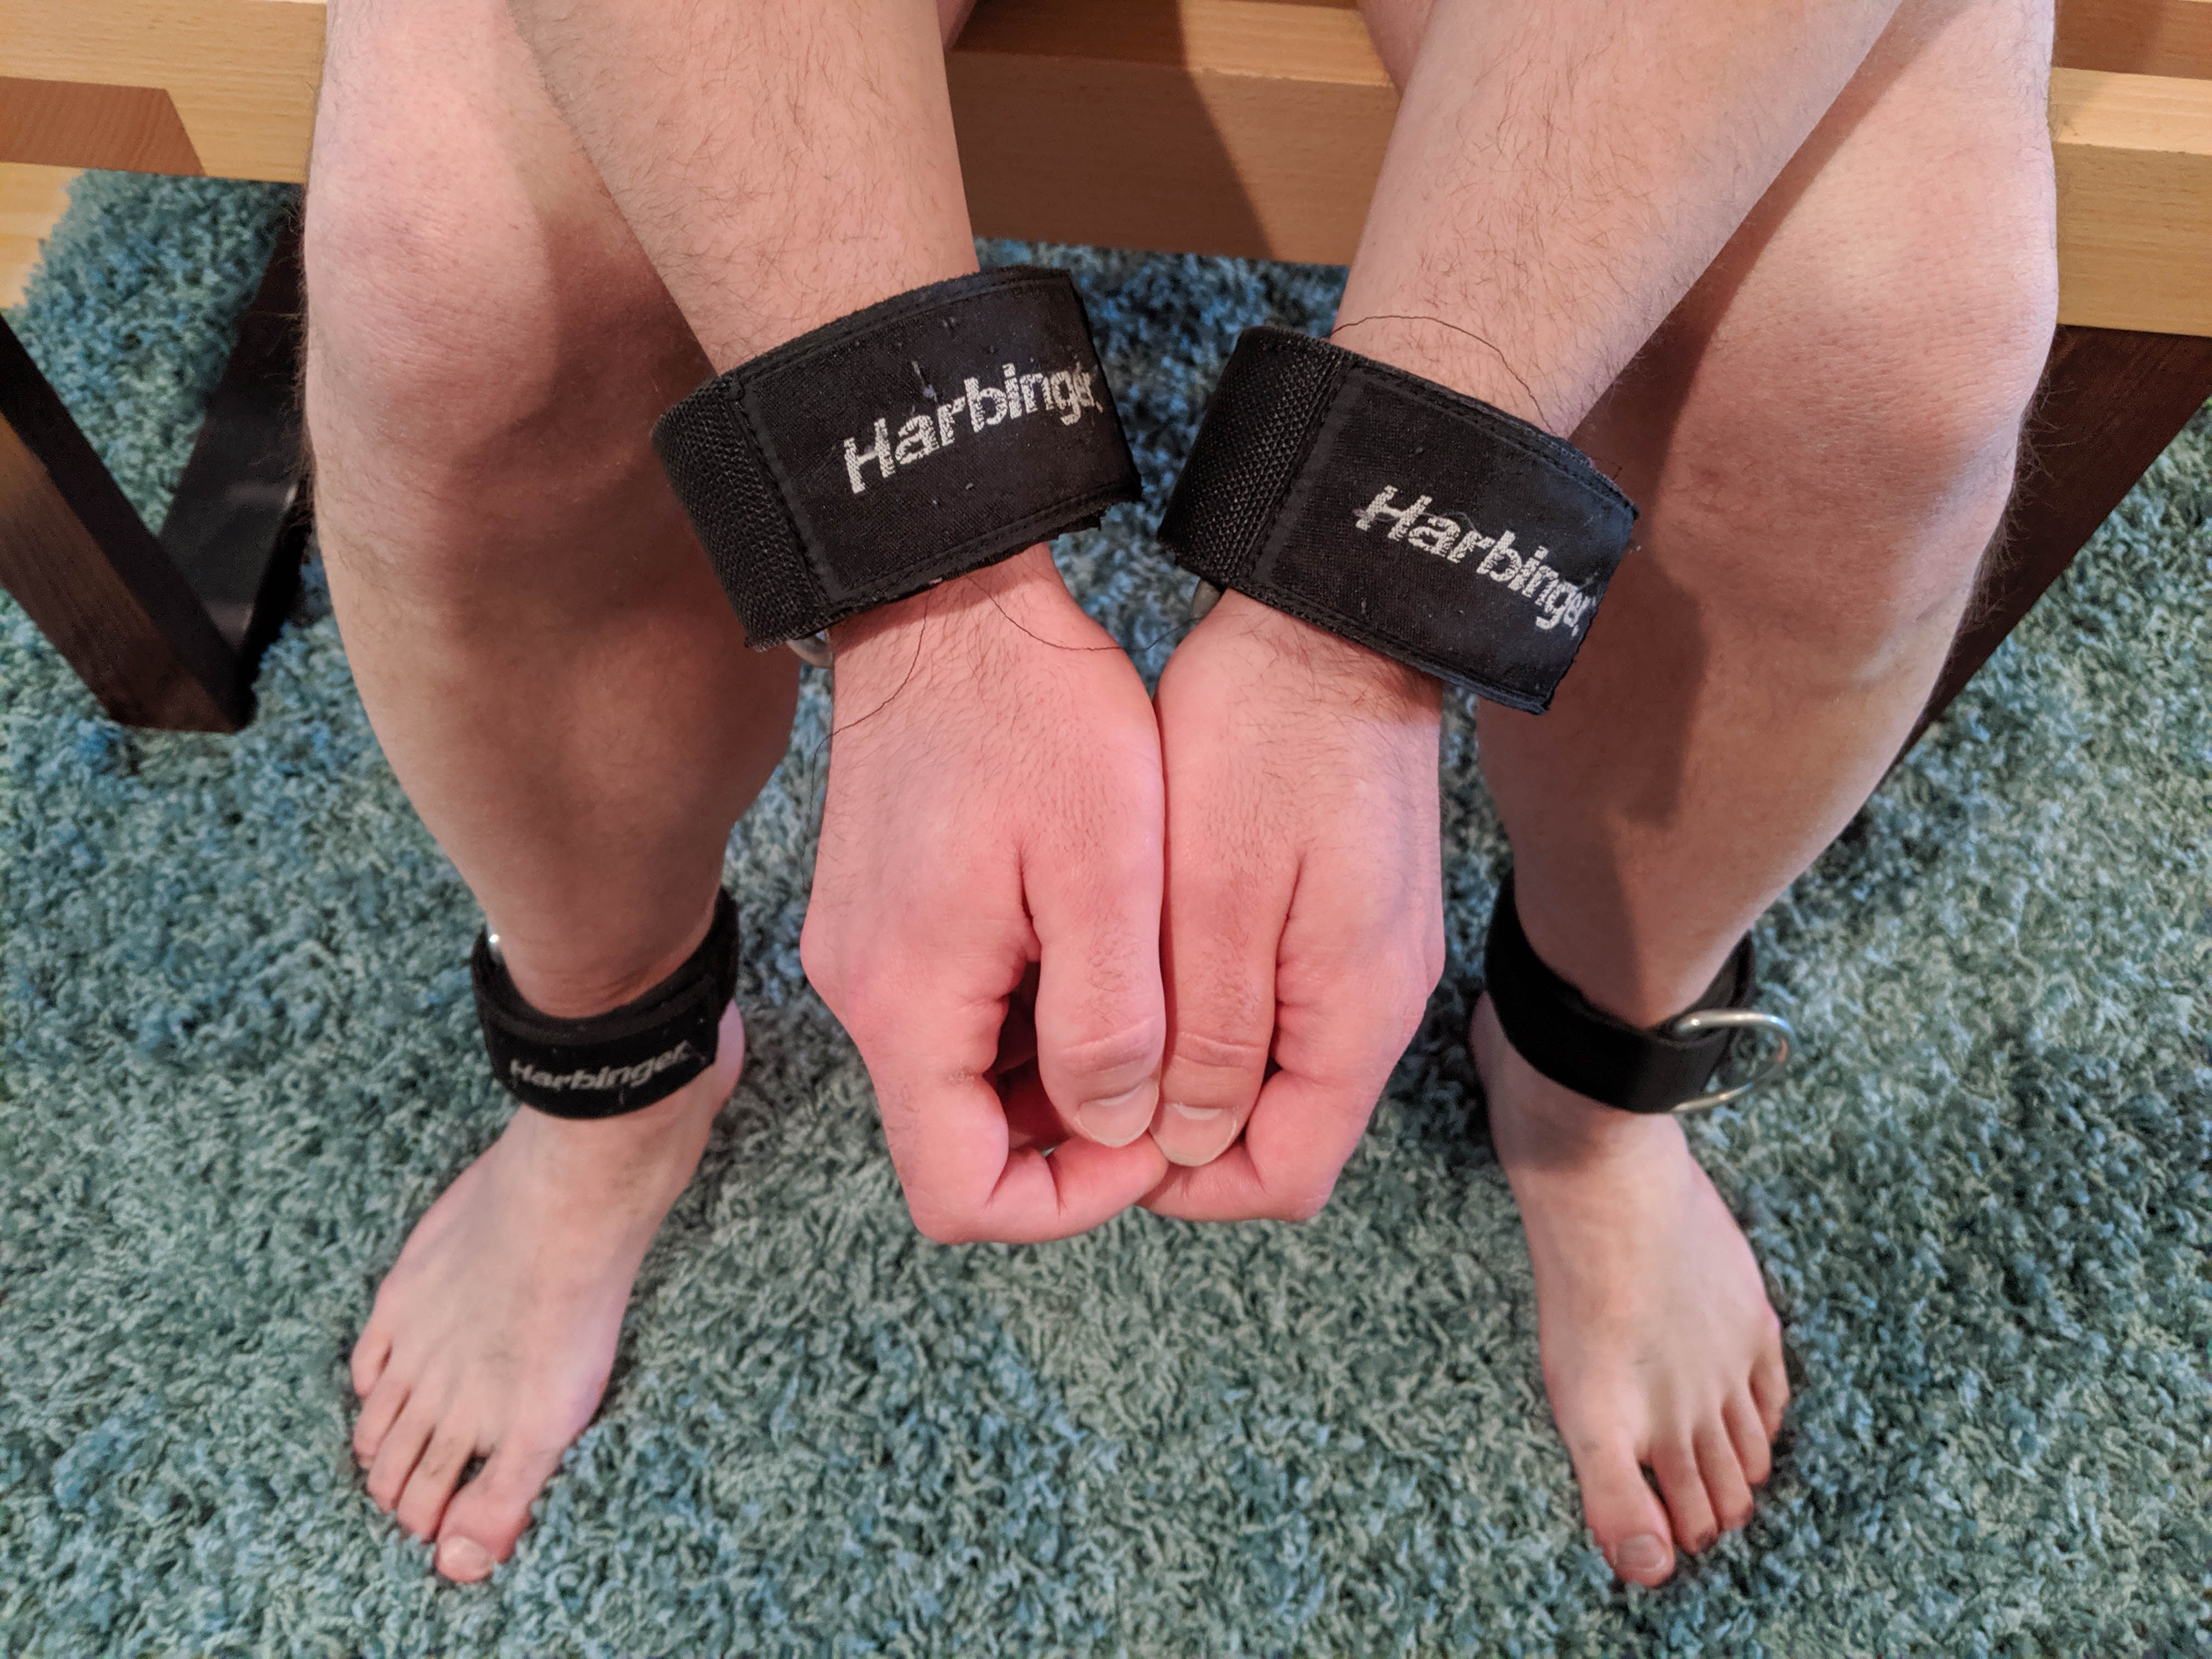
- Four comfortable cuffs. These are the ones I used for this tutorial.
- 20-40 ft of rope, depending on the size of the person. For refrence, this model didn't need the full 30ft bundle.
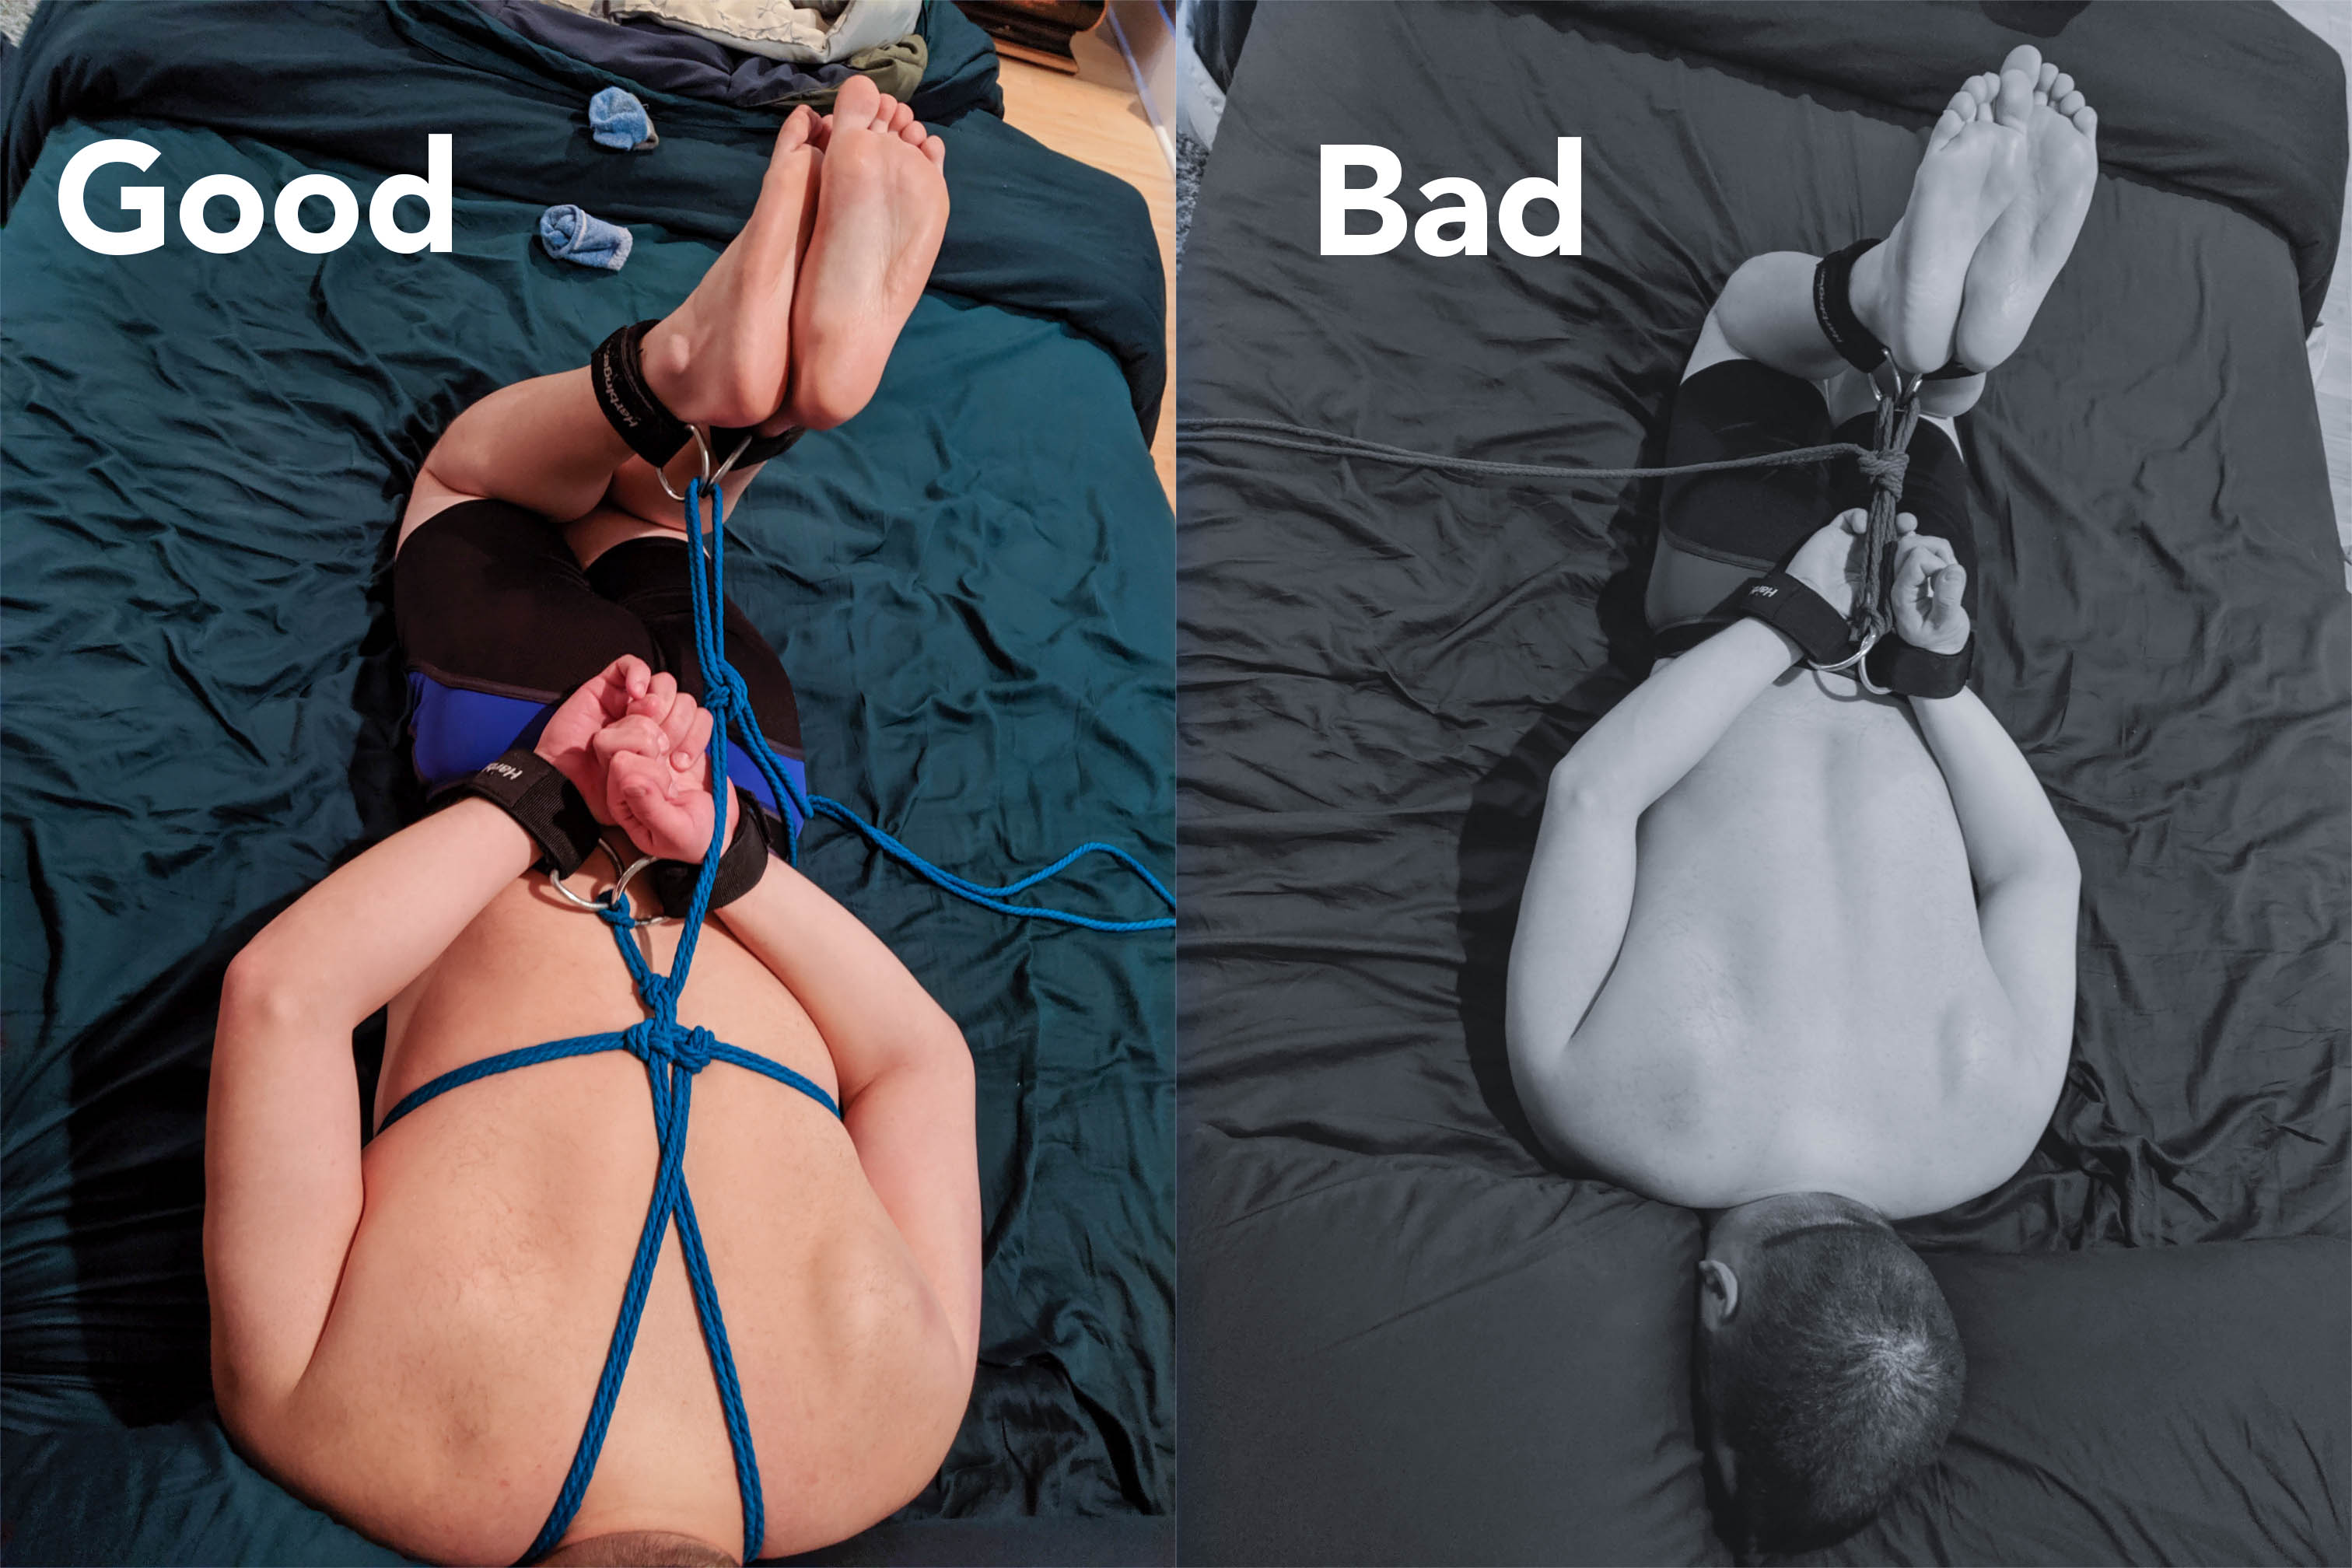 Pictured above: Two versions of a hogtie
The hogtie on the right isn't very good because the ankles are attached directly to the wrists. This isn't a particularly safe tie because sudden kicks risk damaging their wrists and shoulders. It turns out this tie leaves them with a pretty wide range of motion and can be rather unsatisfying for the person being tied. This tutorial will instead show you how to tie the better hog tie on the left.
Knots used in this tie:
- Munter hitch
- Midshipman's hitch
- Half hitch
- Ring hitch / Lark's head / Cow hitch
Steps
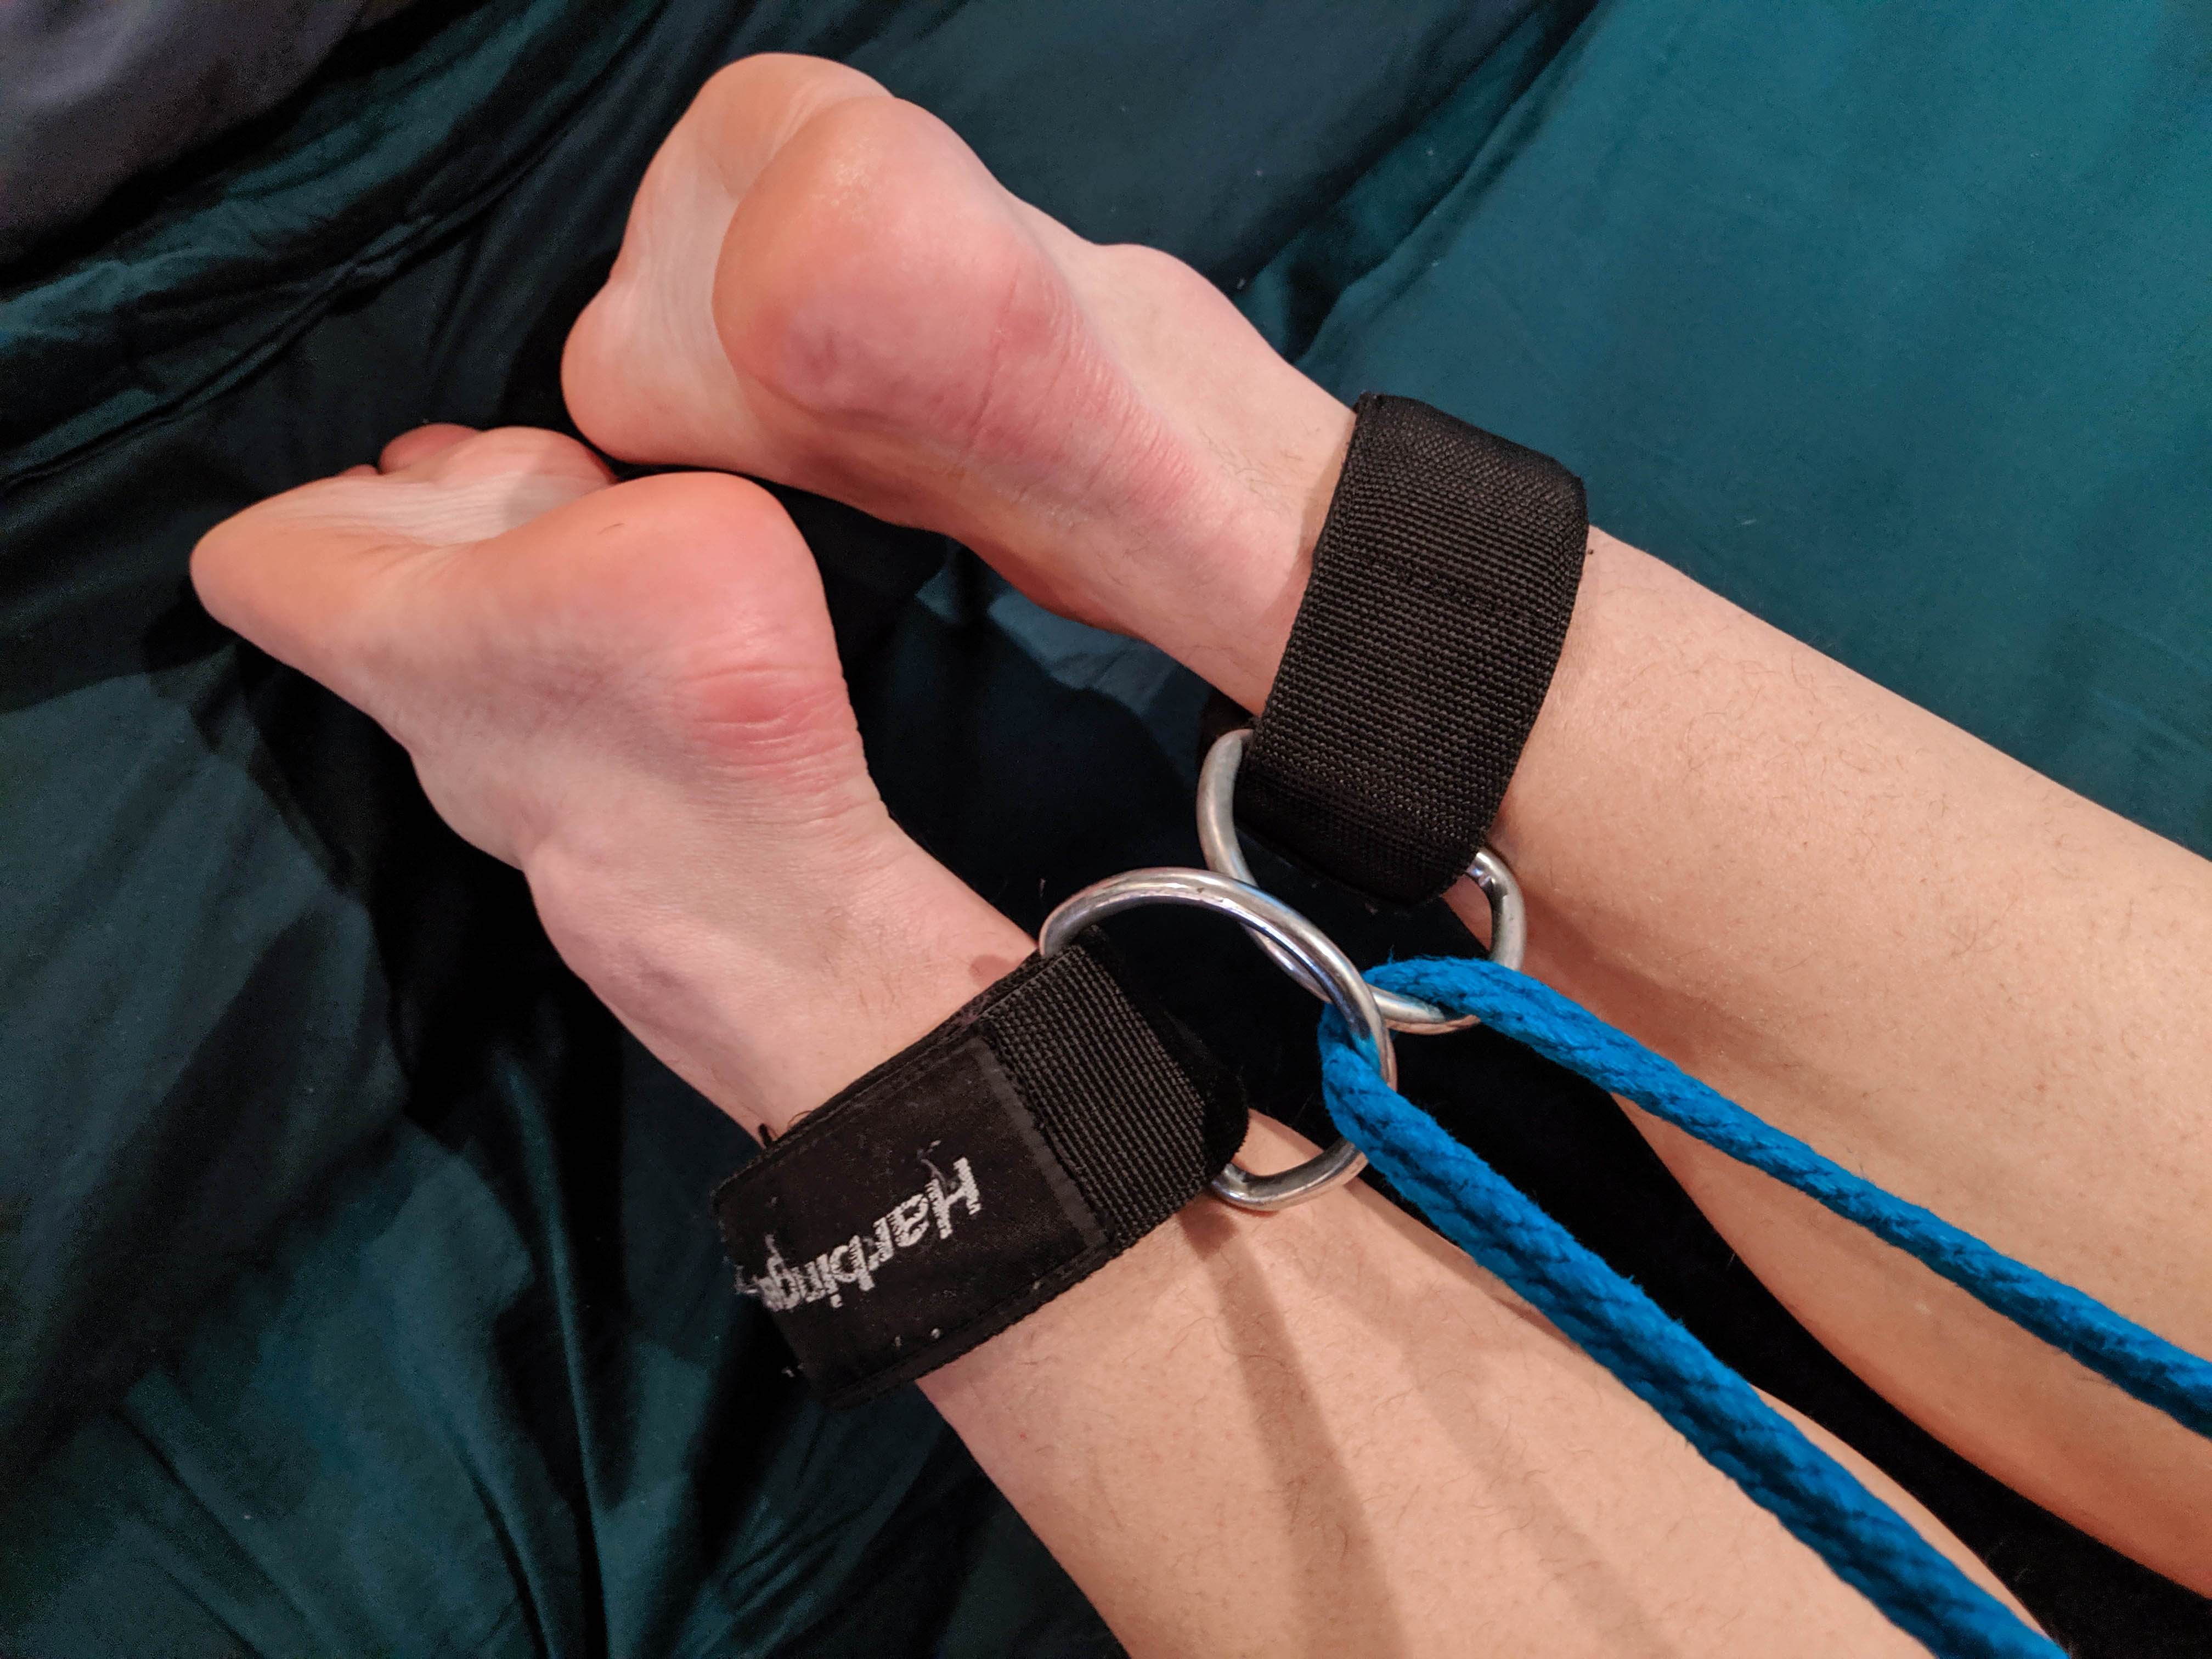
There are lots of ways to do a hogtie with just rope and no cuffs, but using cuffs simplifies the whole thing significantly. They also make the tie much easier to undo in the case of an emergency. You can buy a set of cuffs in nearly any local sex shop, or online. I recommend trying them on in person if you can because some of them can be rigid and hurt even under a reasonable amount of pressure.
Make sure the cuffs are snug, but not tight enough to restrict blood flow or cause fingers to feel numb. If your partner feels either of these things be sure to adjust the cuffs or take them out of the tie if it's not quickly improving.
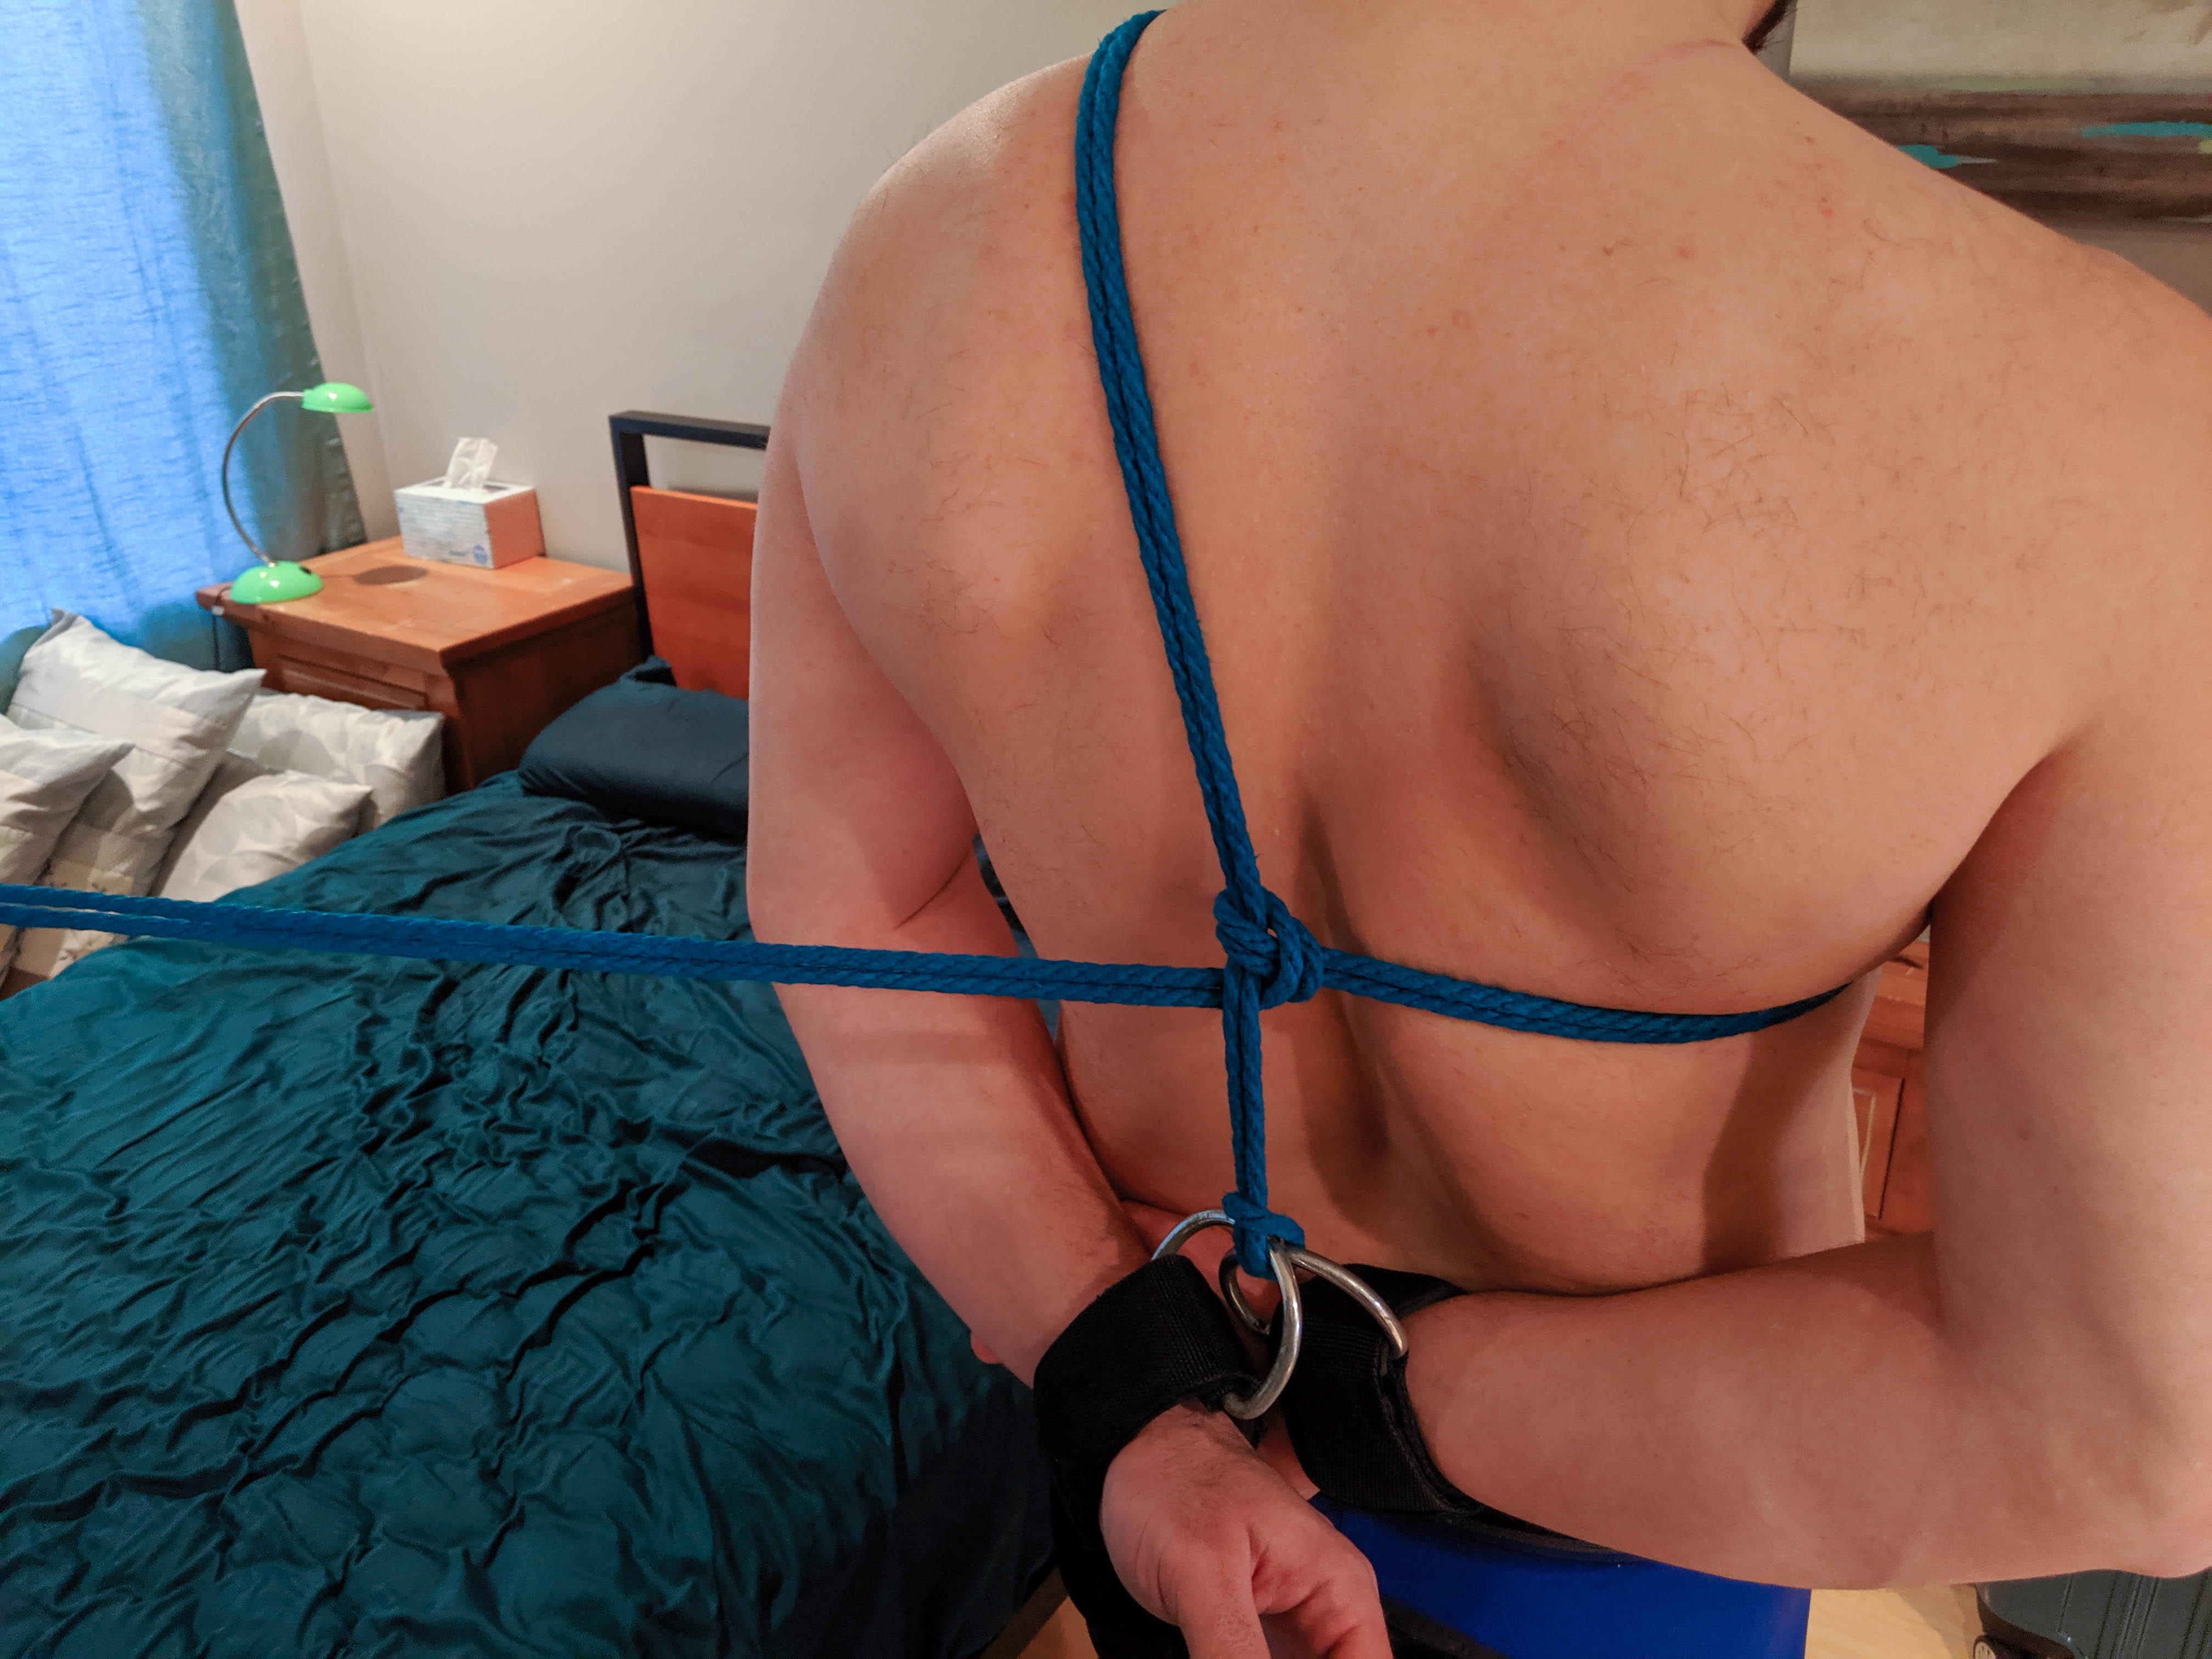
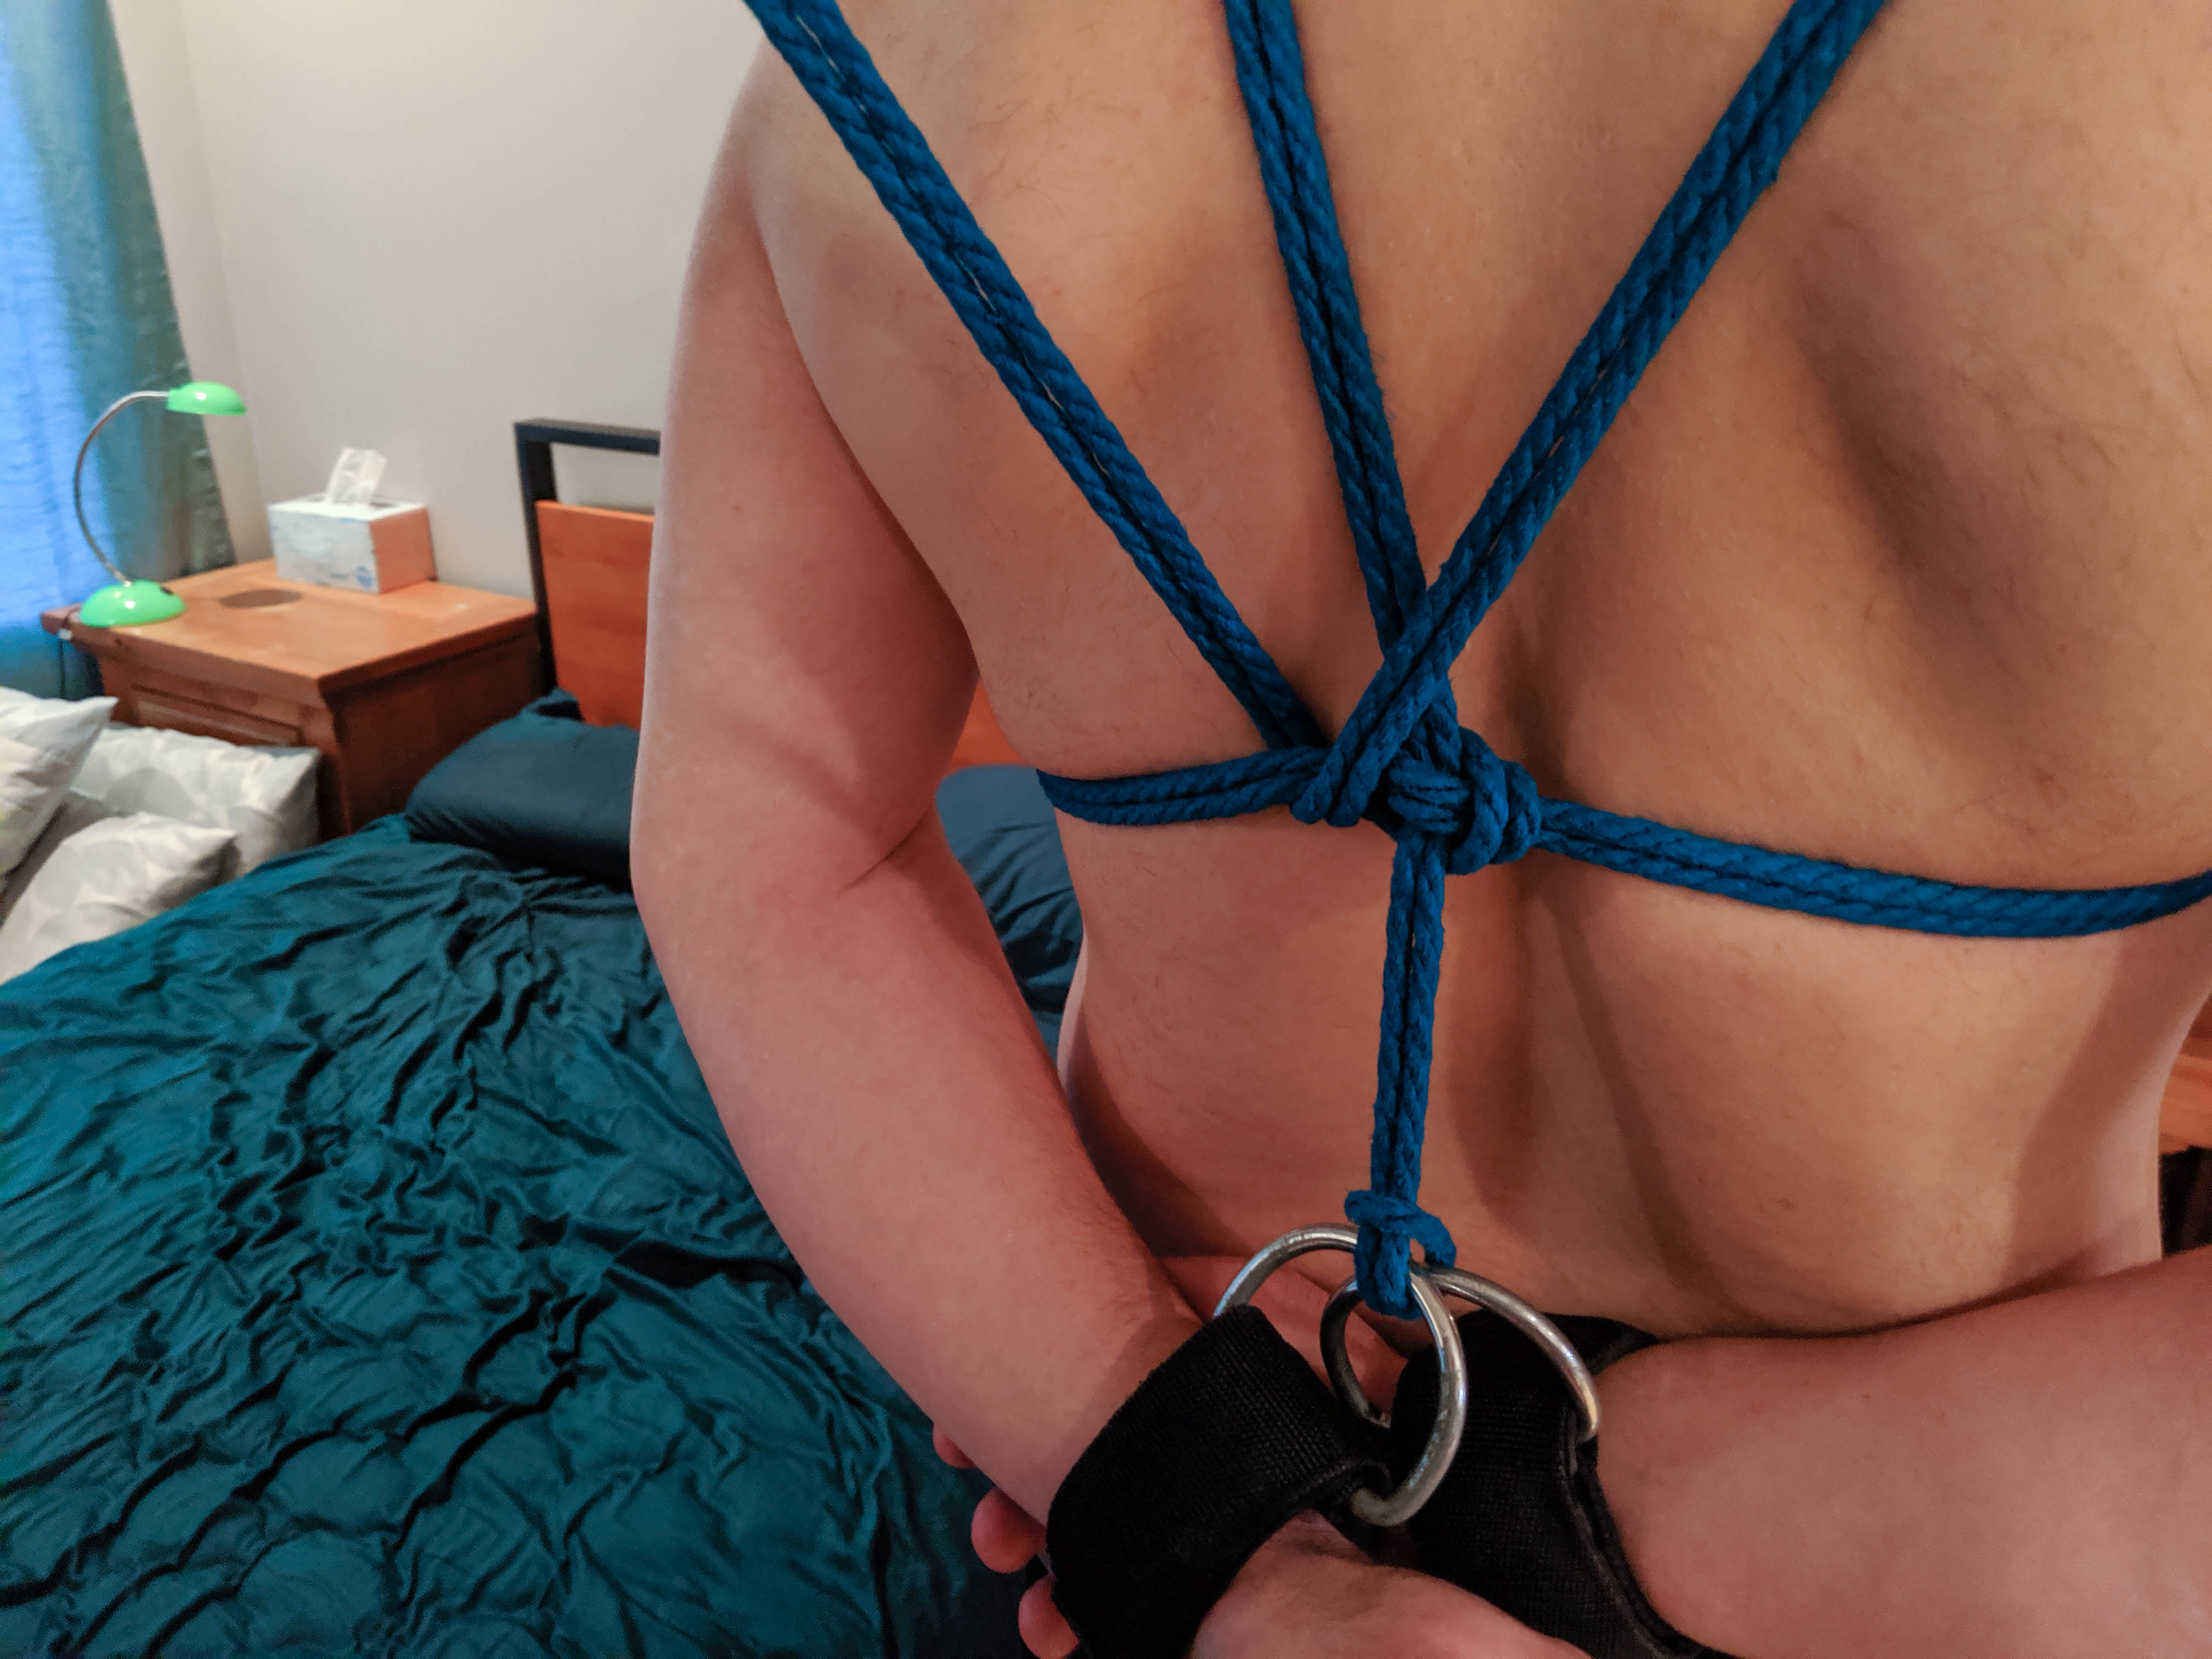
First, have your partner put their arms behind their back.
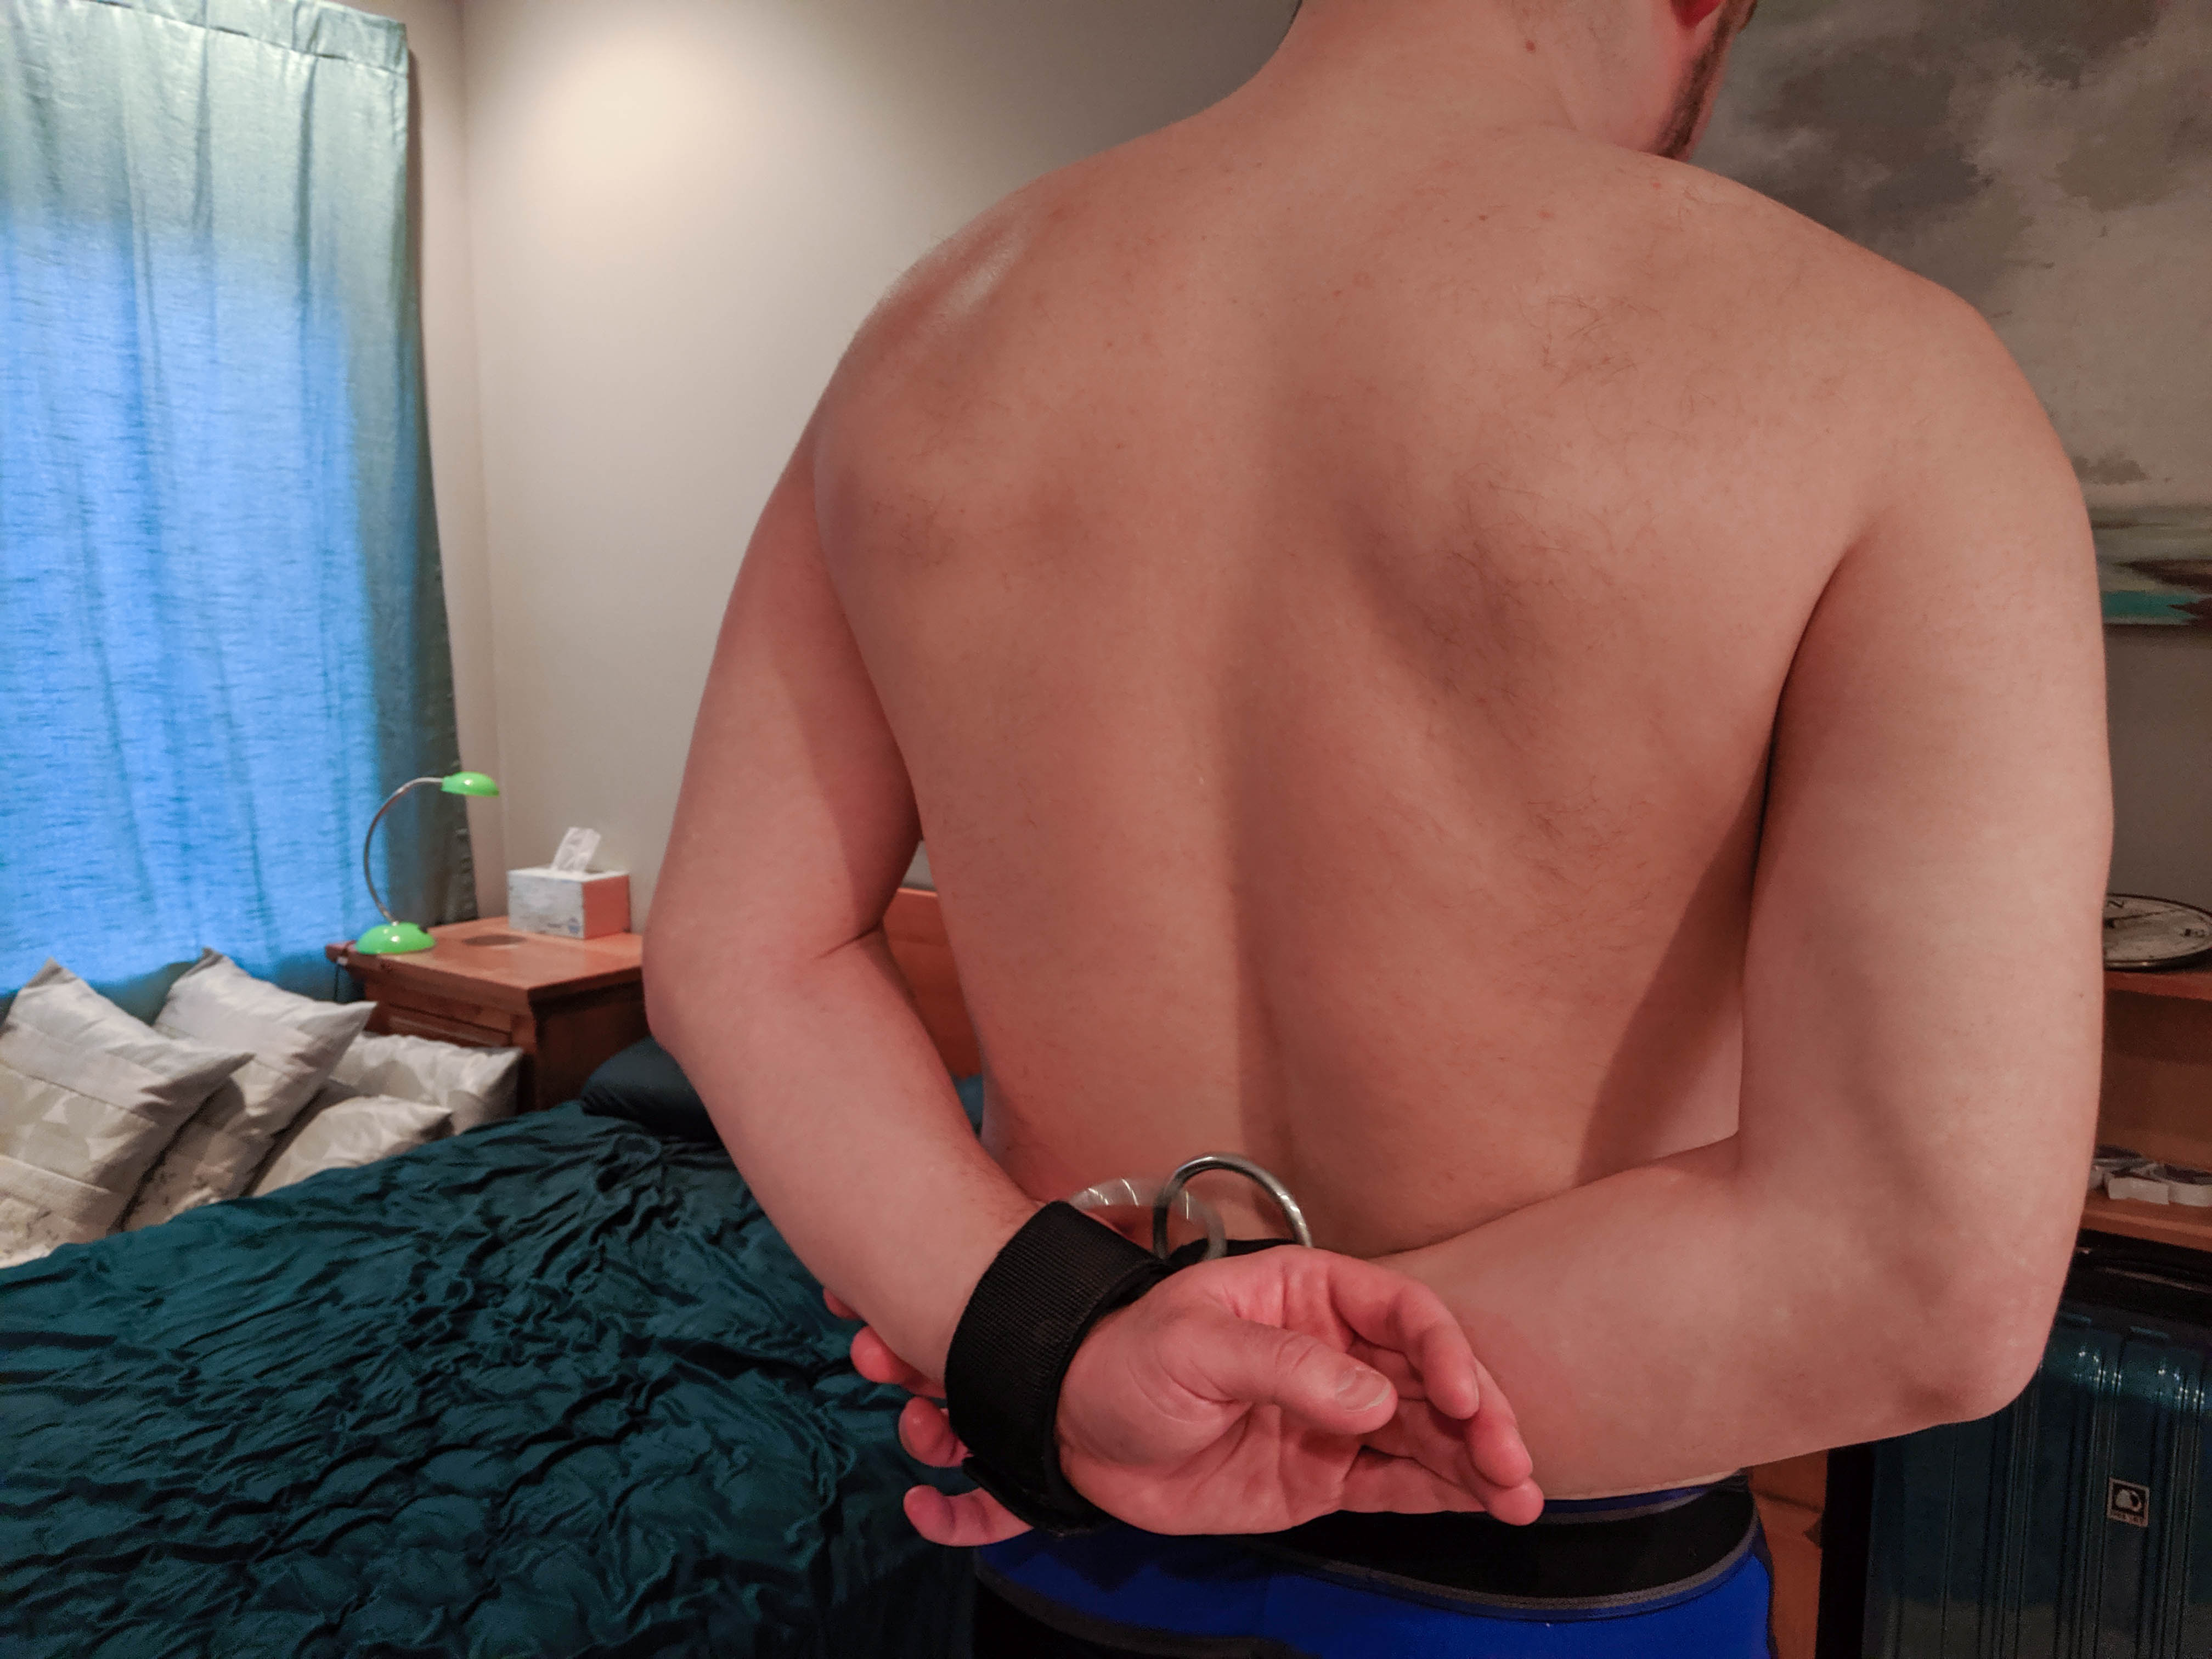
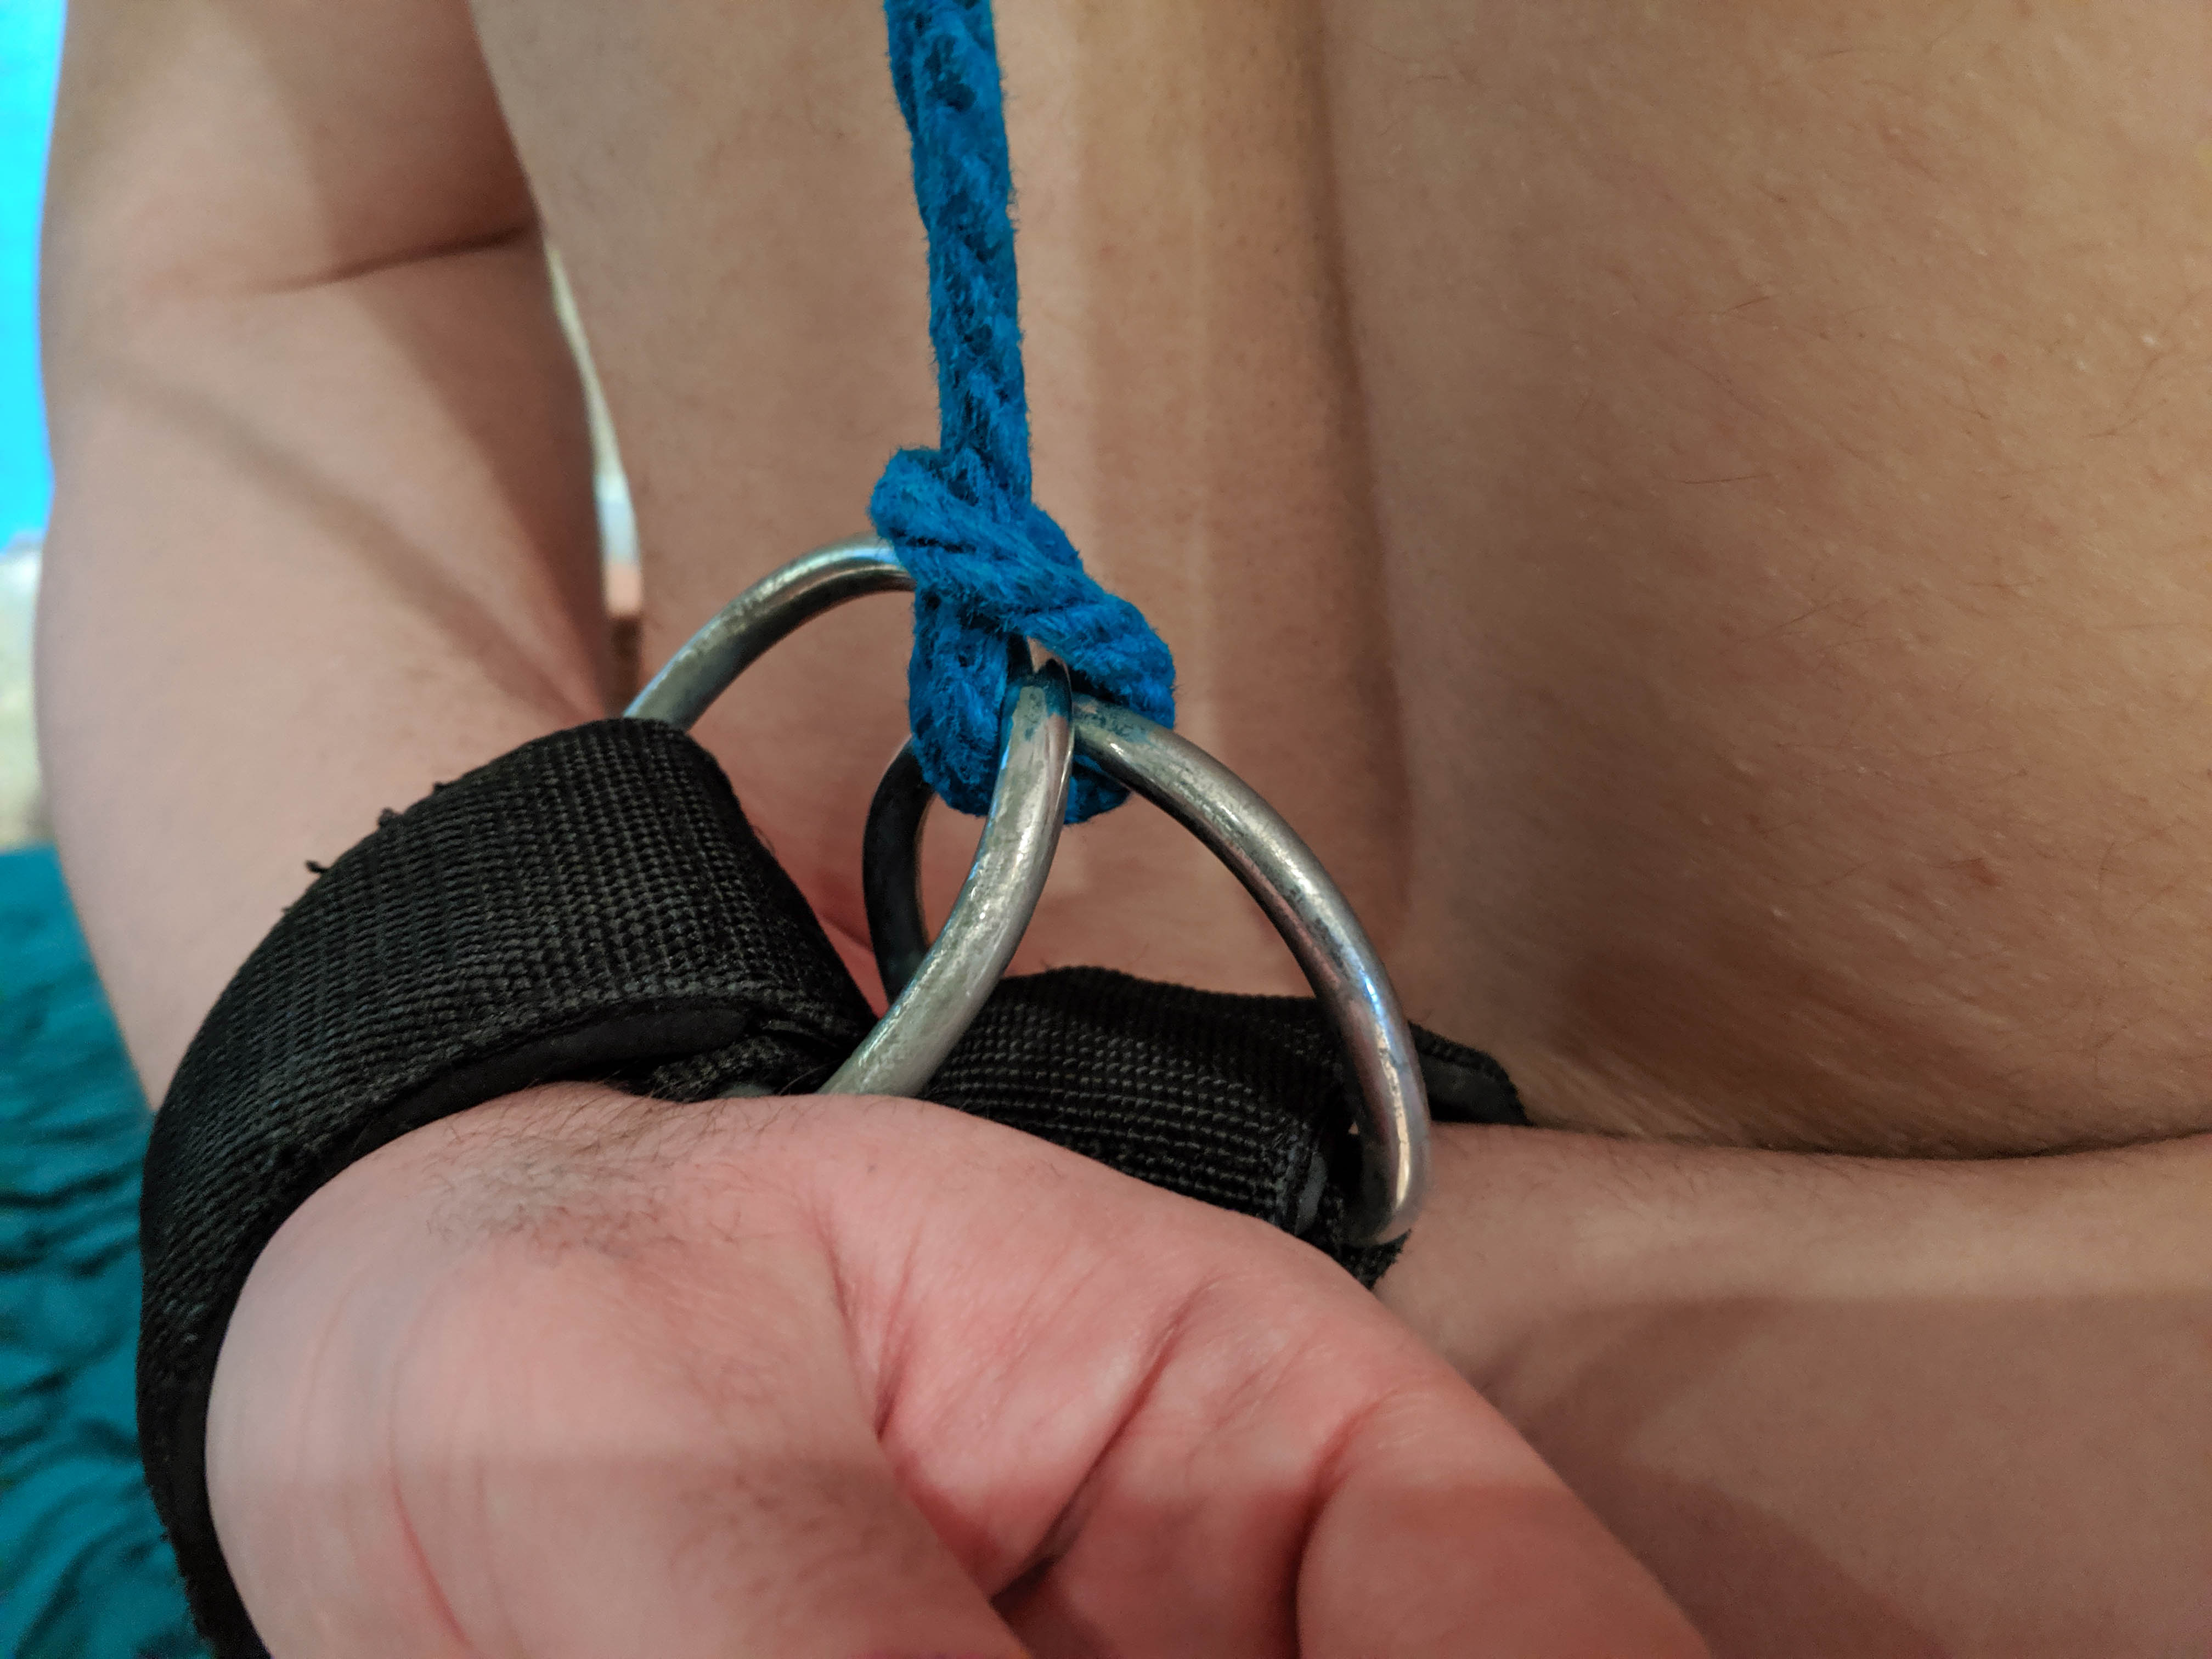
Put the bight (middle) of the rope through both rings of the two wrist cuffs to start the ring hitch.
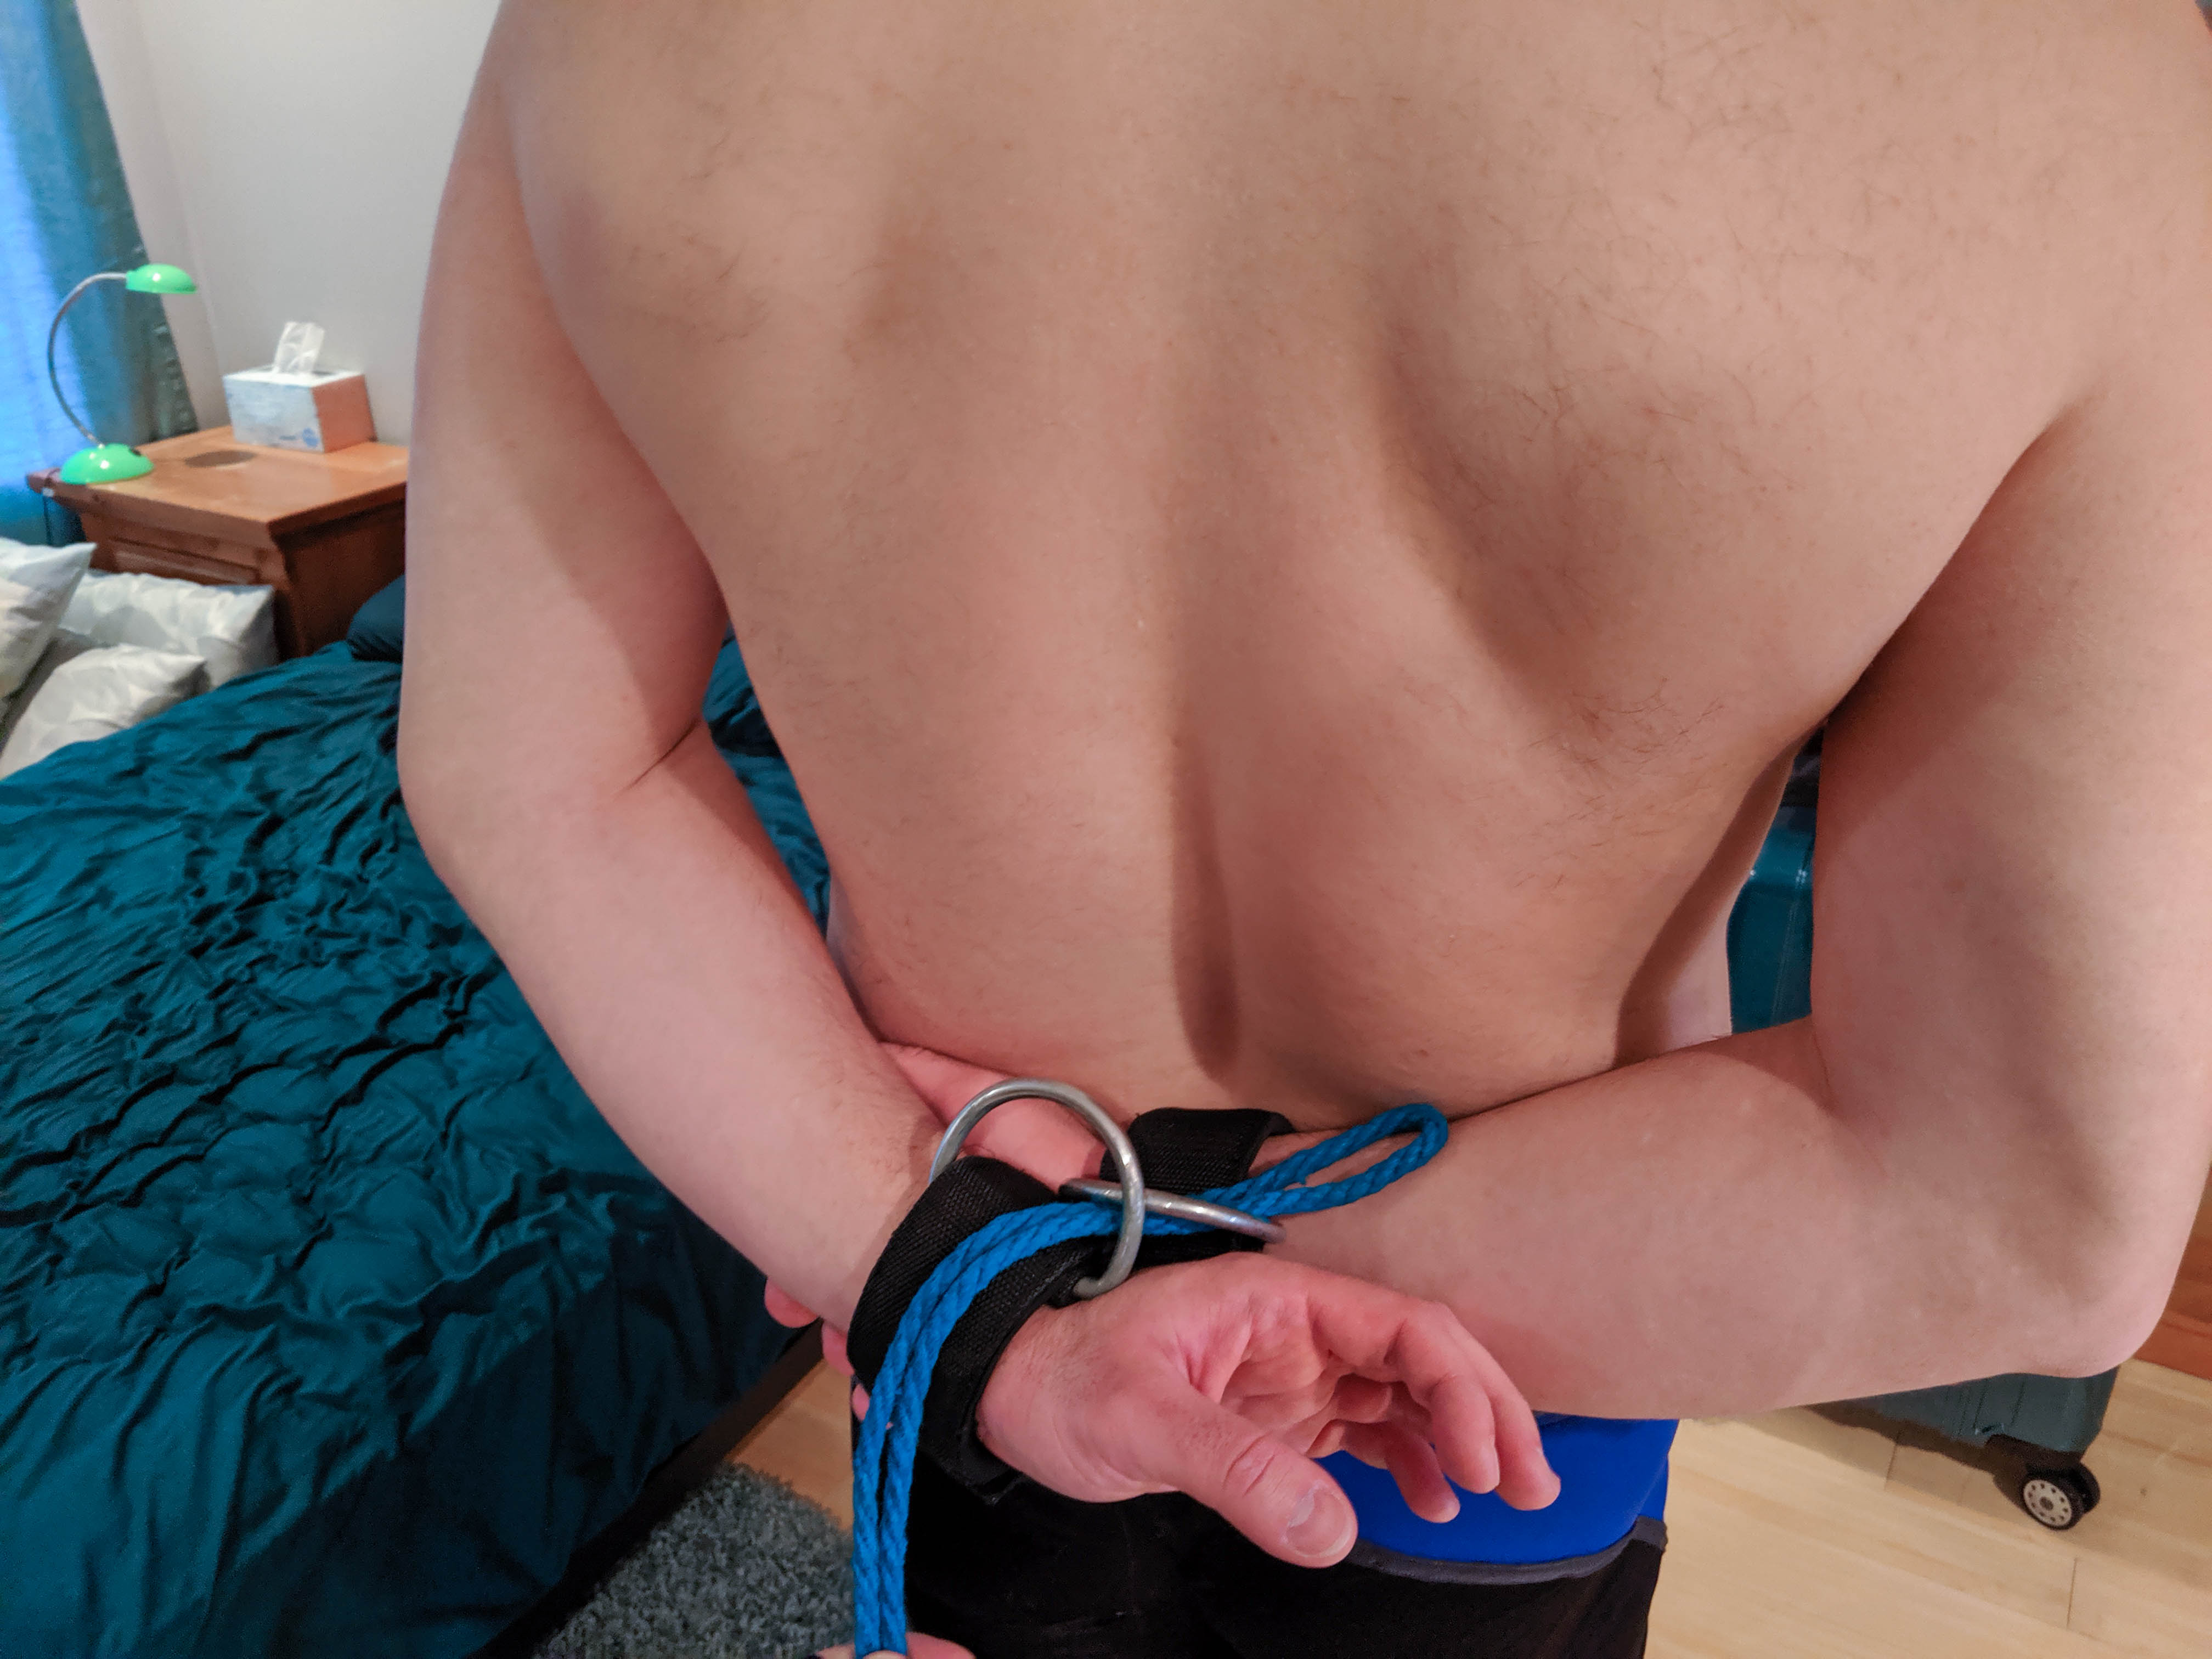
Thread the working end of the rope through the bight
Pull it all the way through
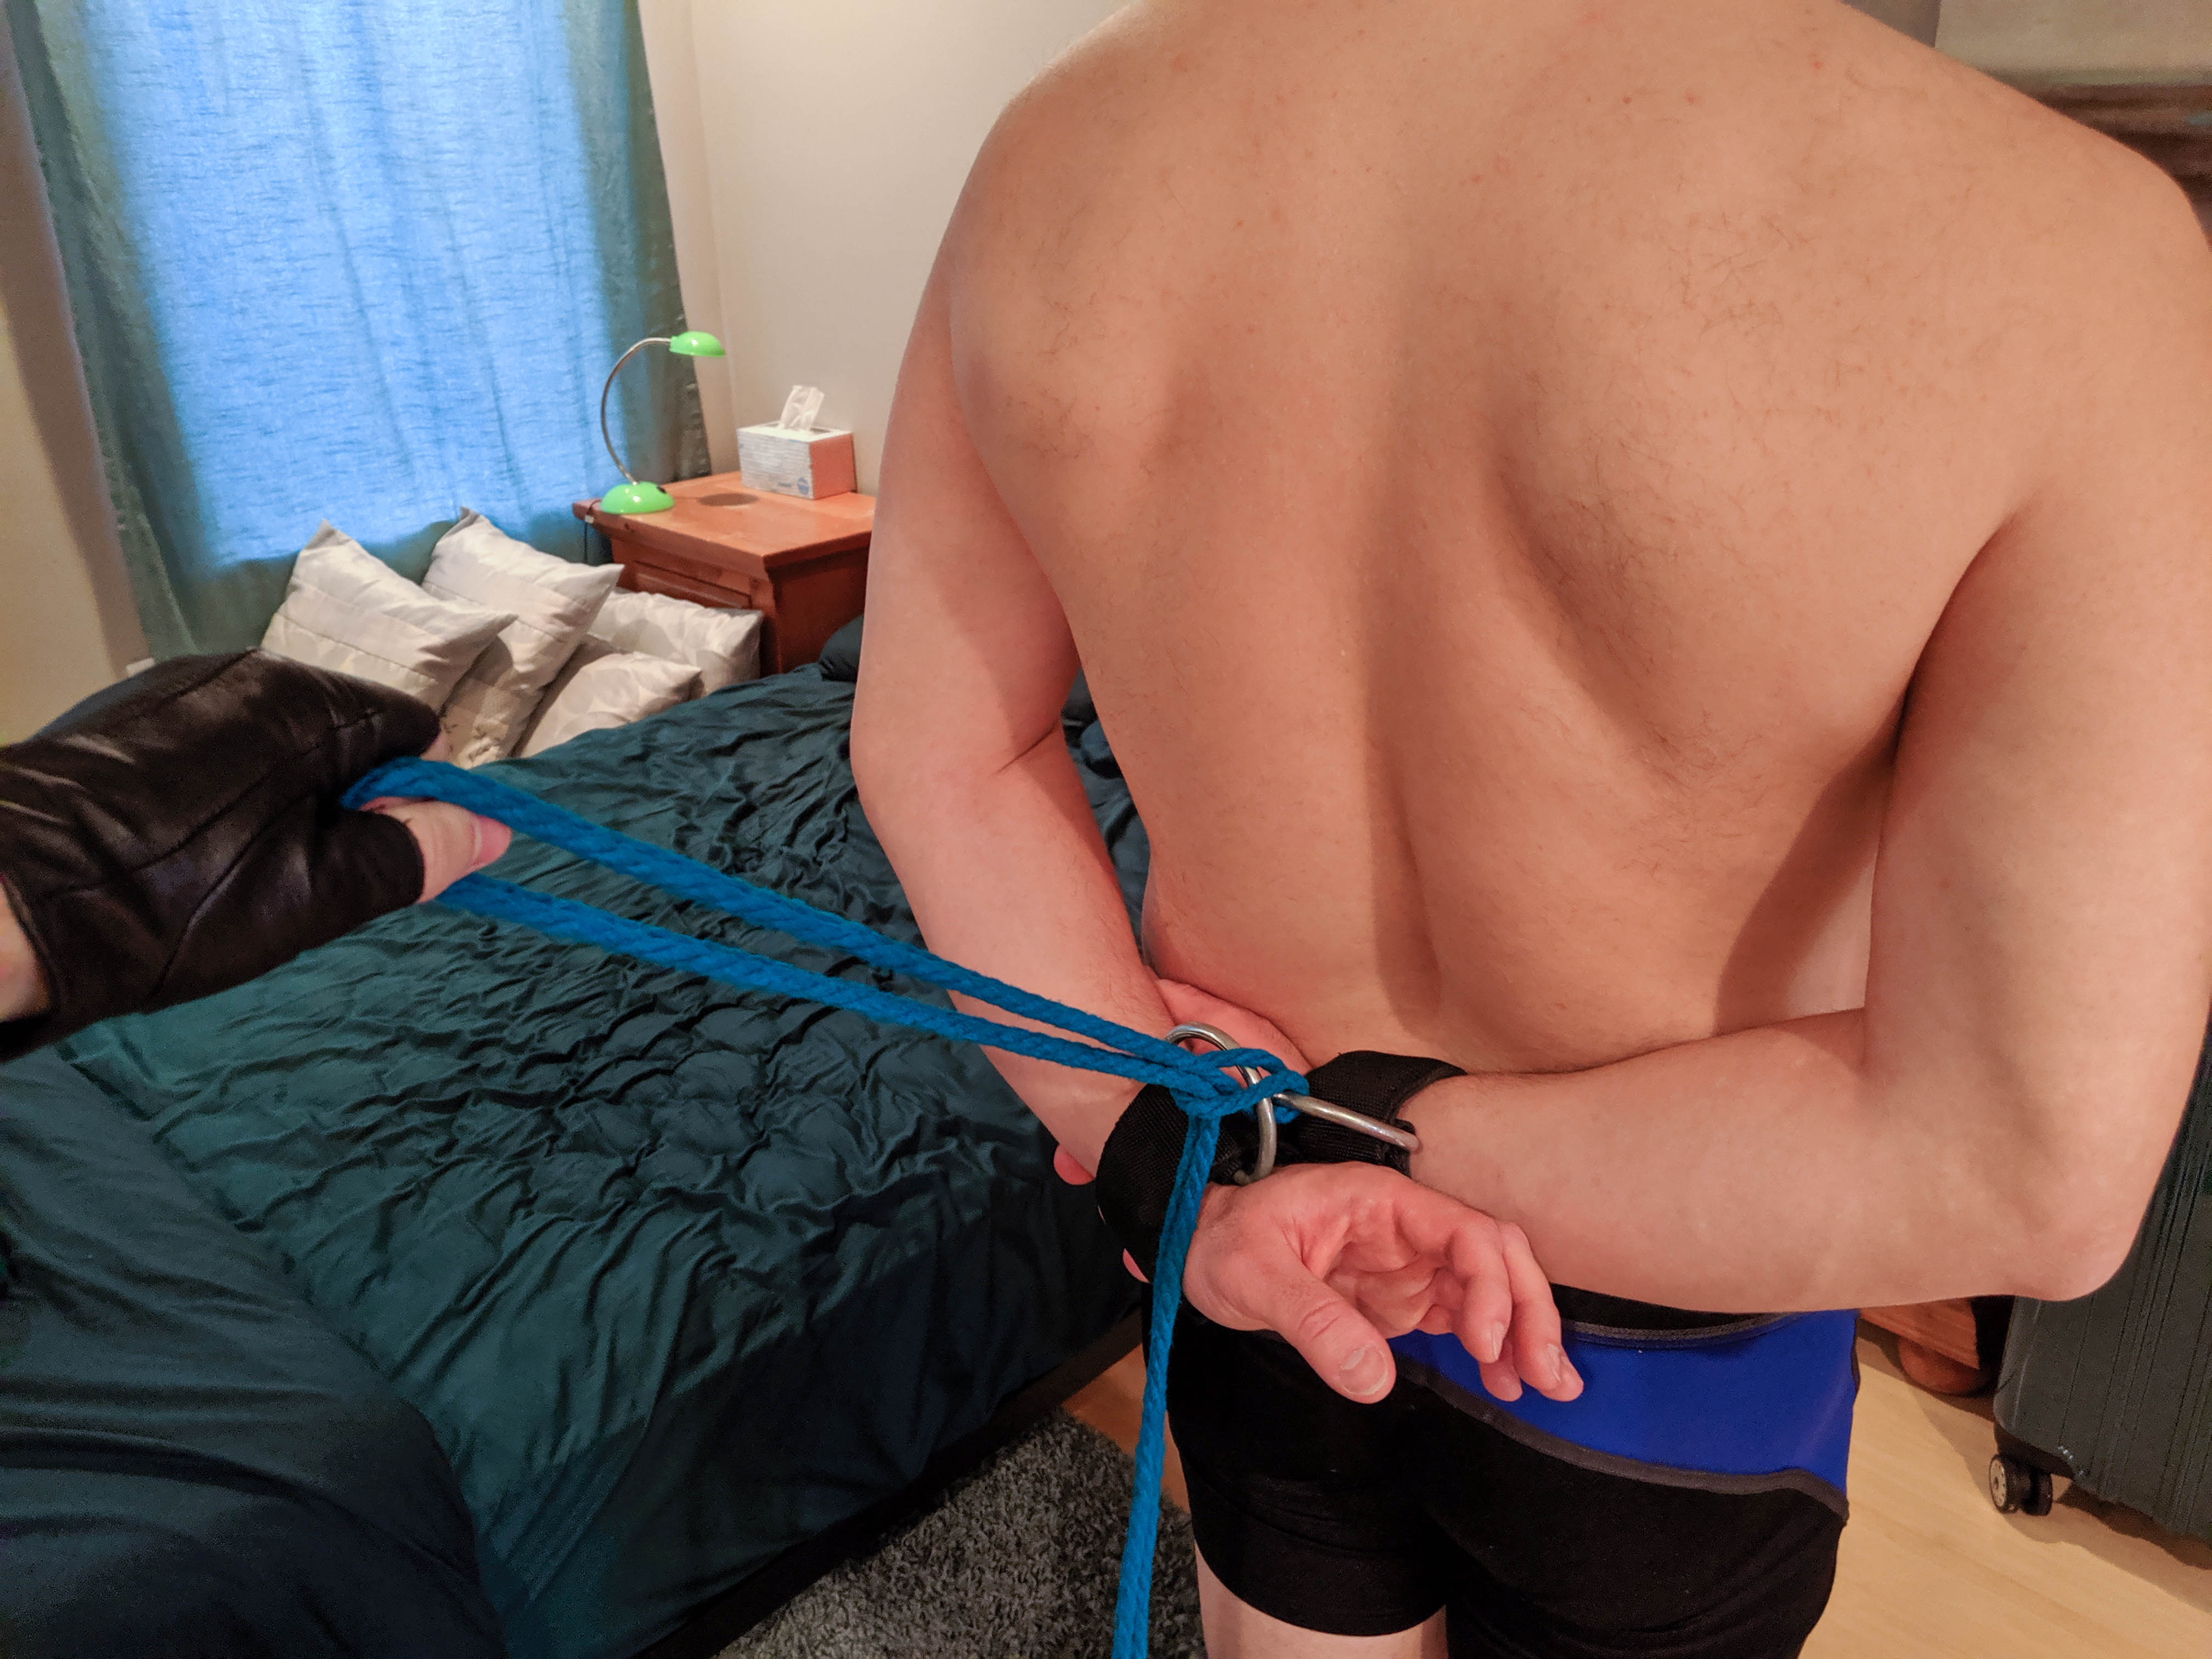
It should look like this when you're done
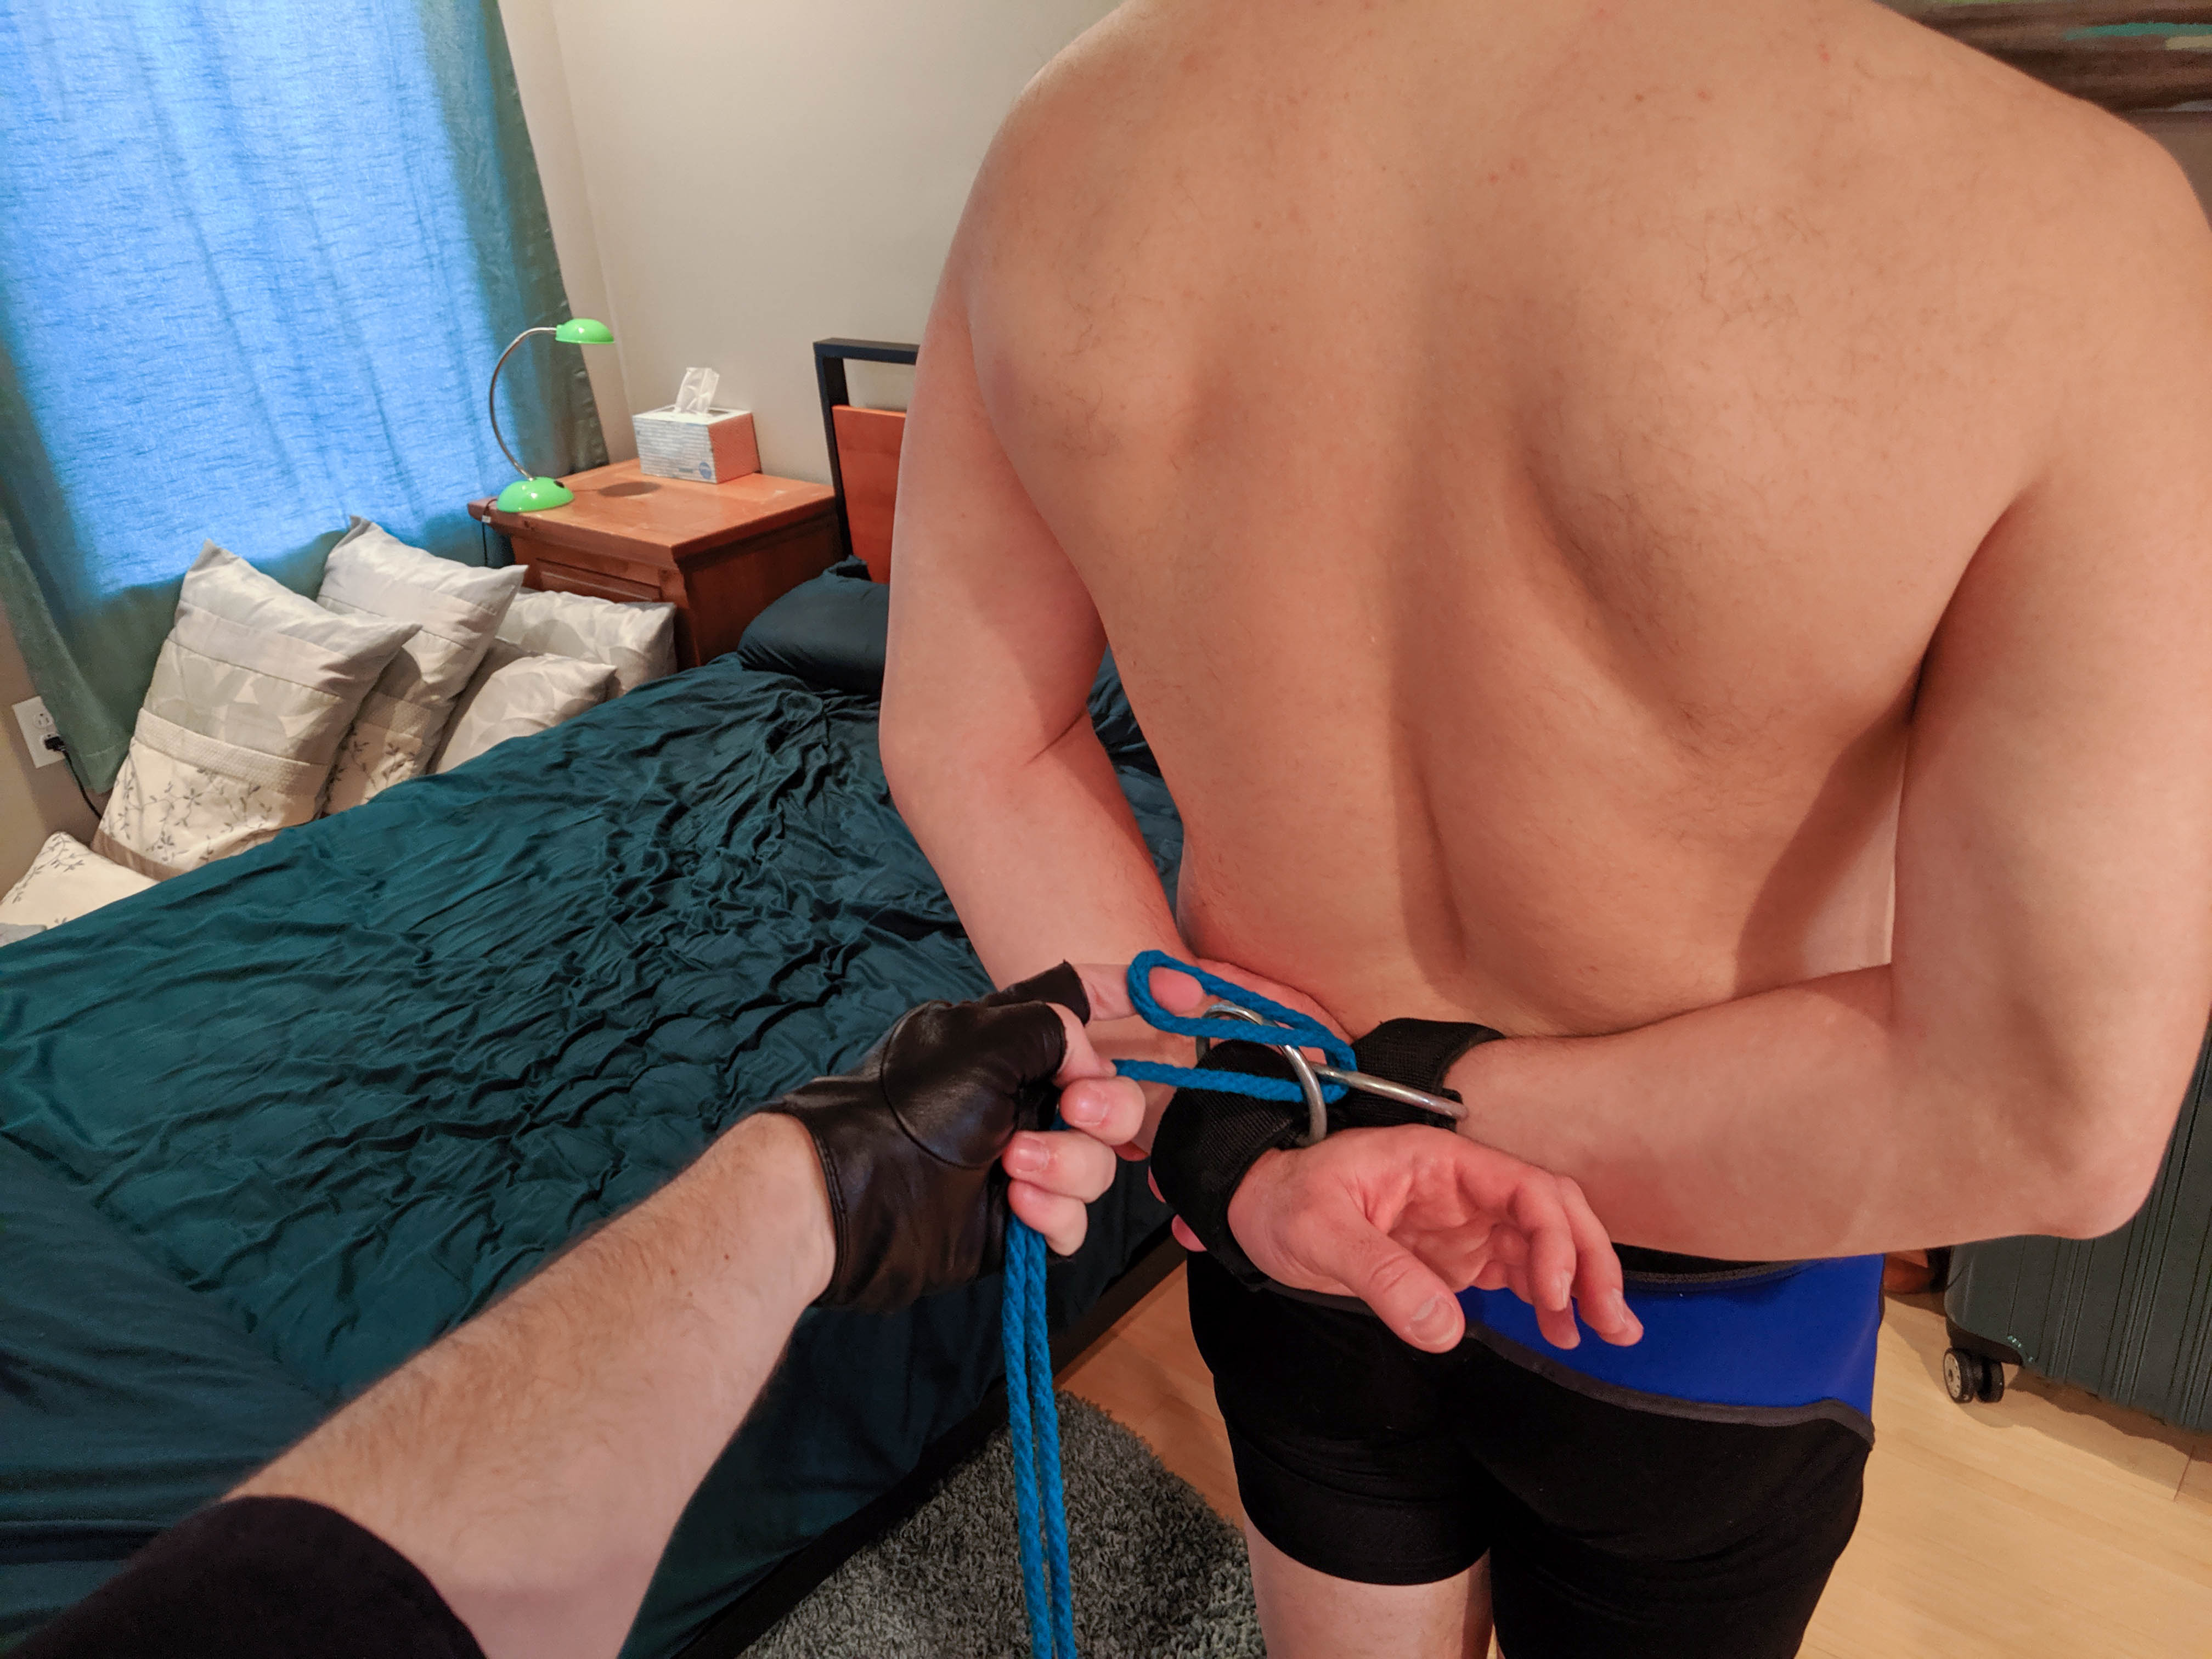
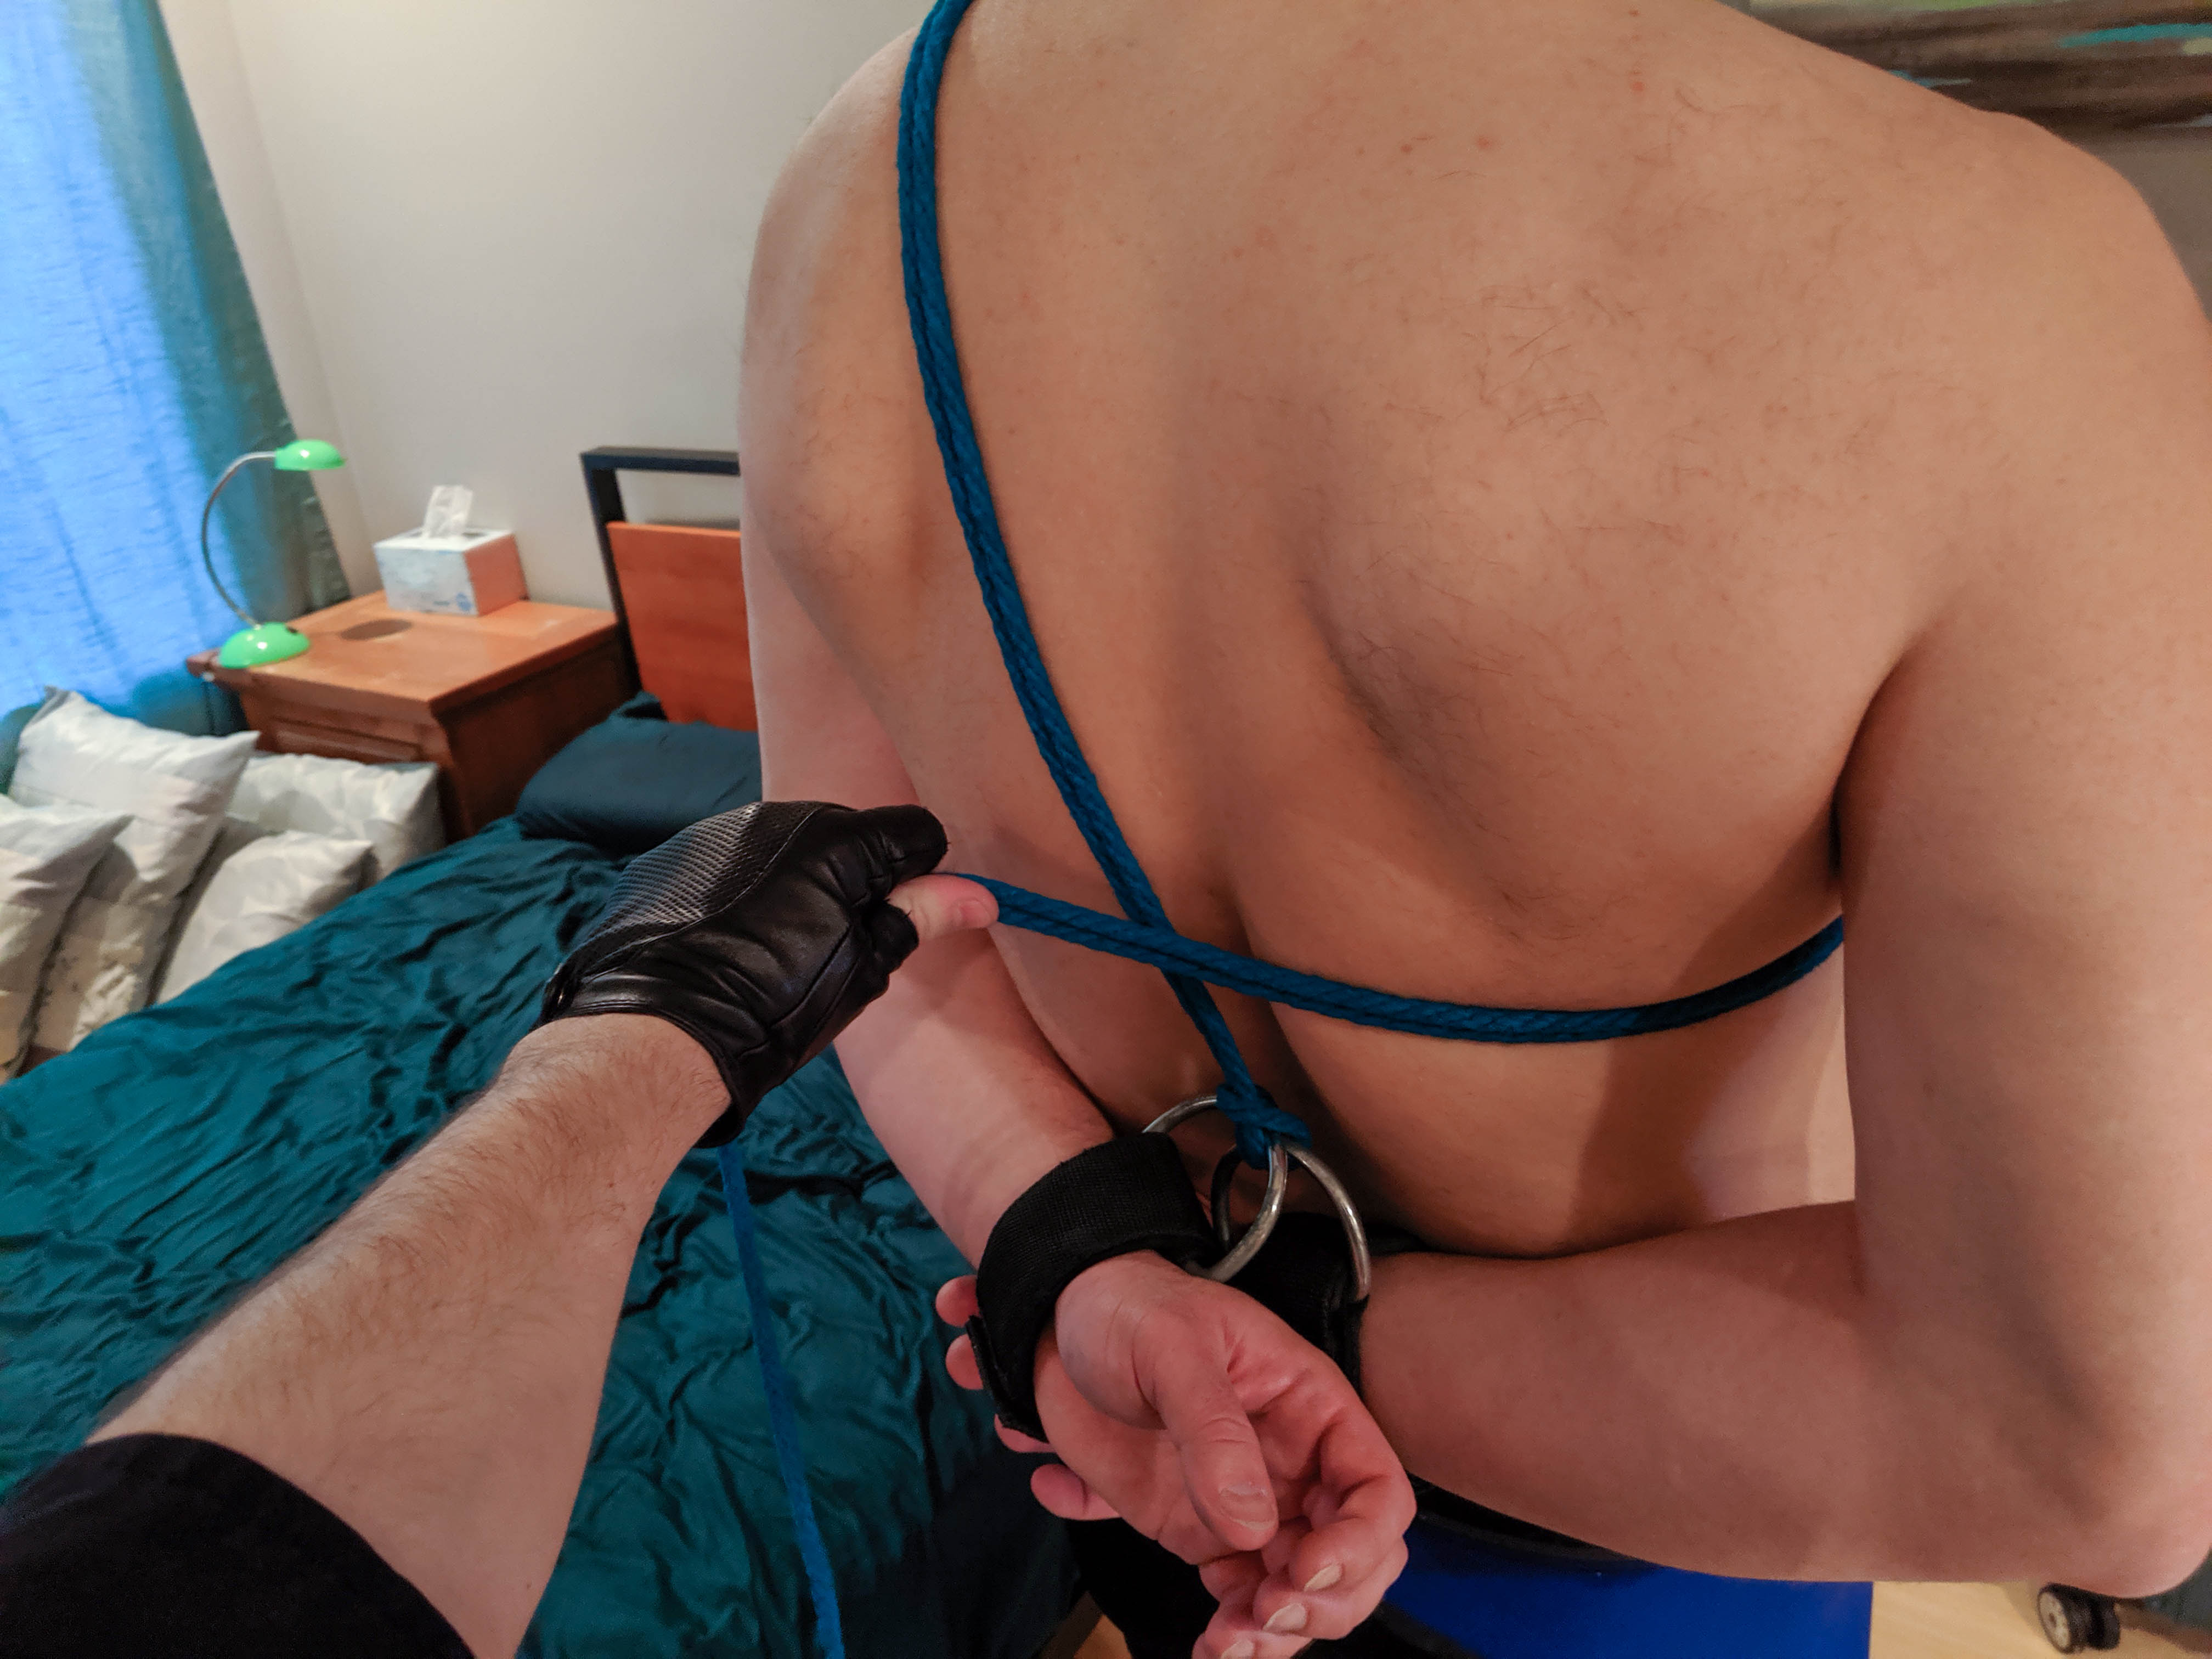
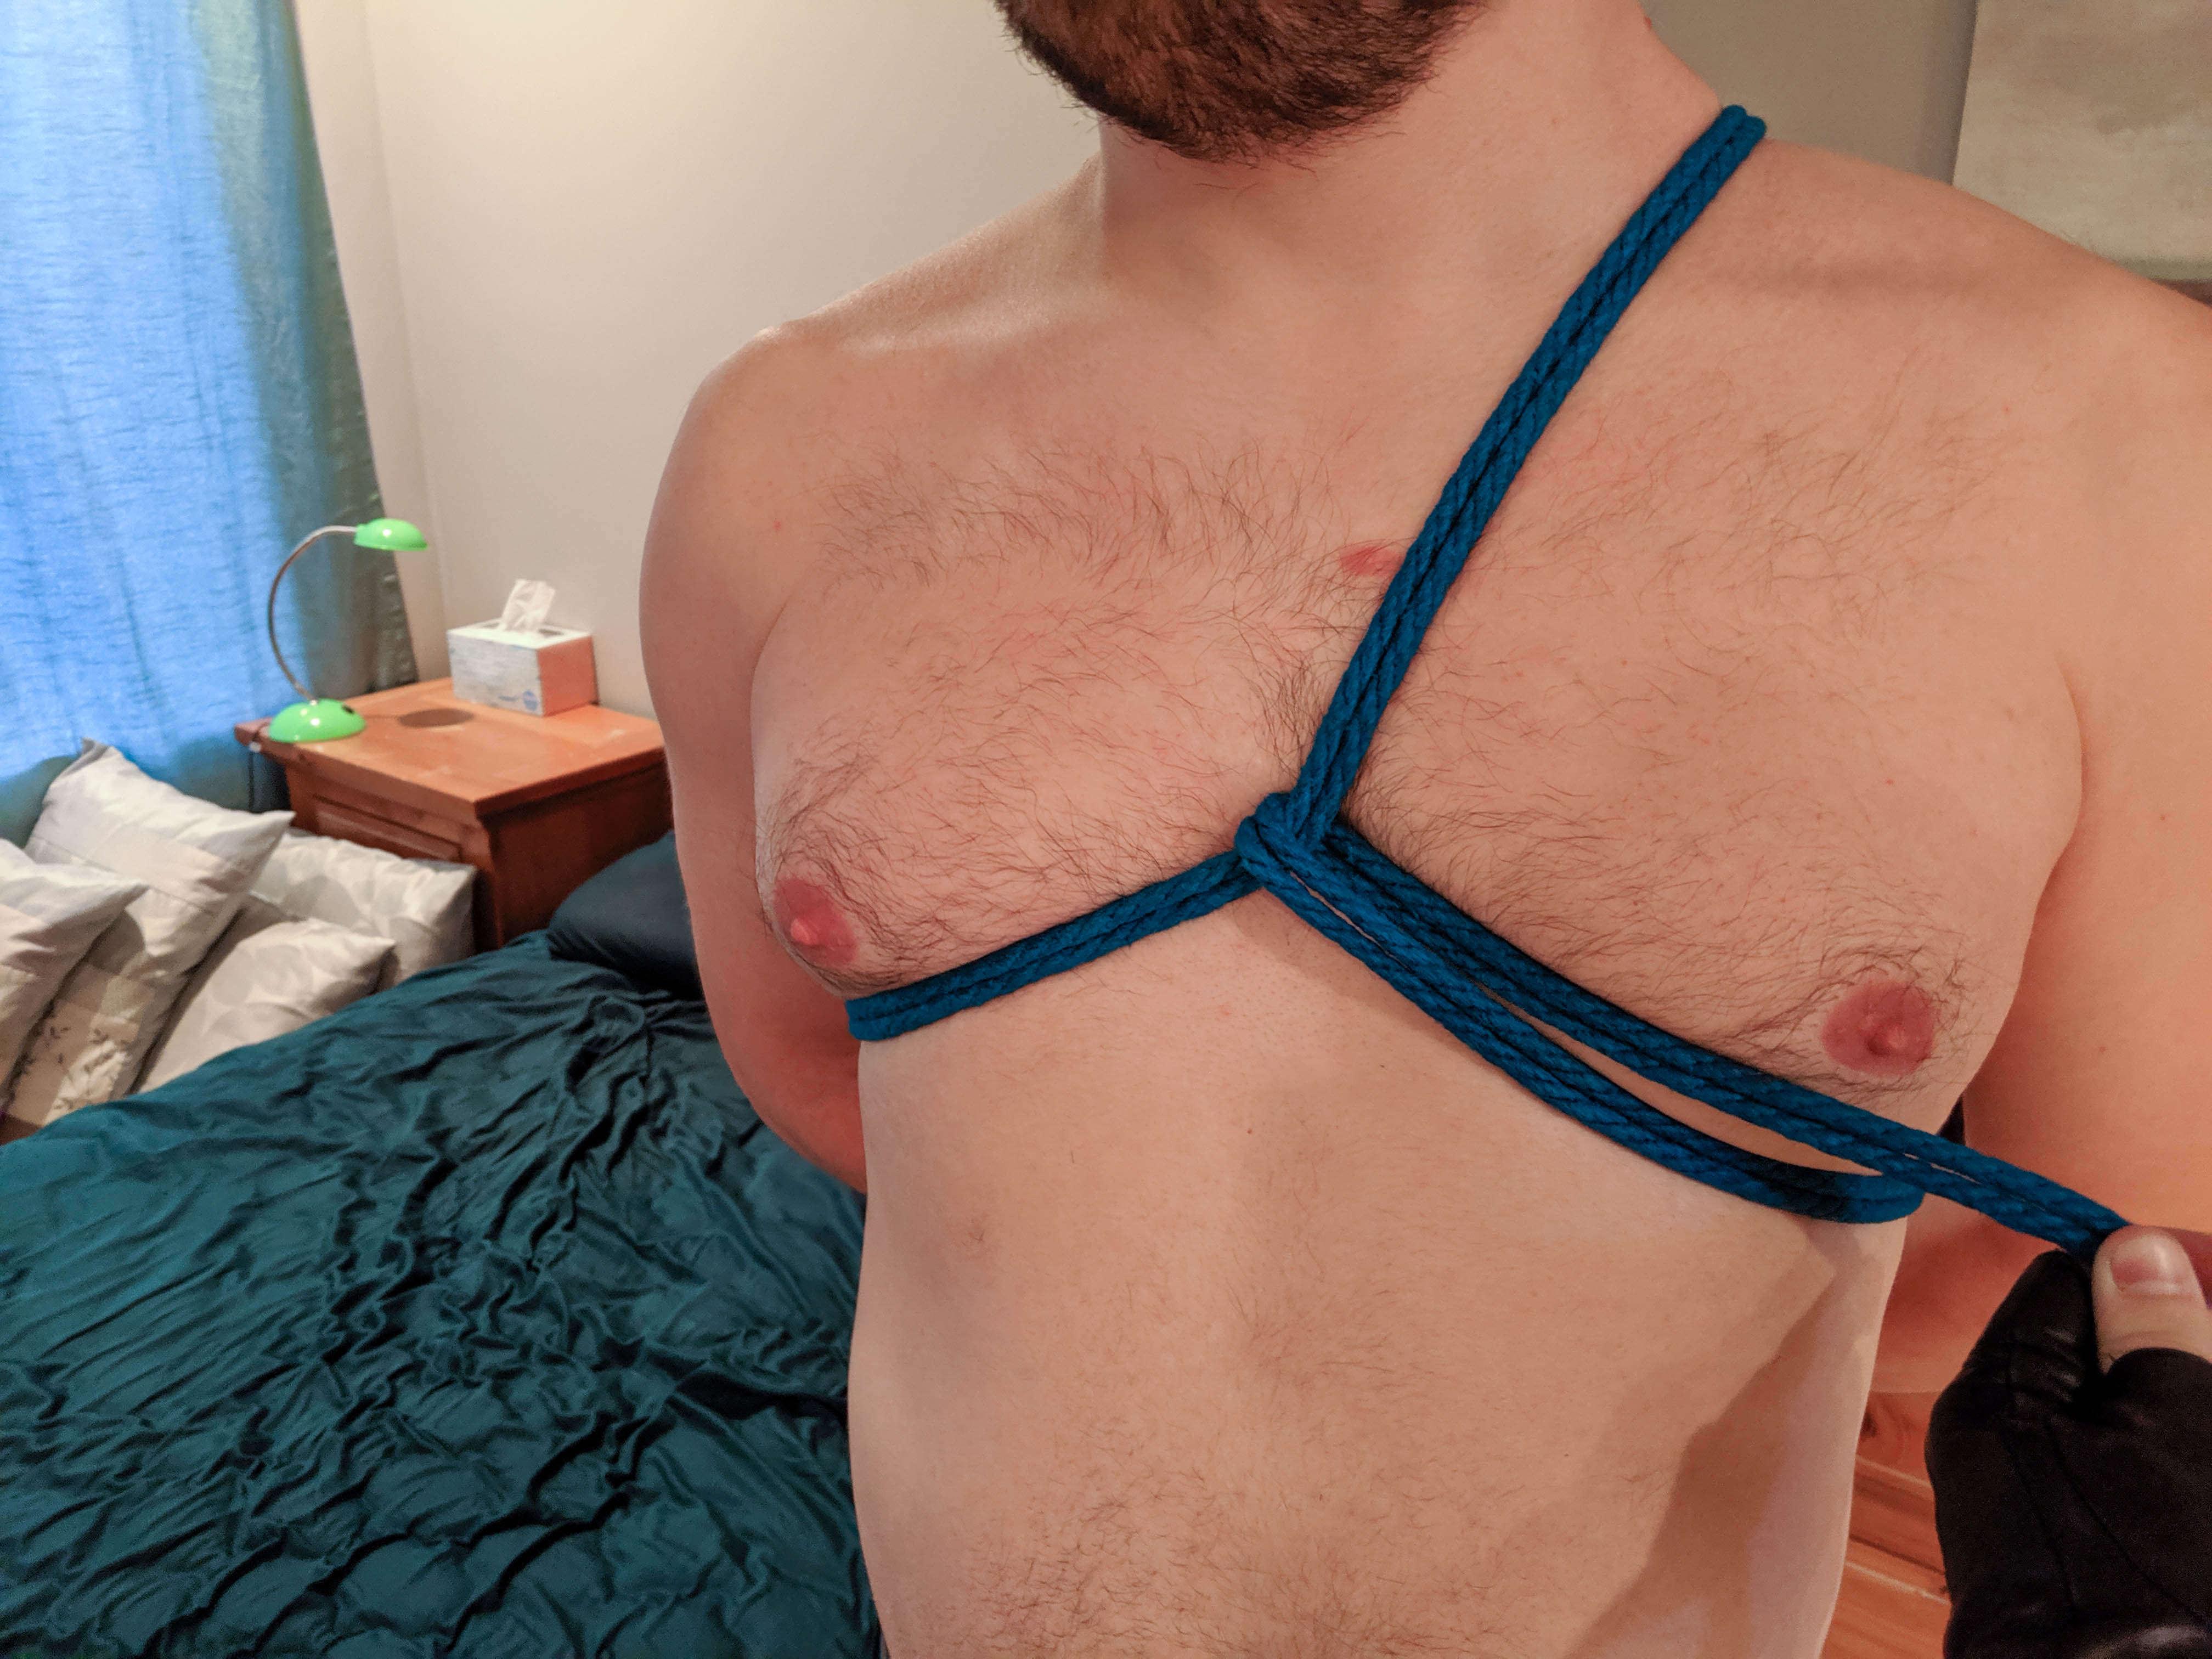
Pull the working end up
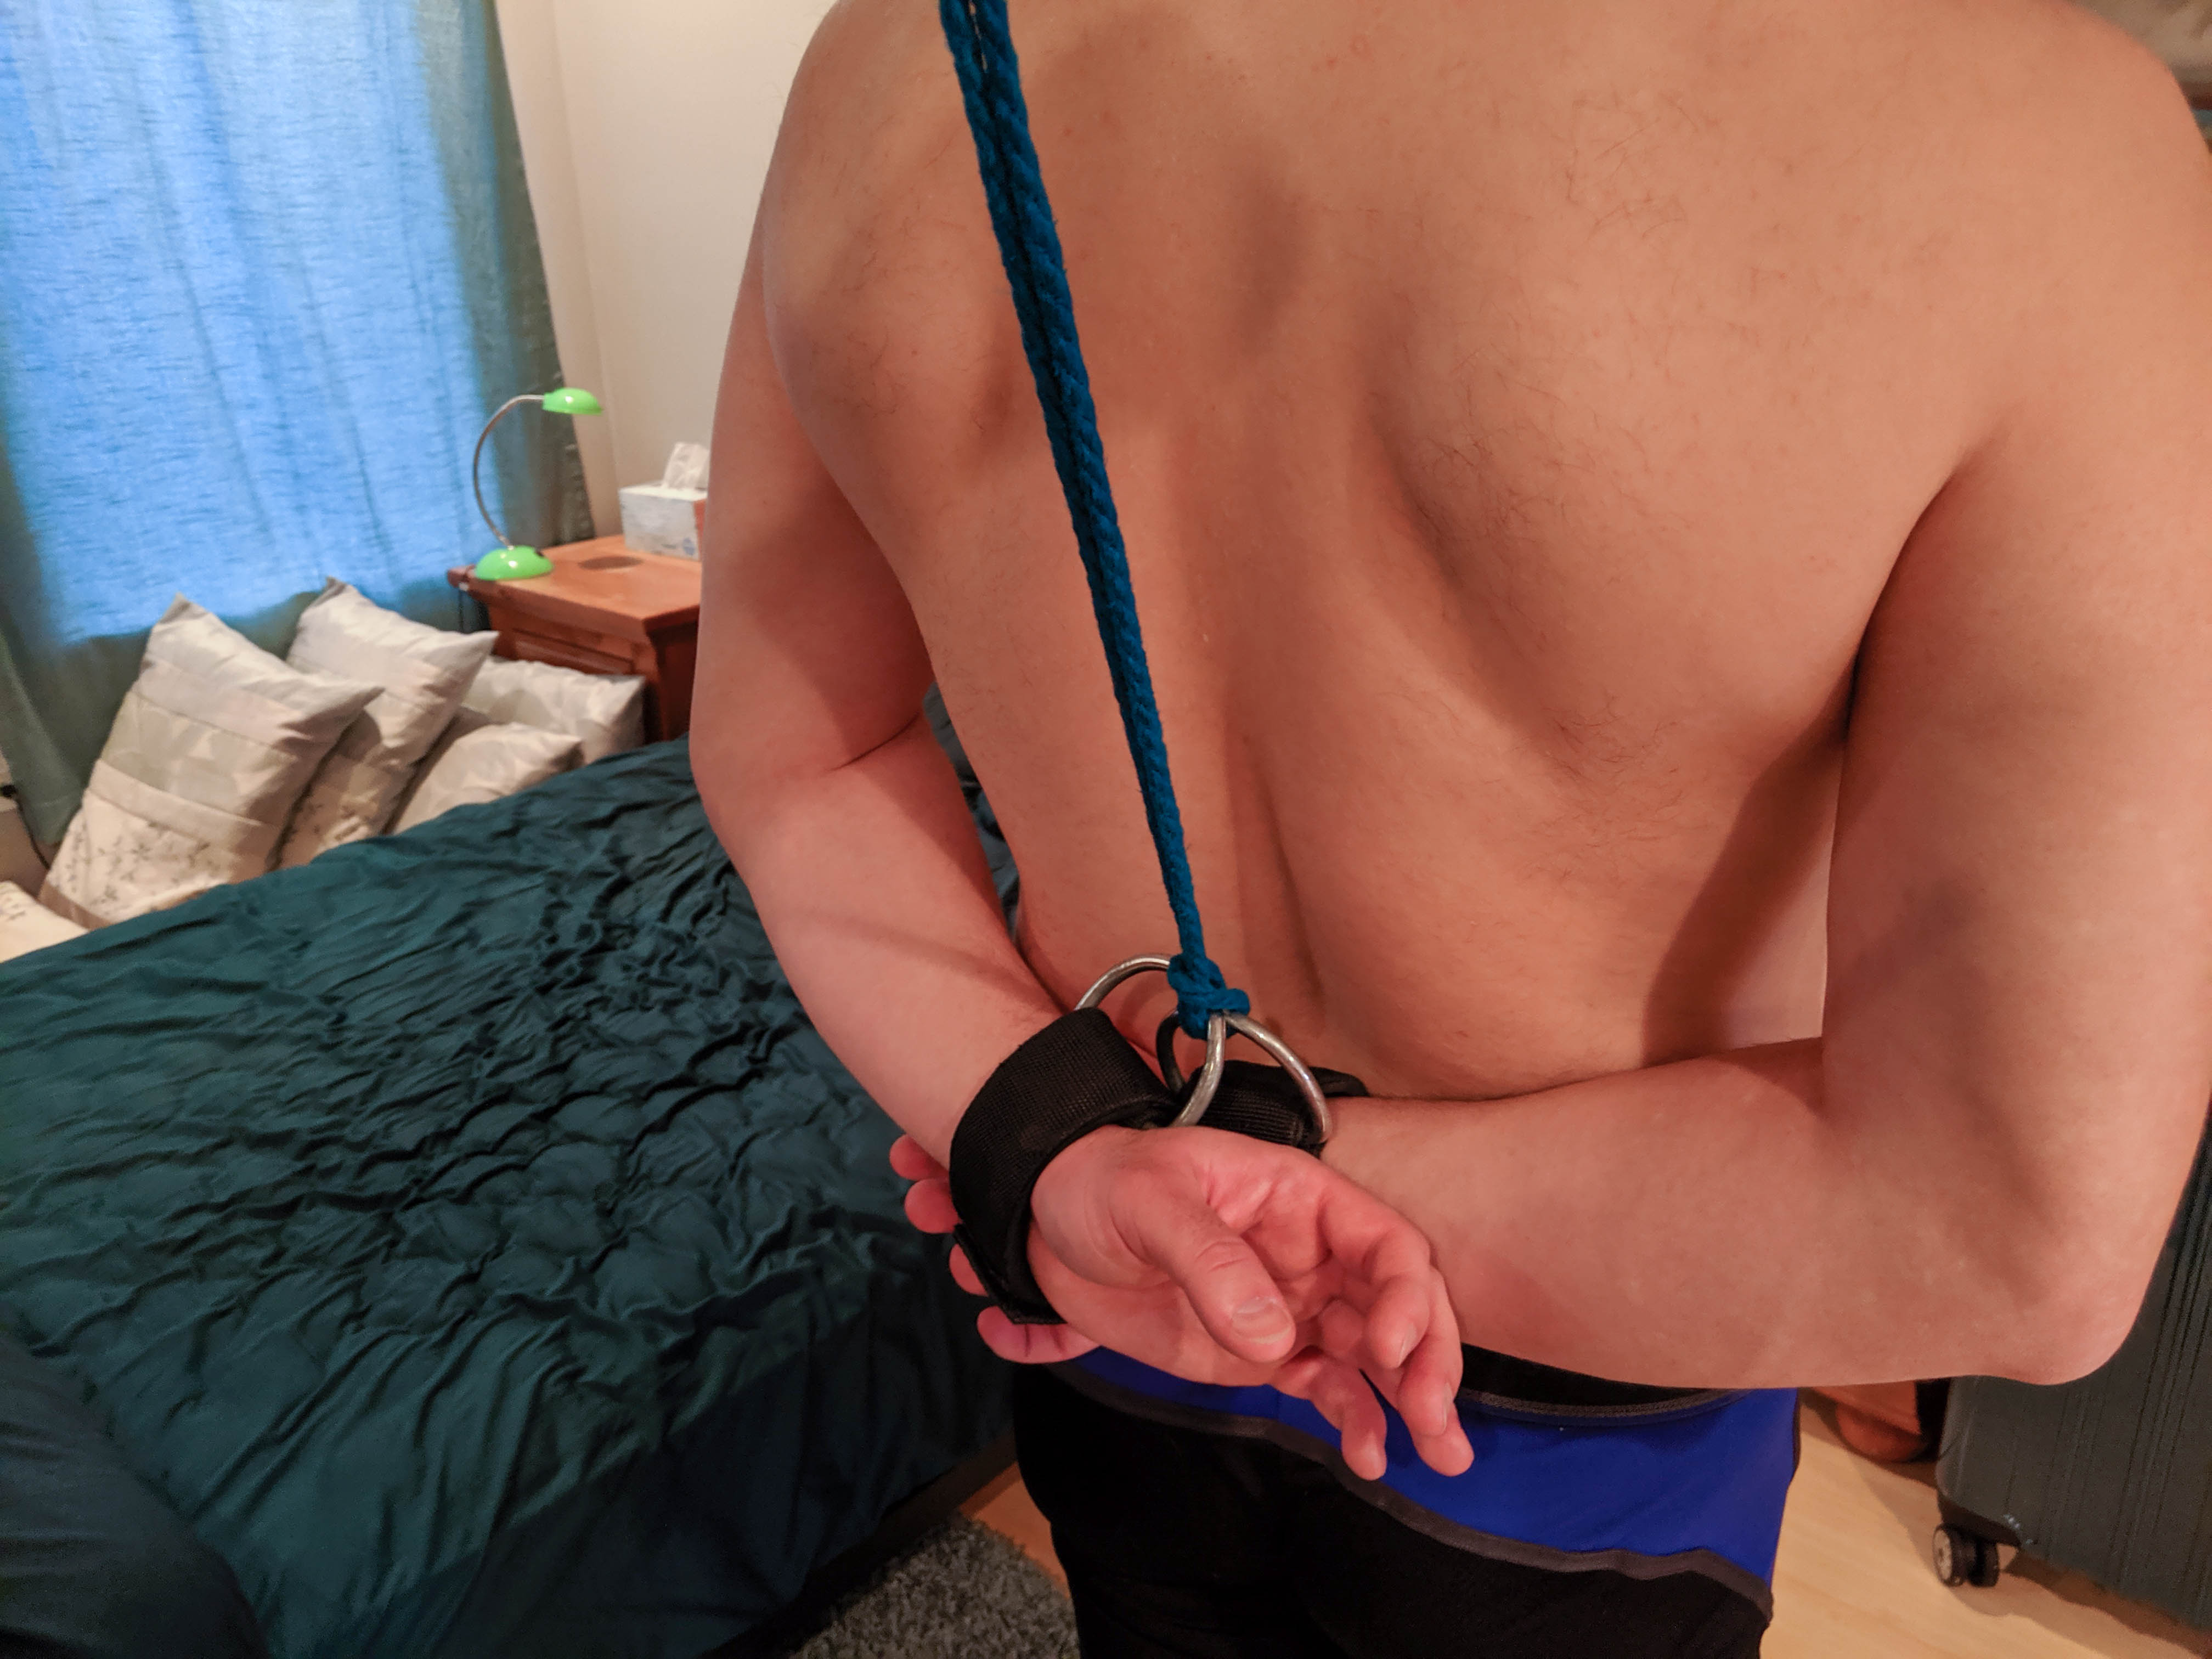
And put it over their shoulder. This is when you choose how tightly to bring their arms up. Too tight, and a shoulder is going to give up in maybe 20 minutes. Too loose and it might not be as fun.
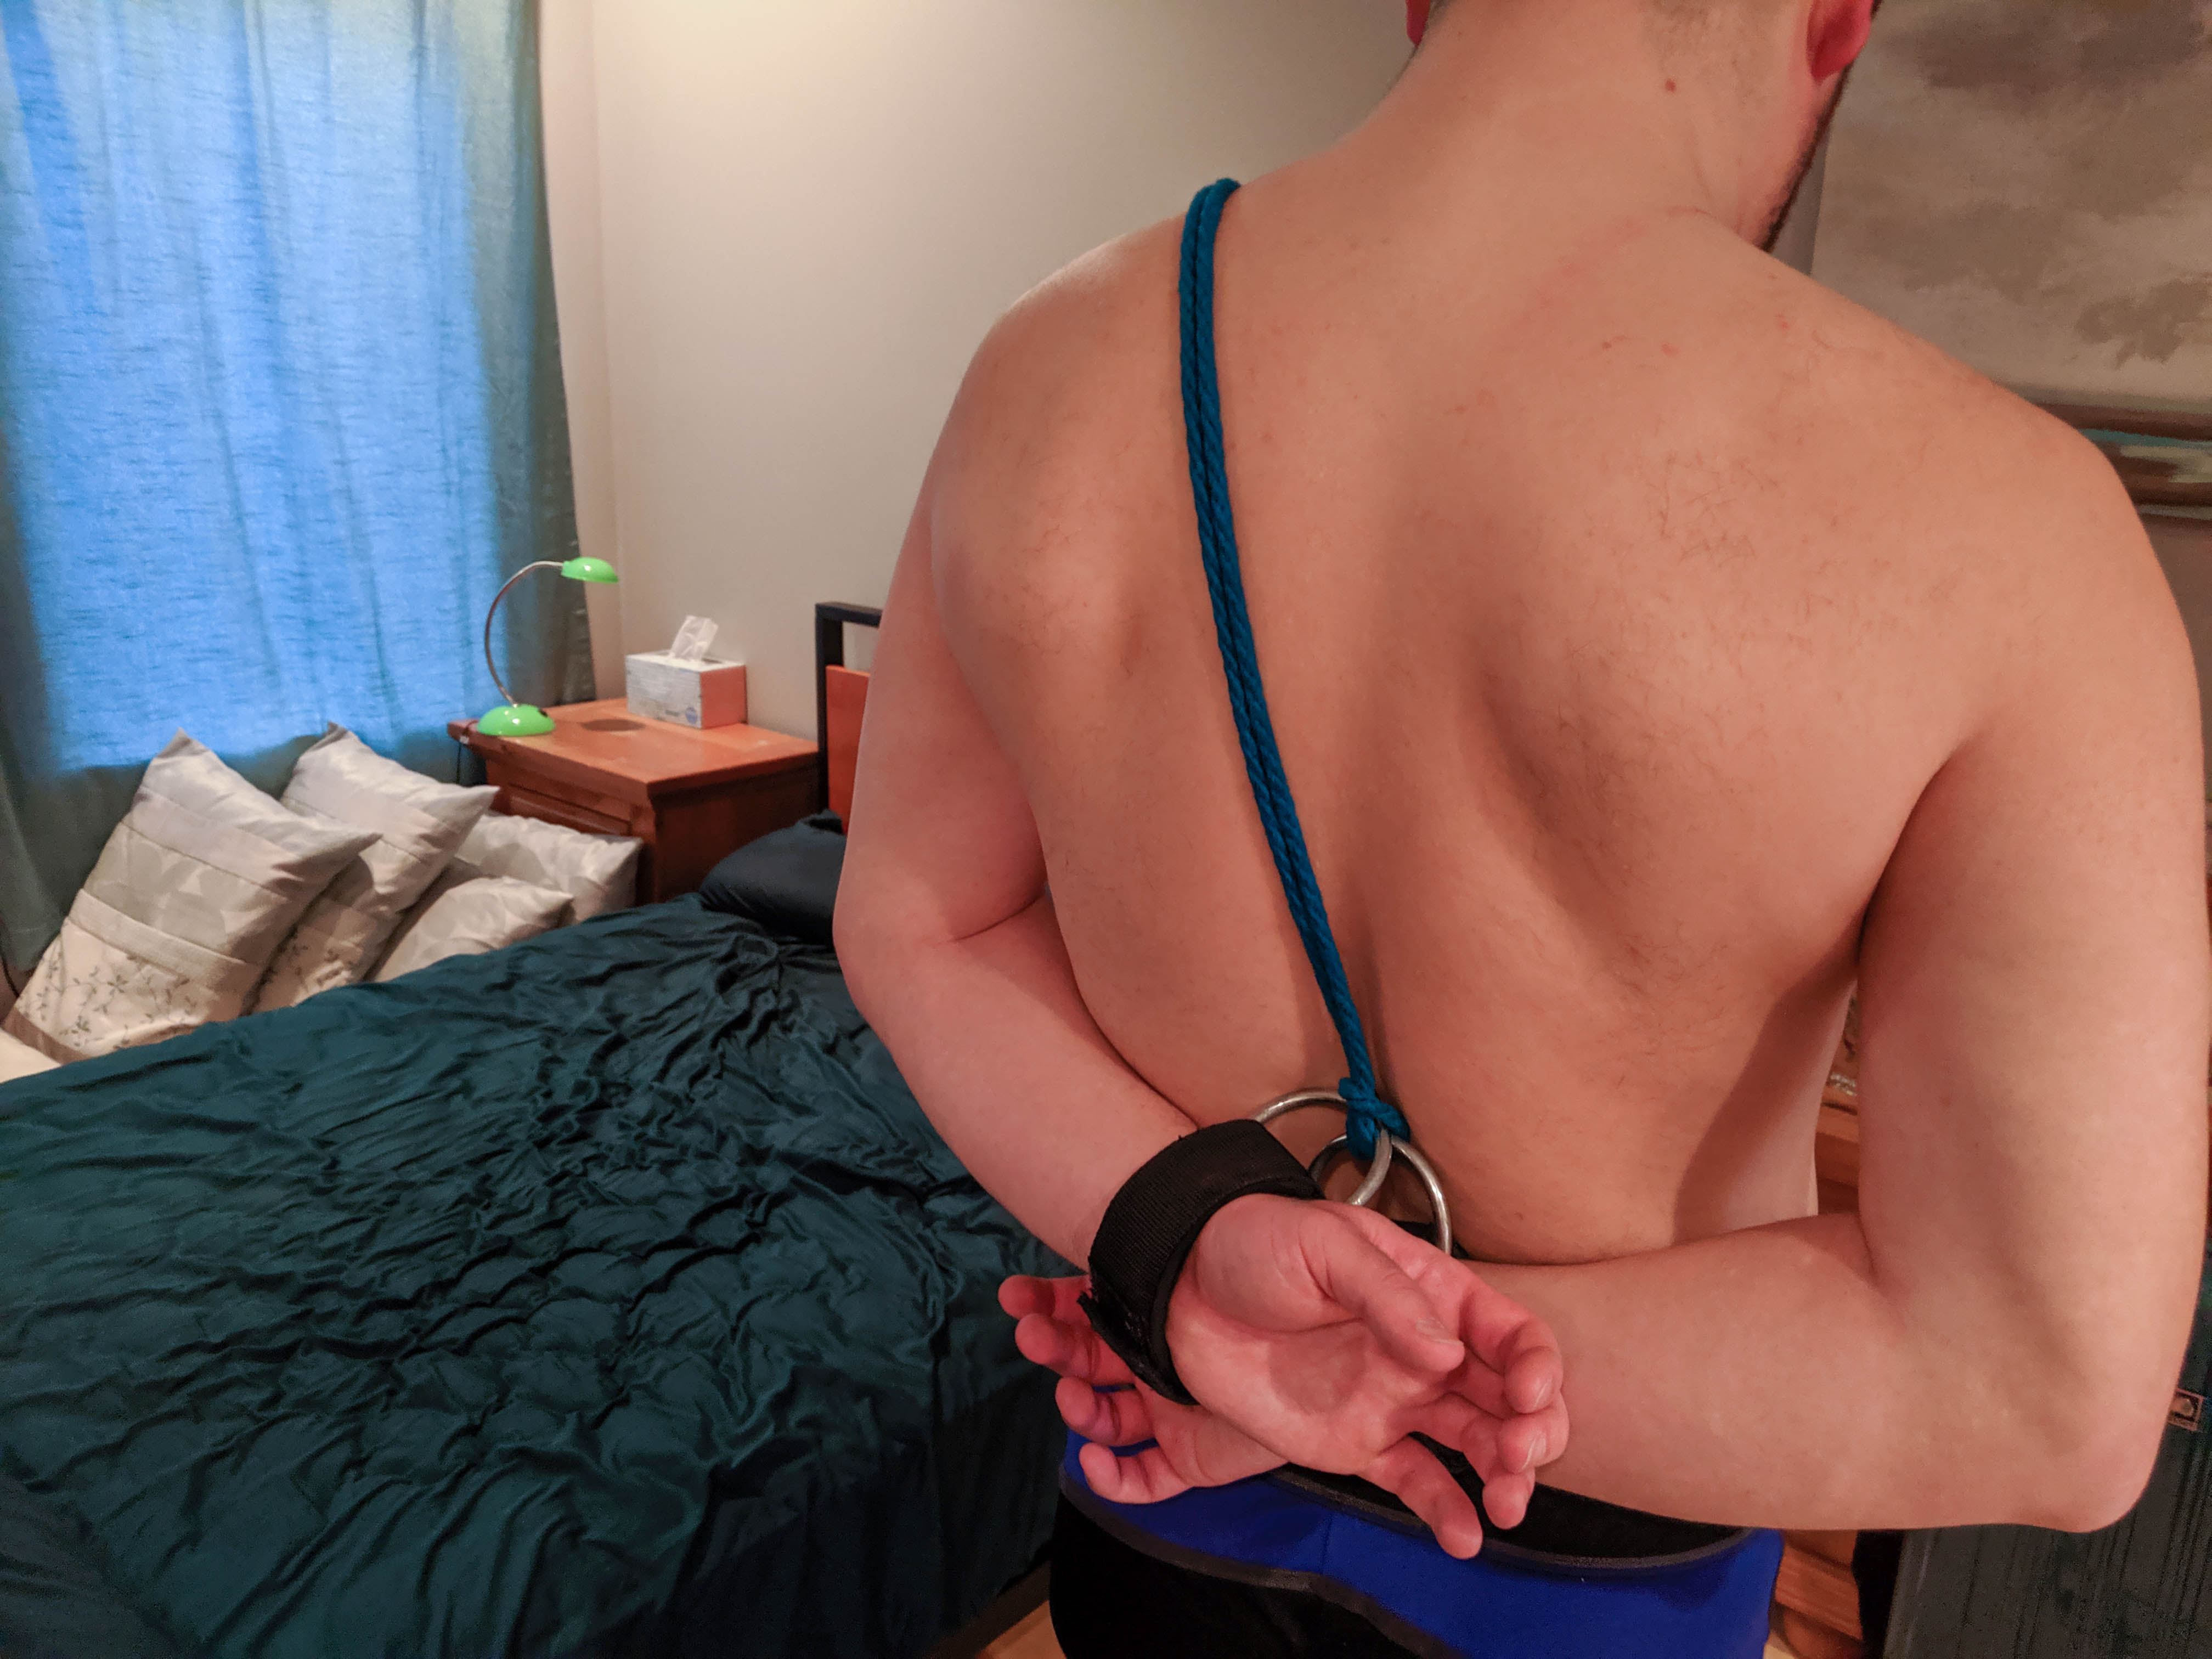
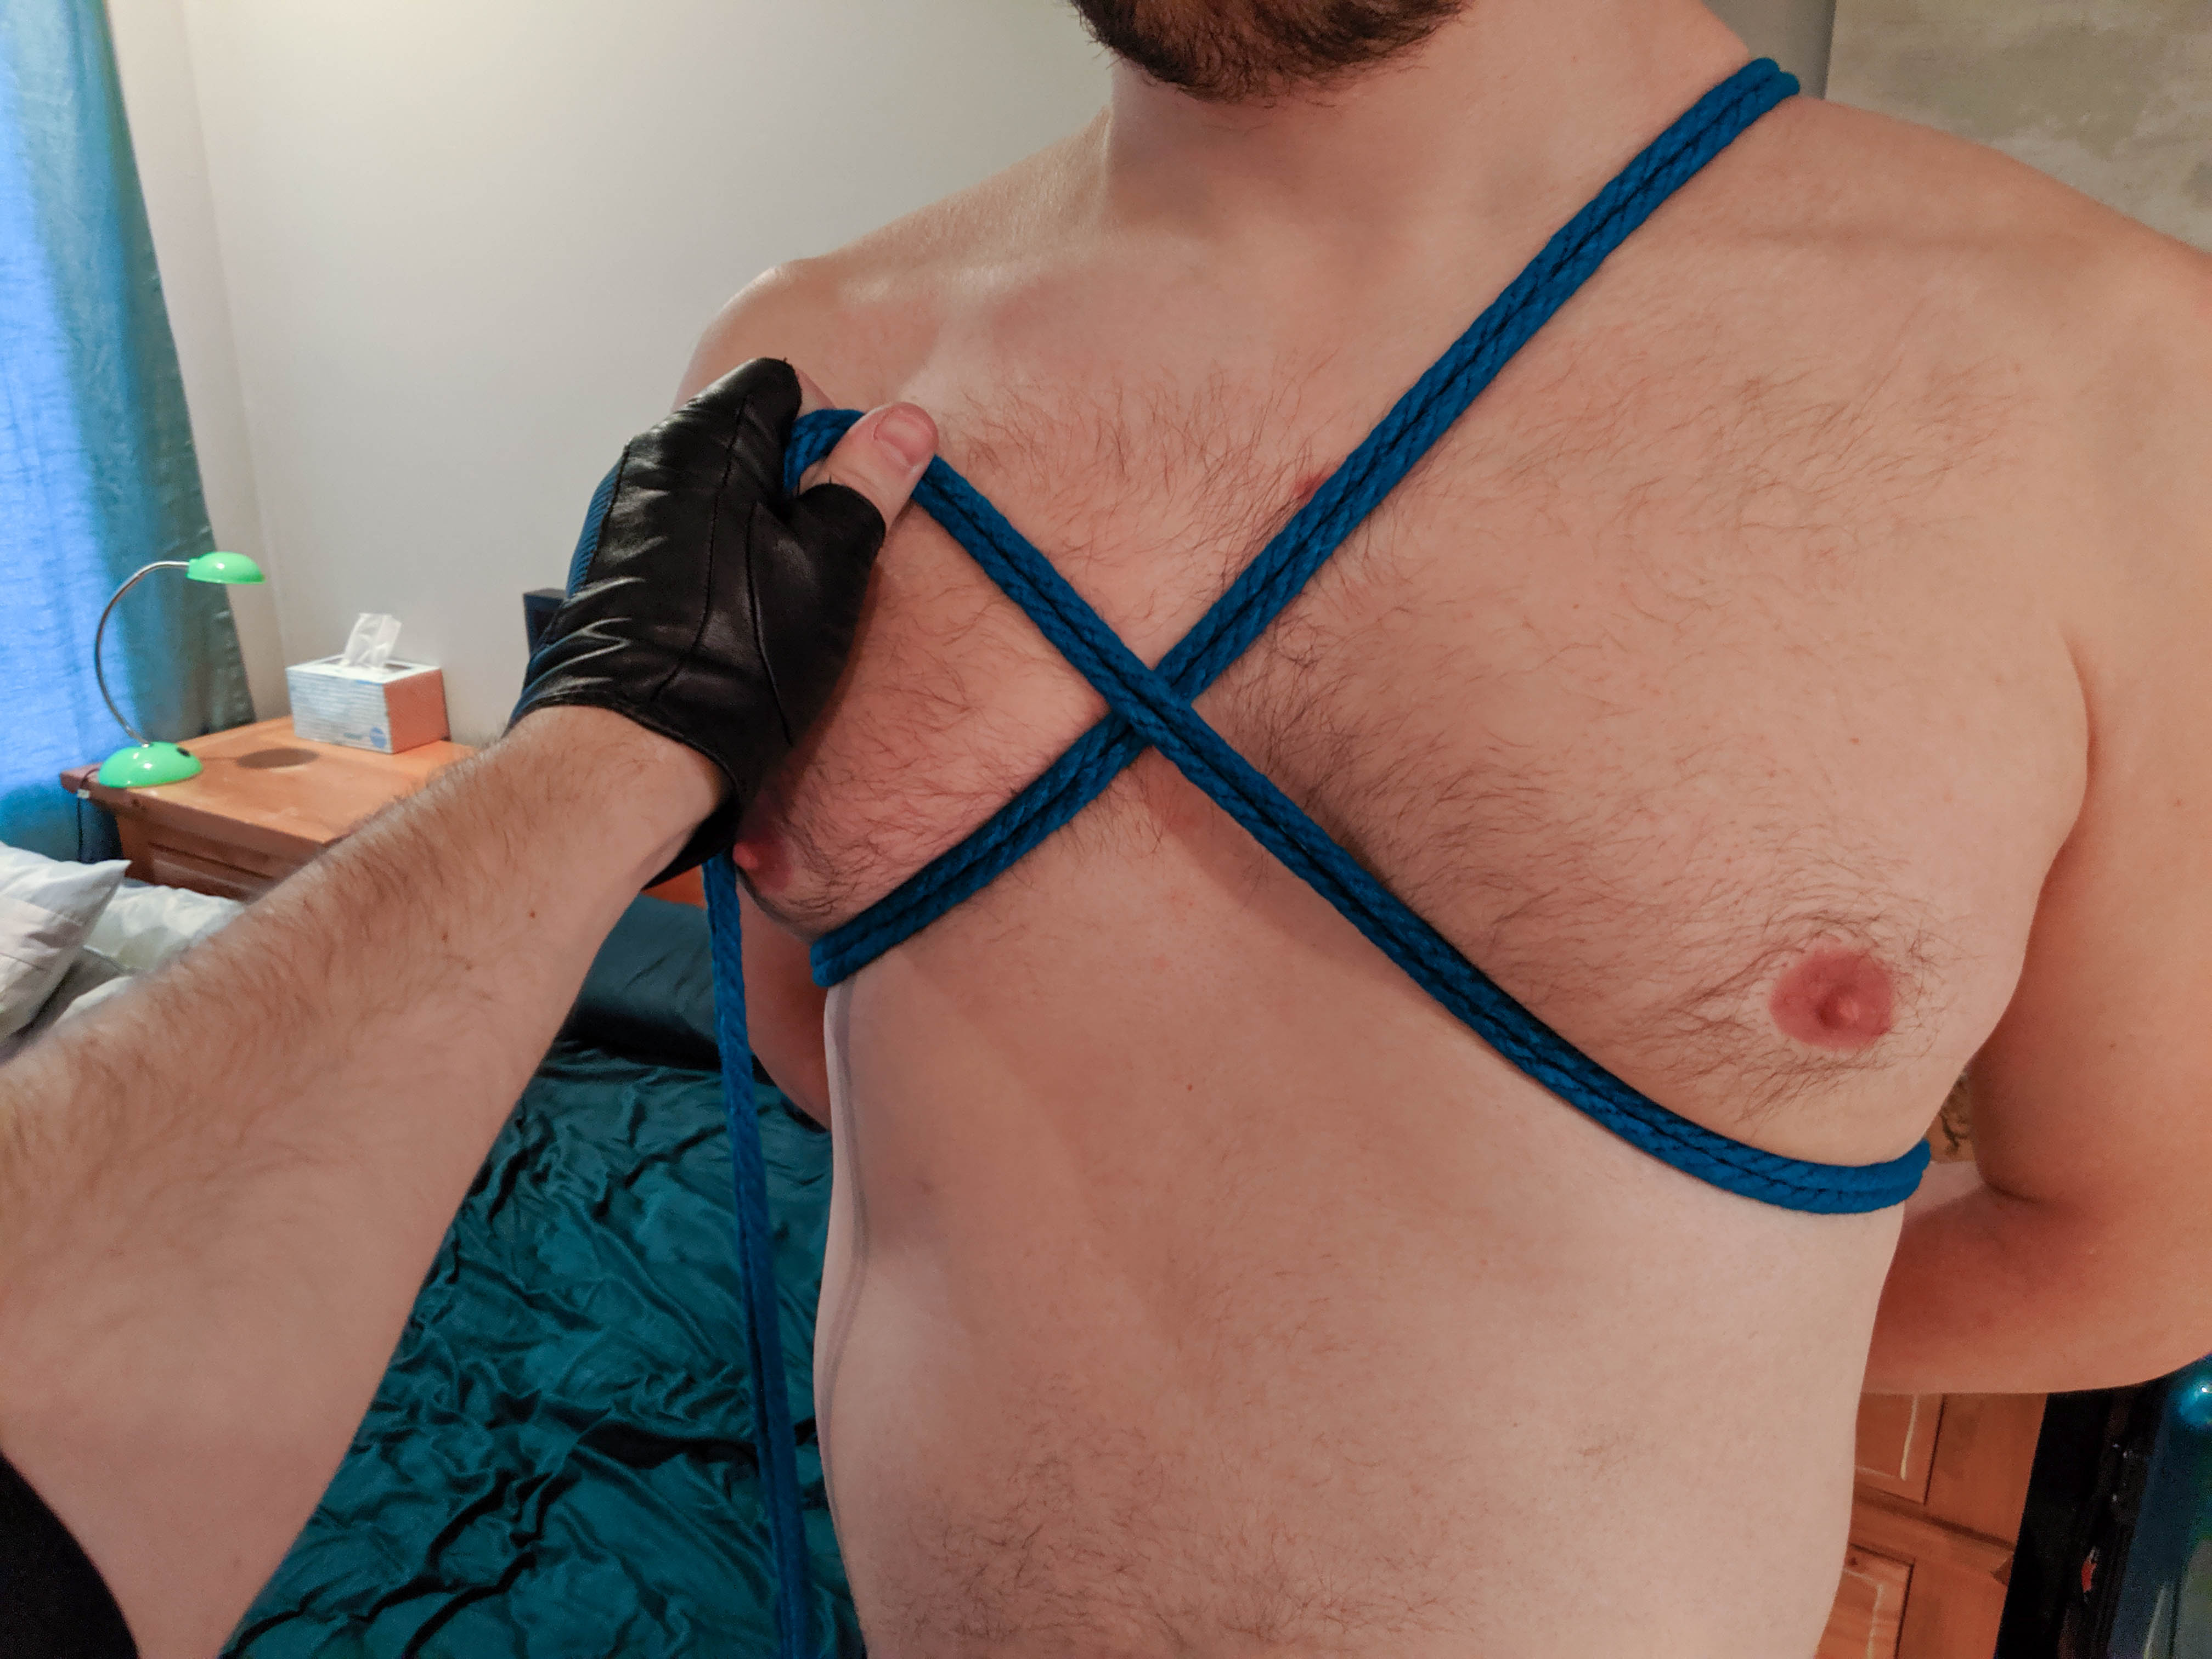
Bring the working end across their chest
And wrap it diagonally around
Making sure to go on top of the forearm
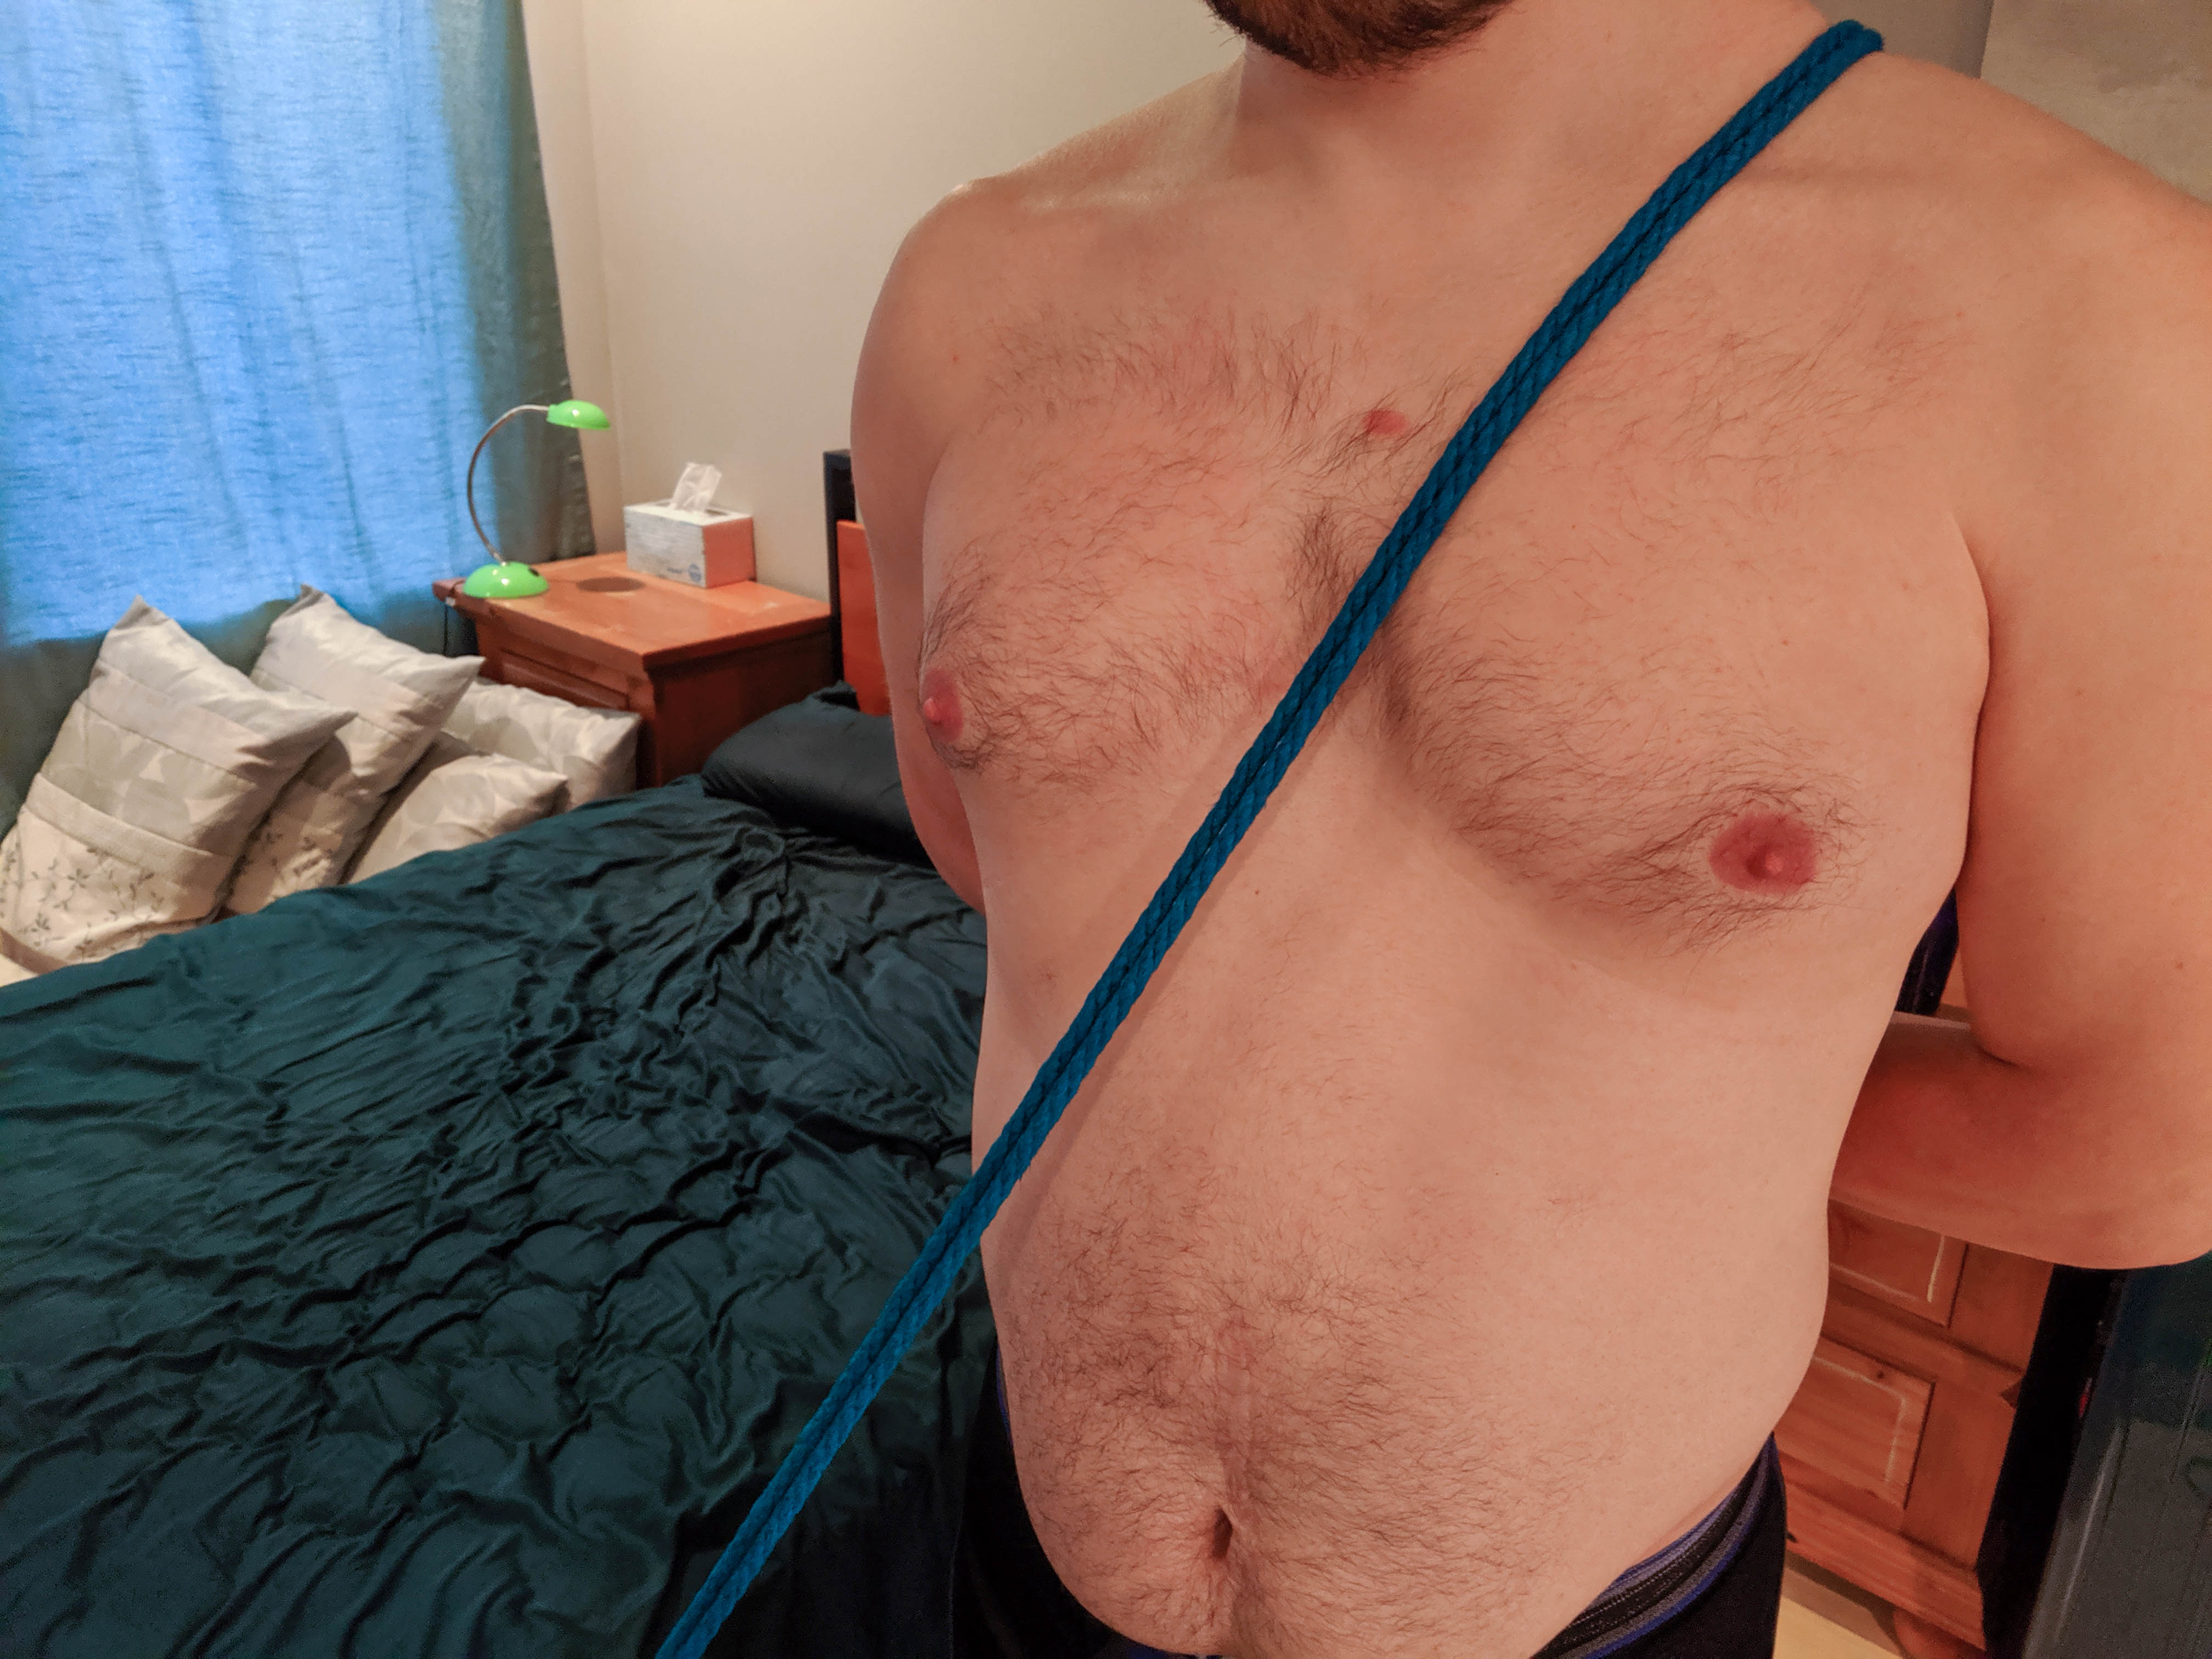
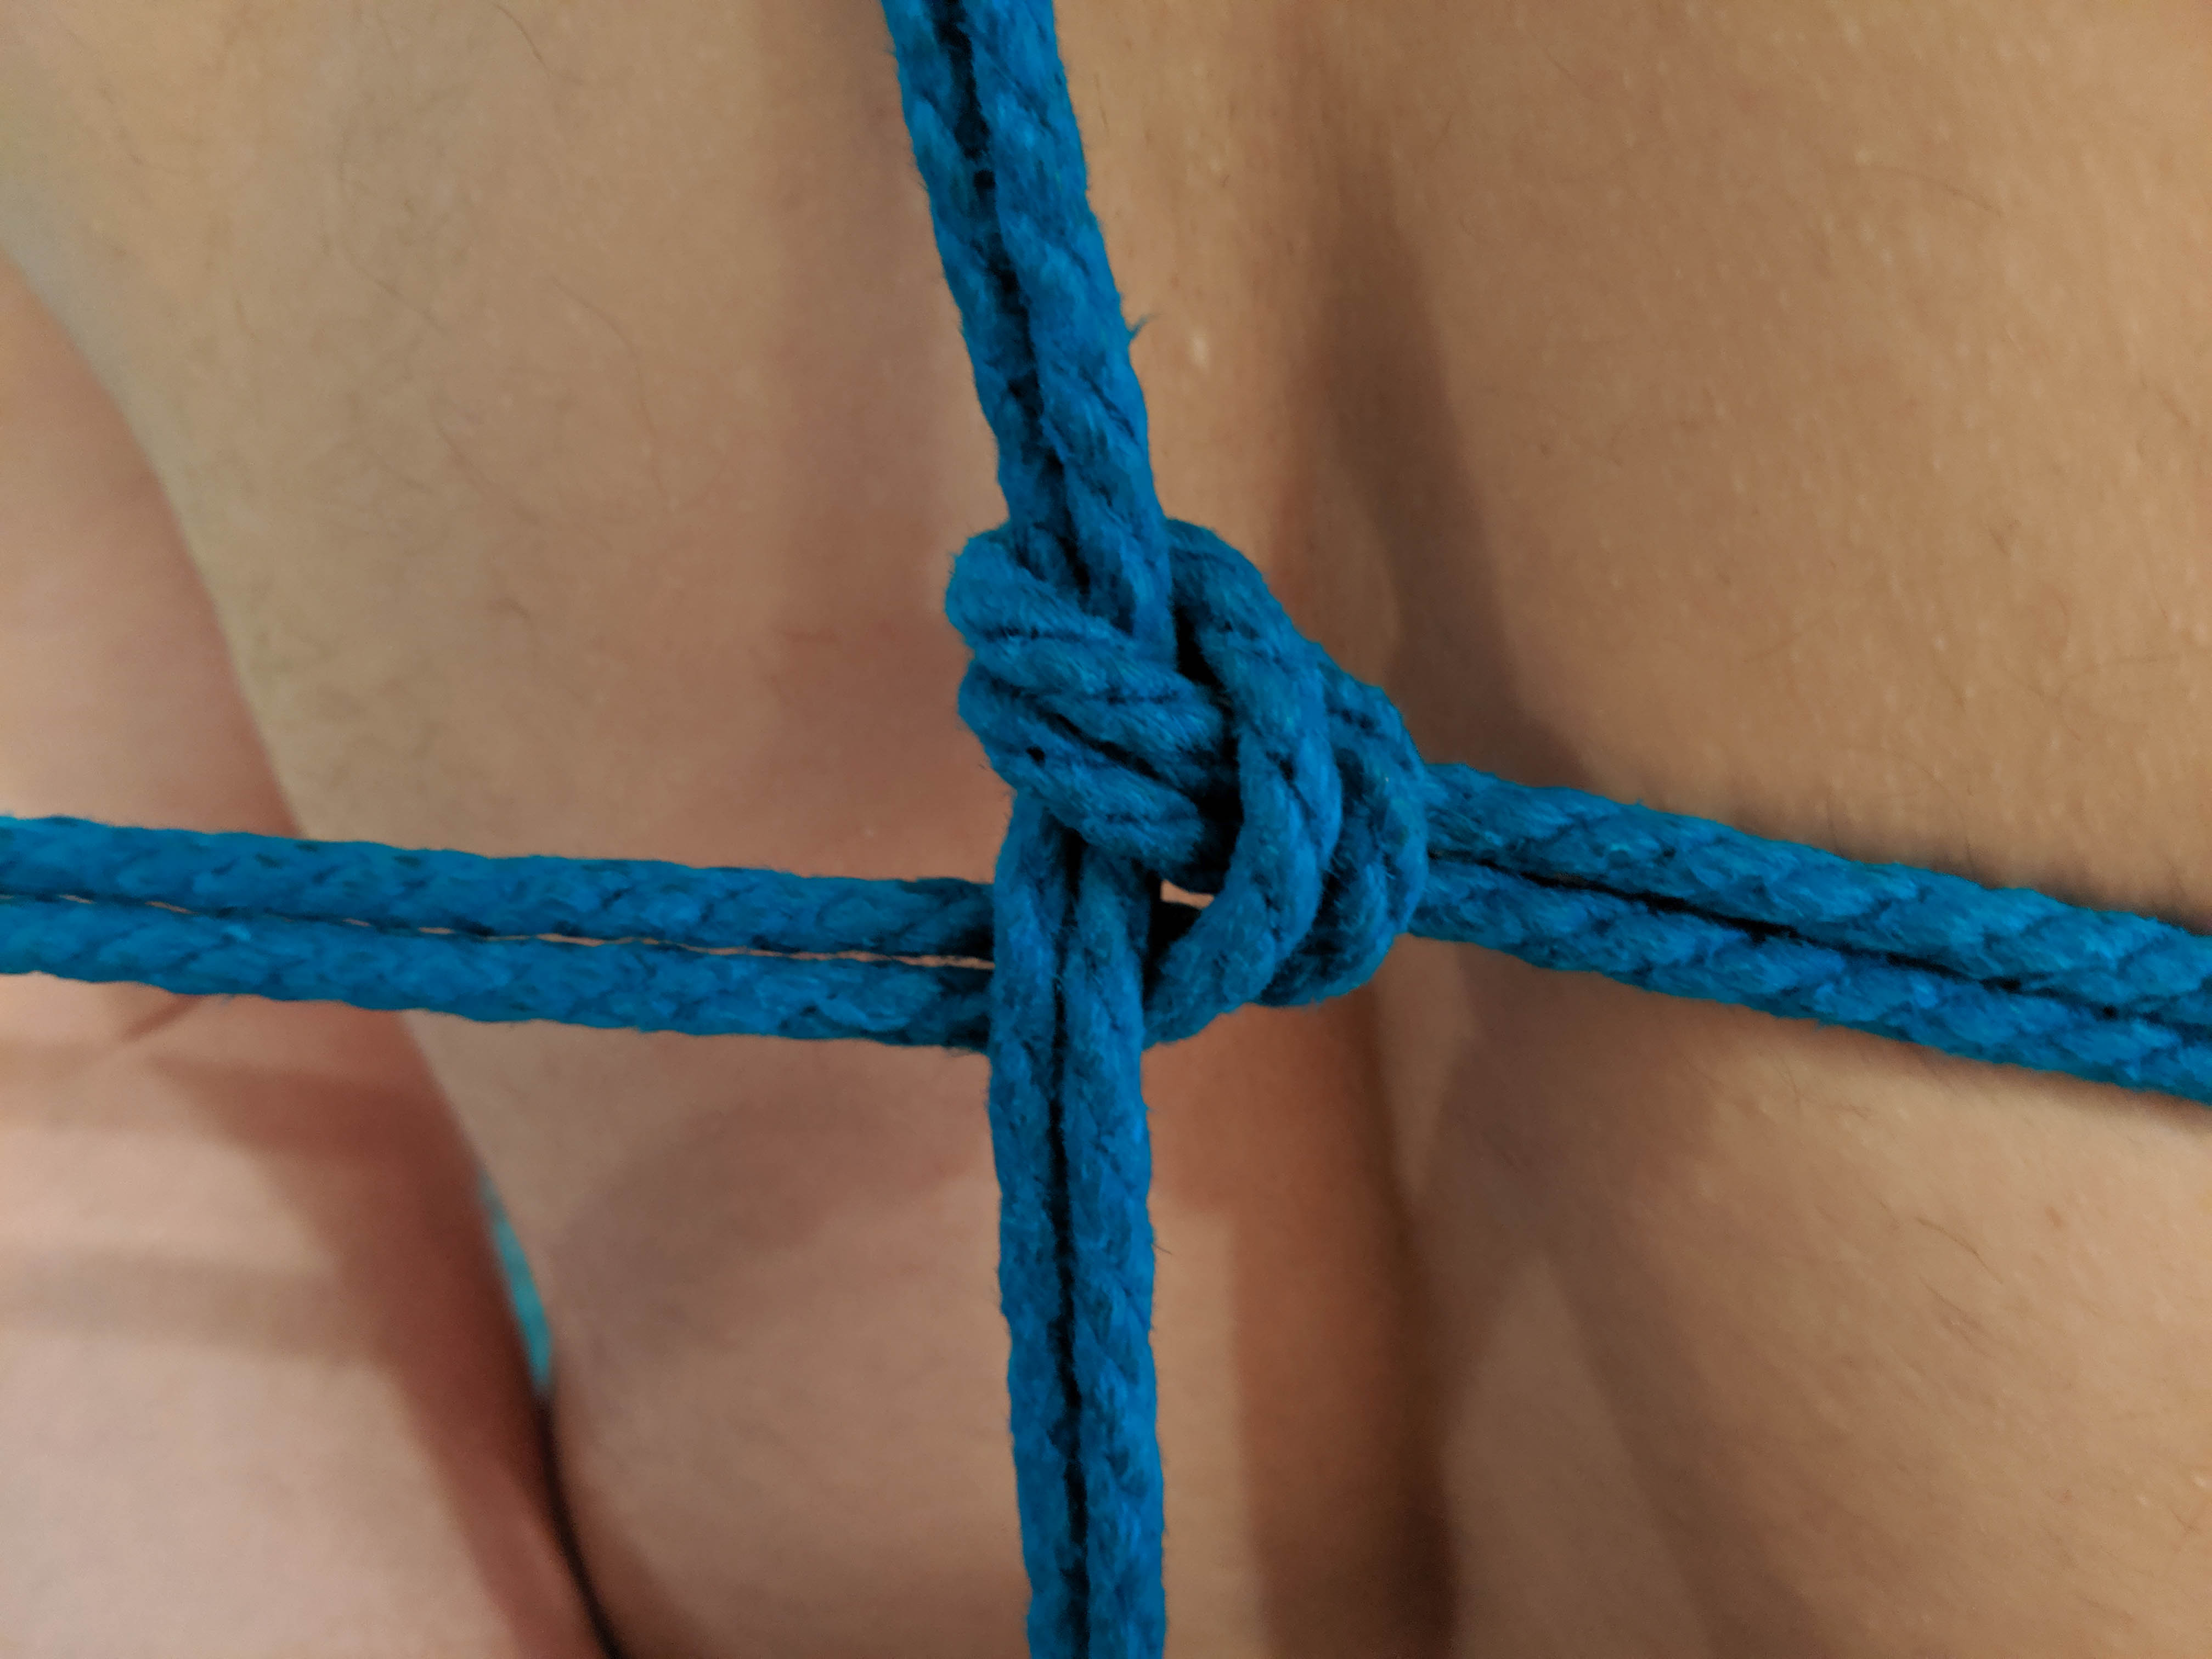
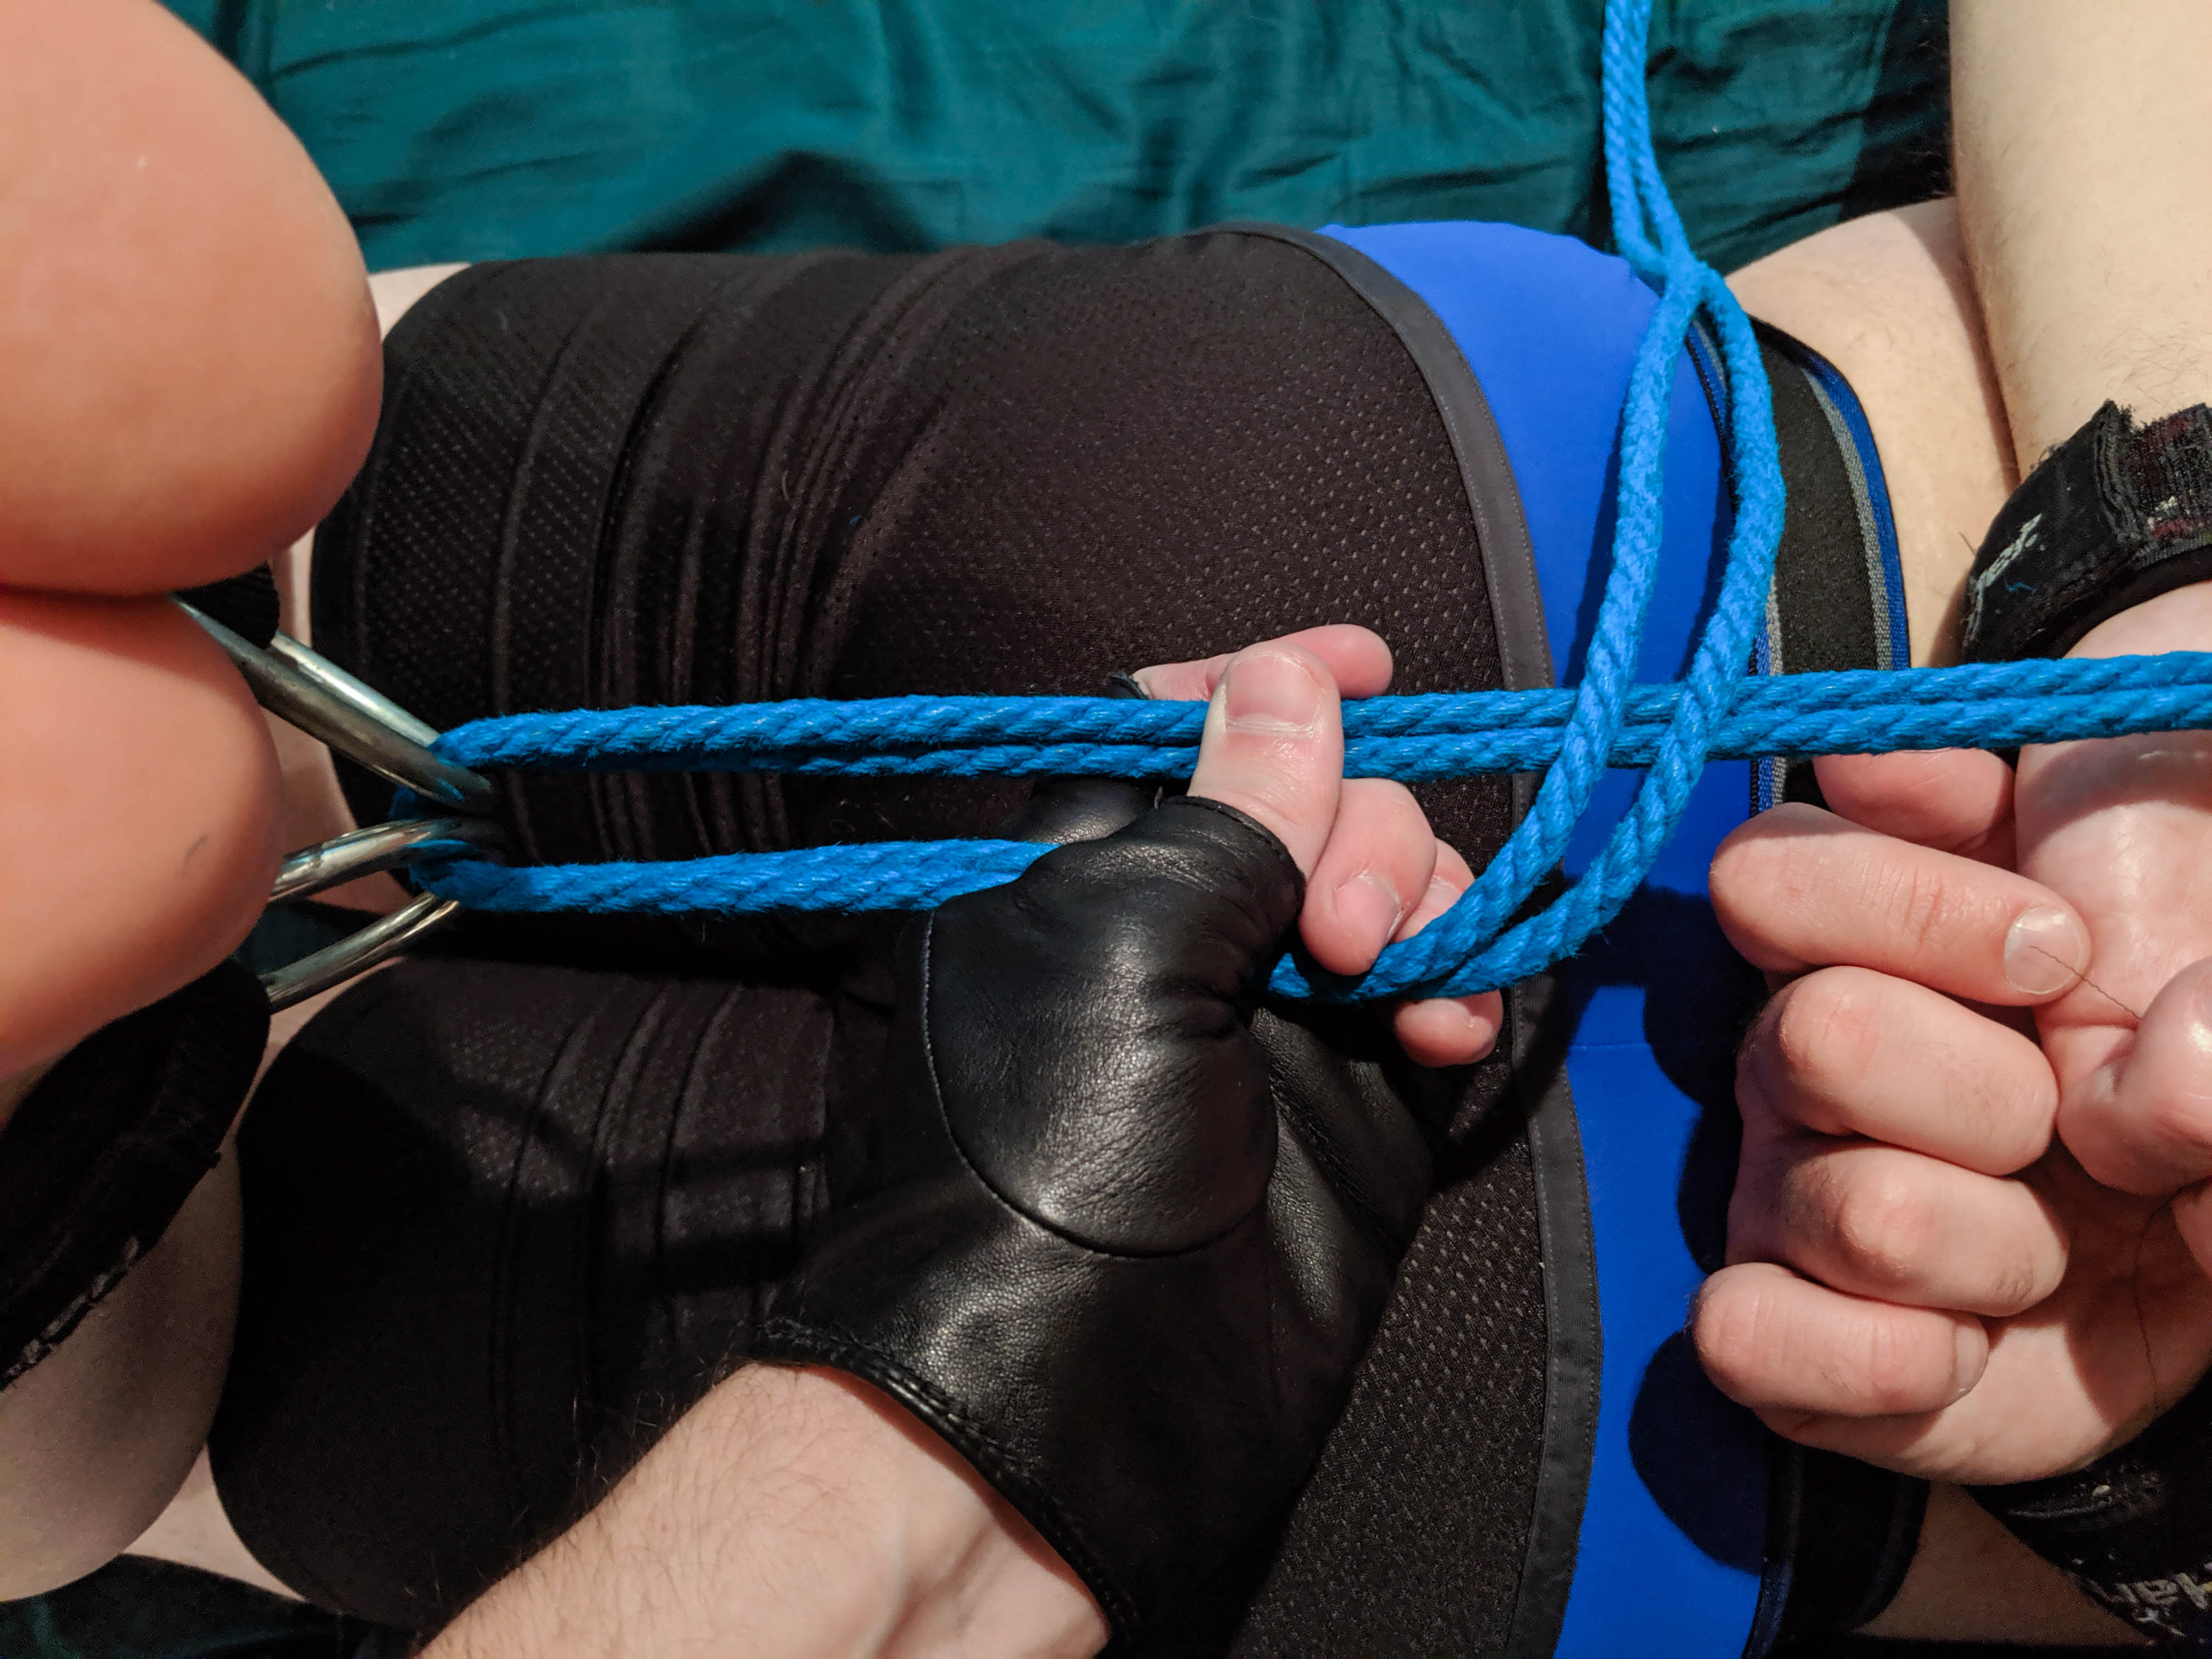
Bring the working end around so it crosses with the vertical rope on their back
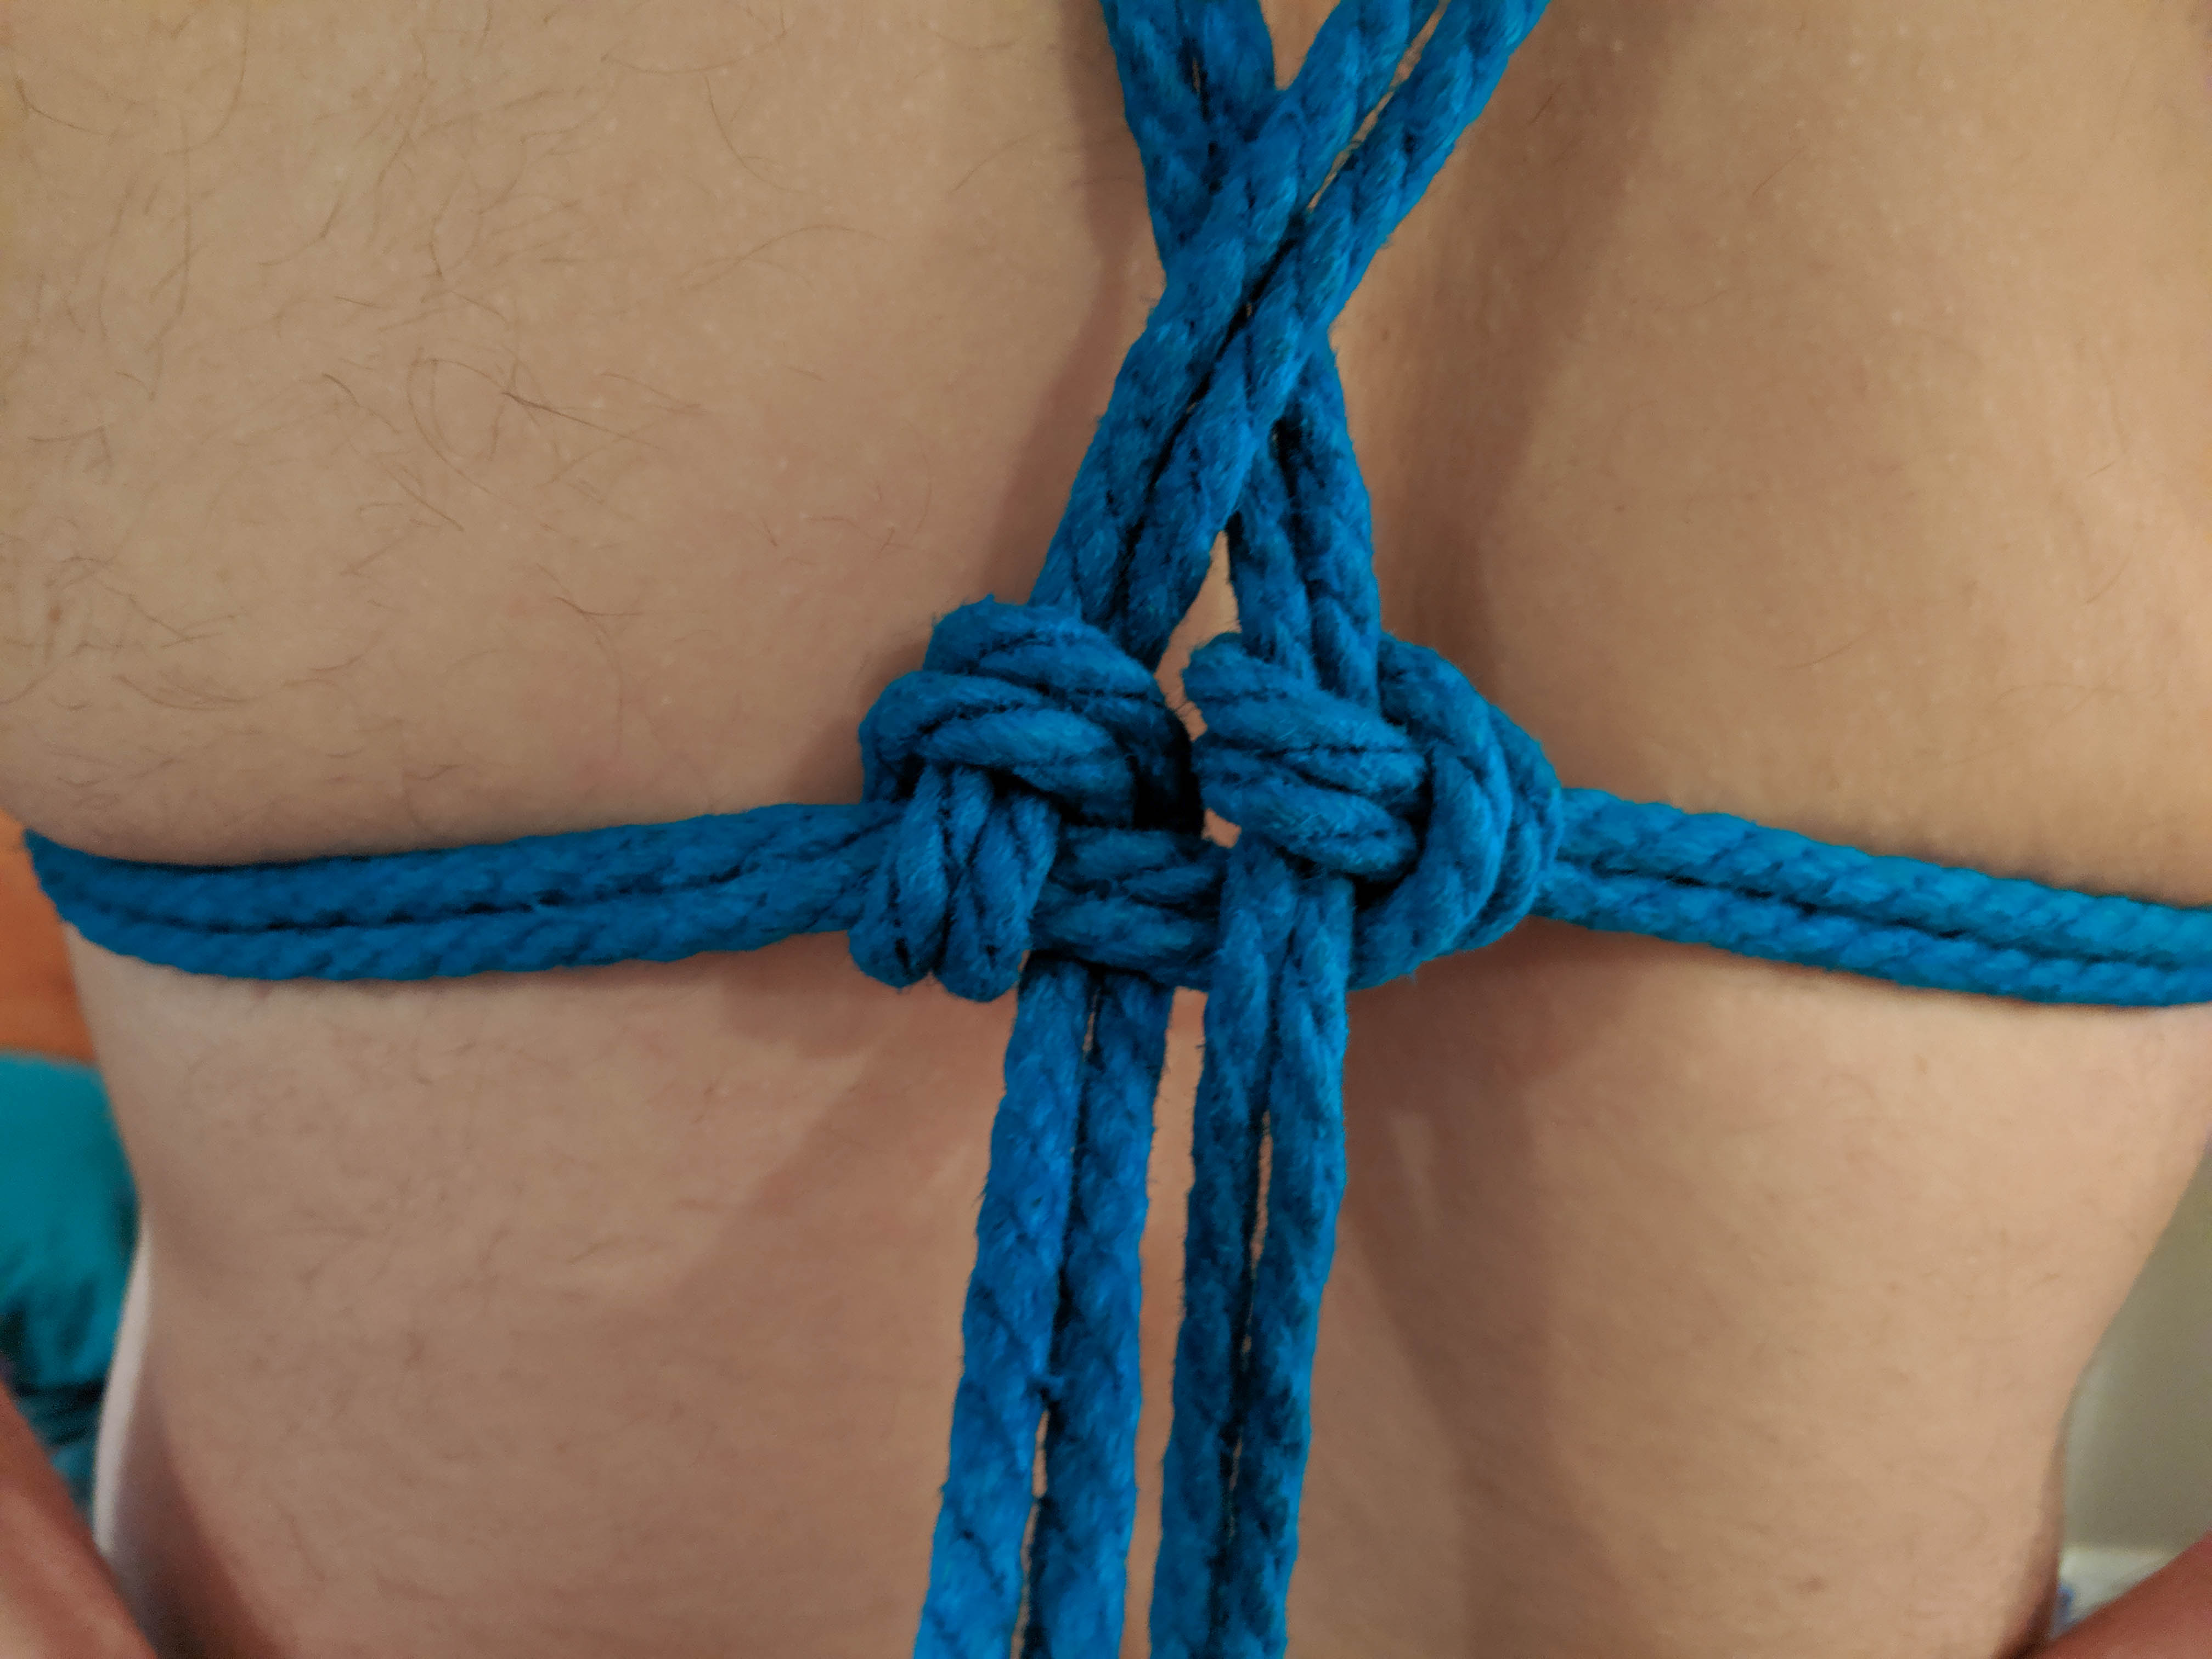
Bring the rope over and back under to start a munter hitch. Munter hitches let a rope pass over another rope perpendicularly but locks the intersection in place. This makes sure any pressure from struggling gets evenly distributed throughout the chest harness and prevents it from deforming.
This is the point where we're going to be locking in the tension of the arms up towards the neck. If it feels to loose tighten everything up before completing the munter hitch.
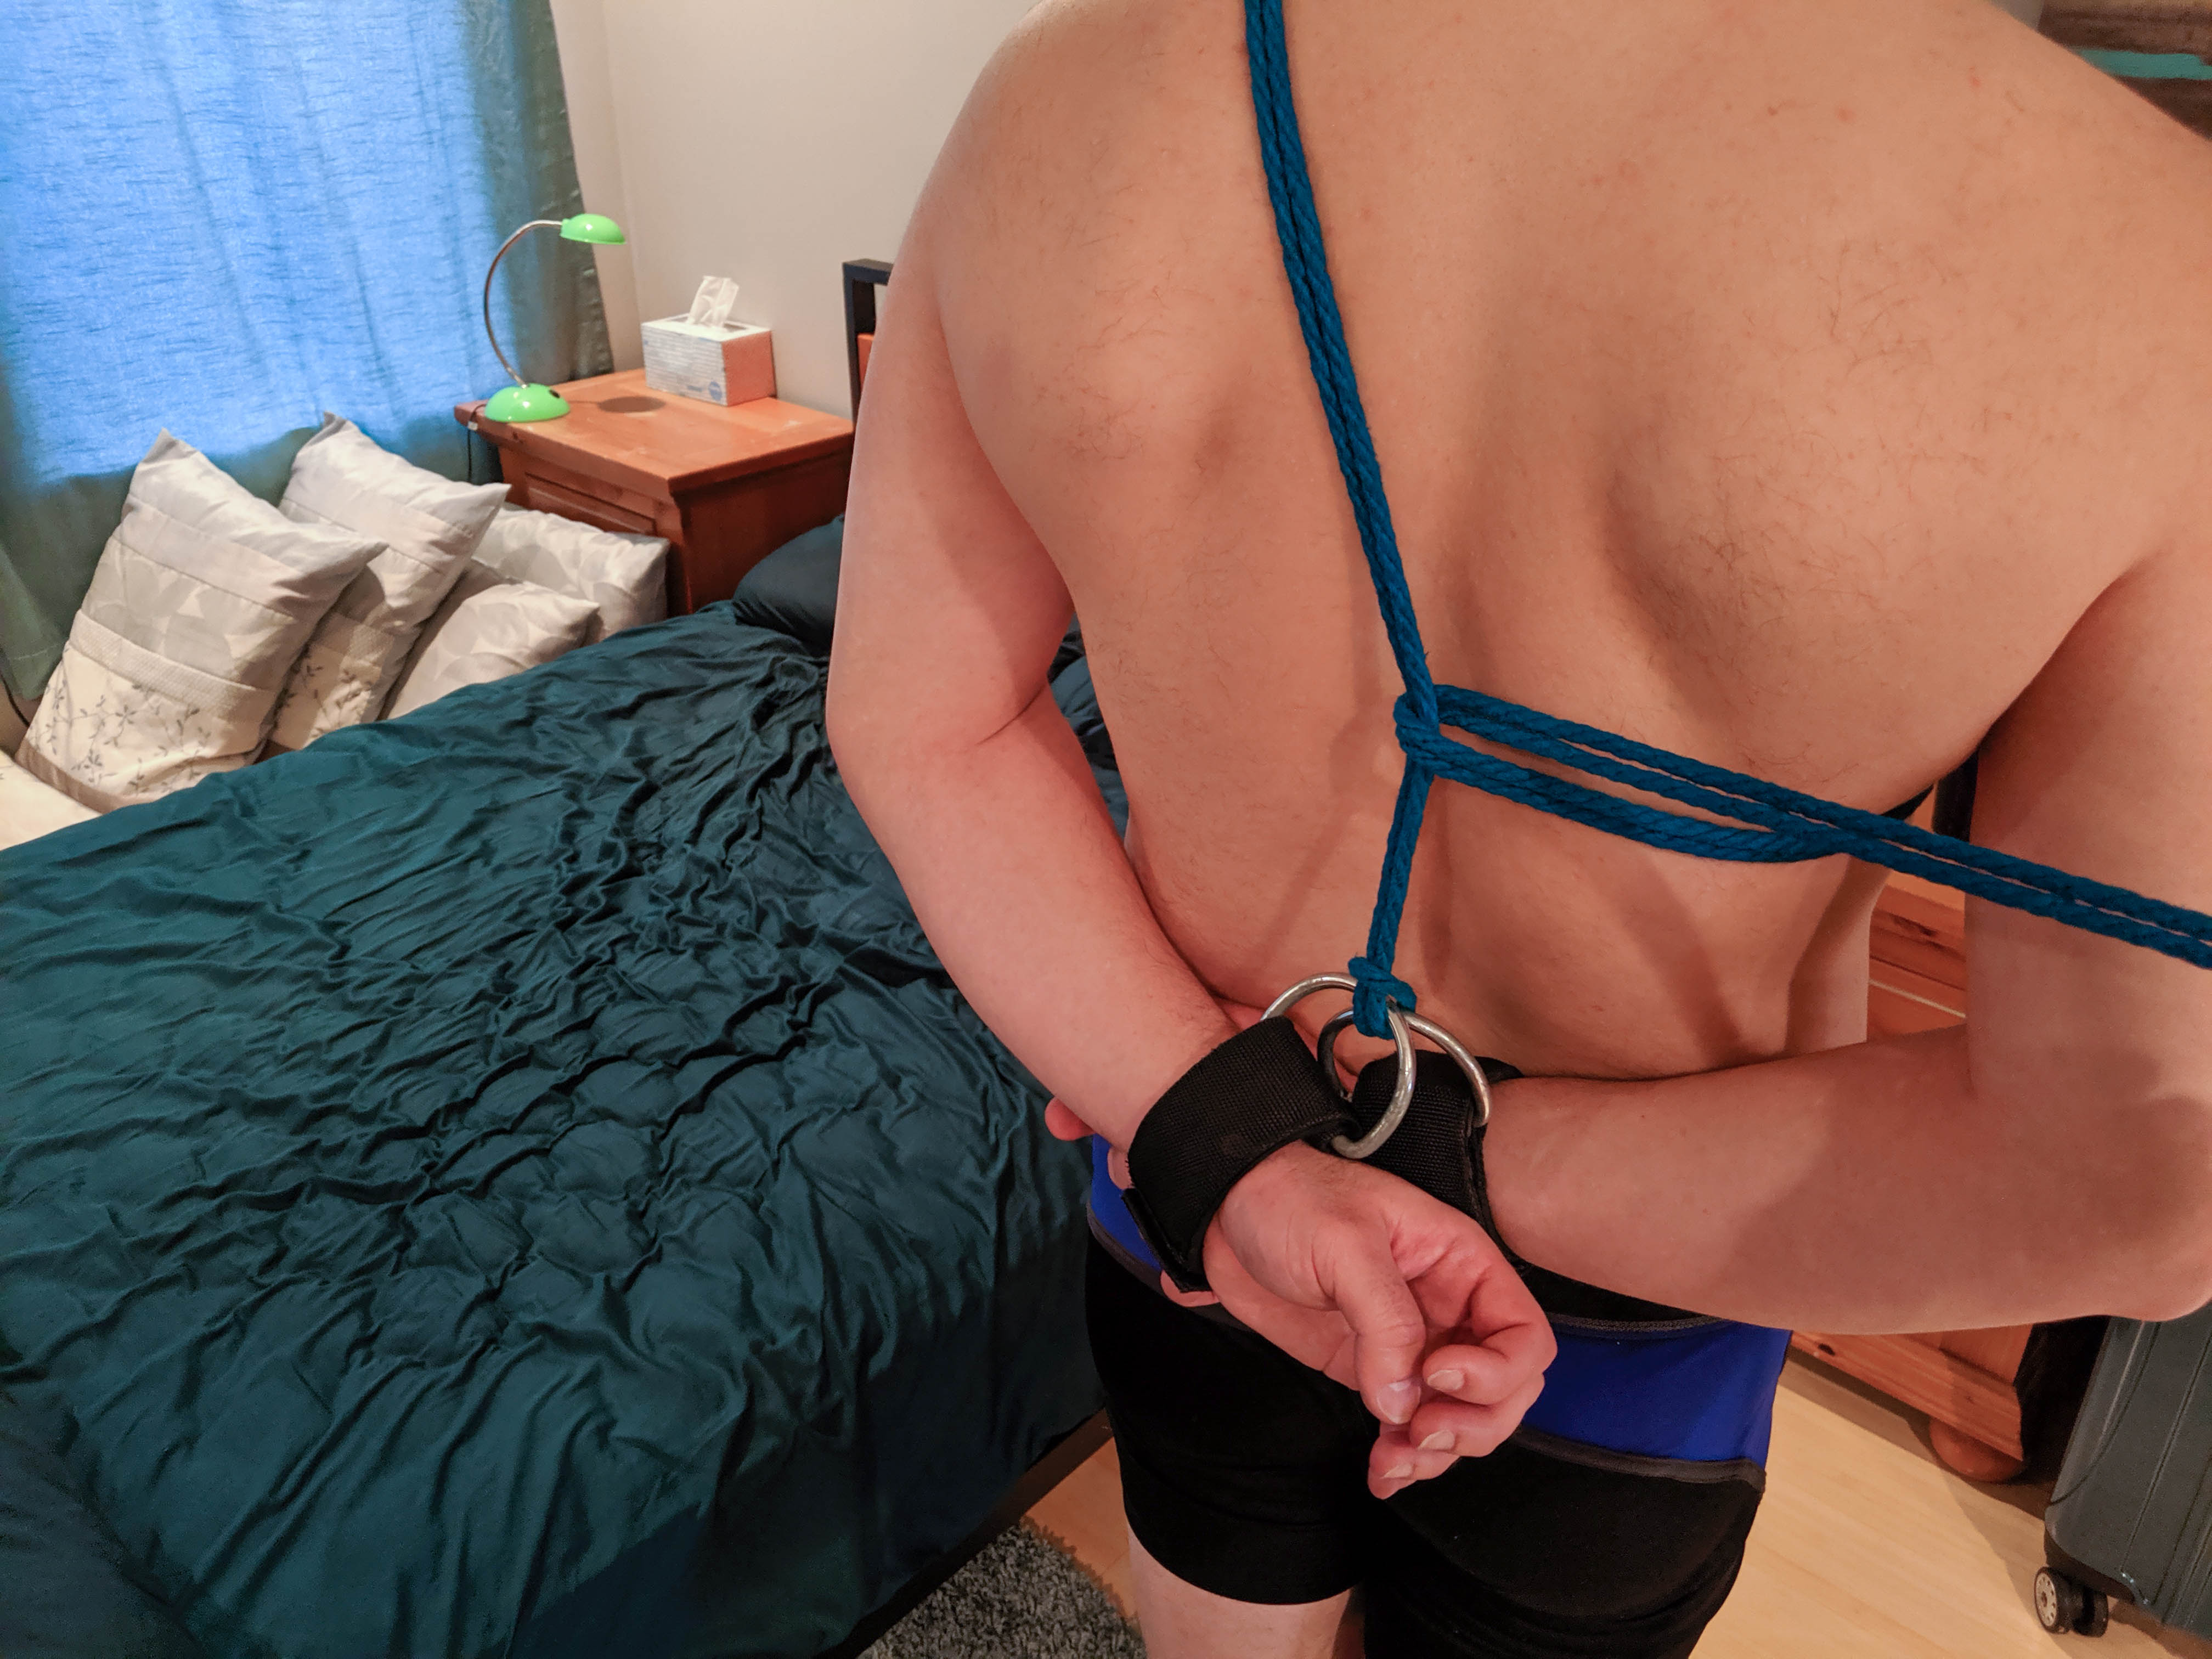
Bring the rope over and back under the vertical
The completed munter hitch should look like this. If yours looks the same just flipped along the horizontal axis, that's perfectly fine too.
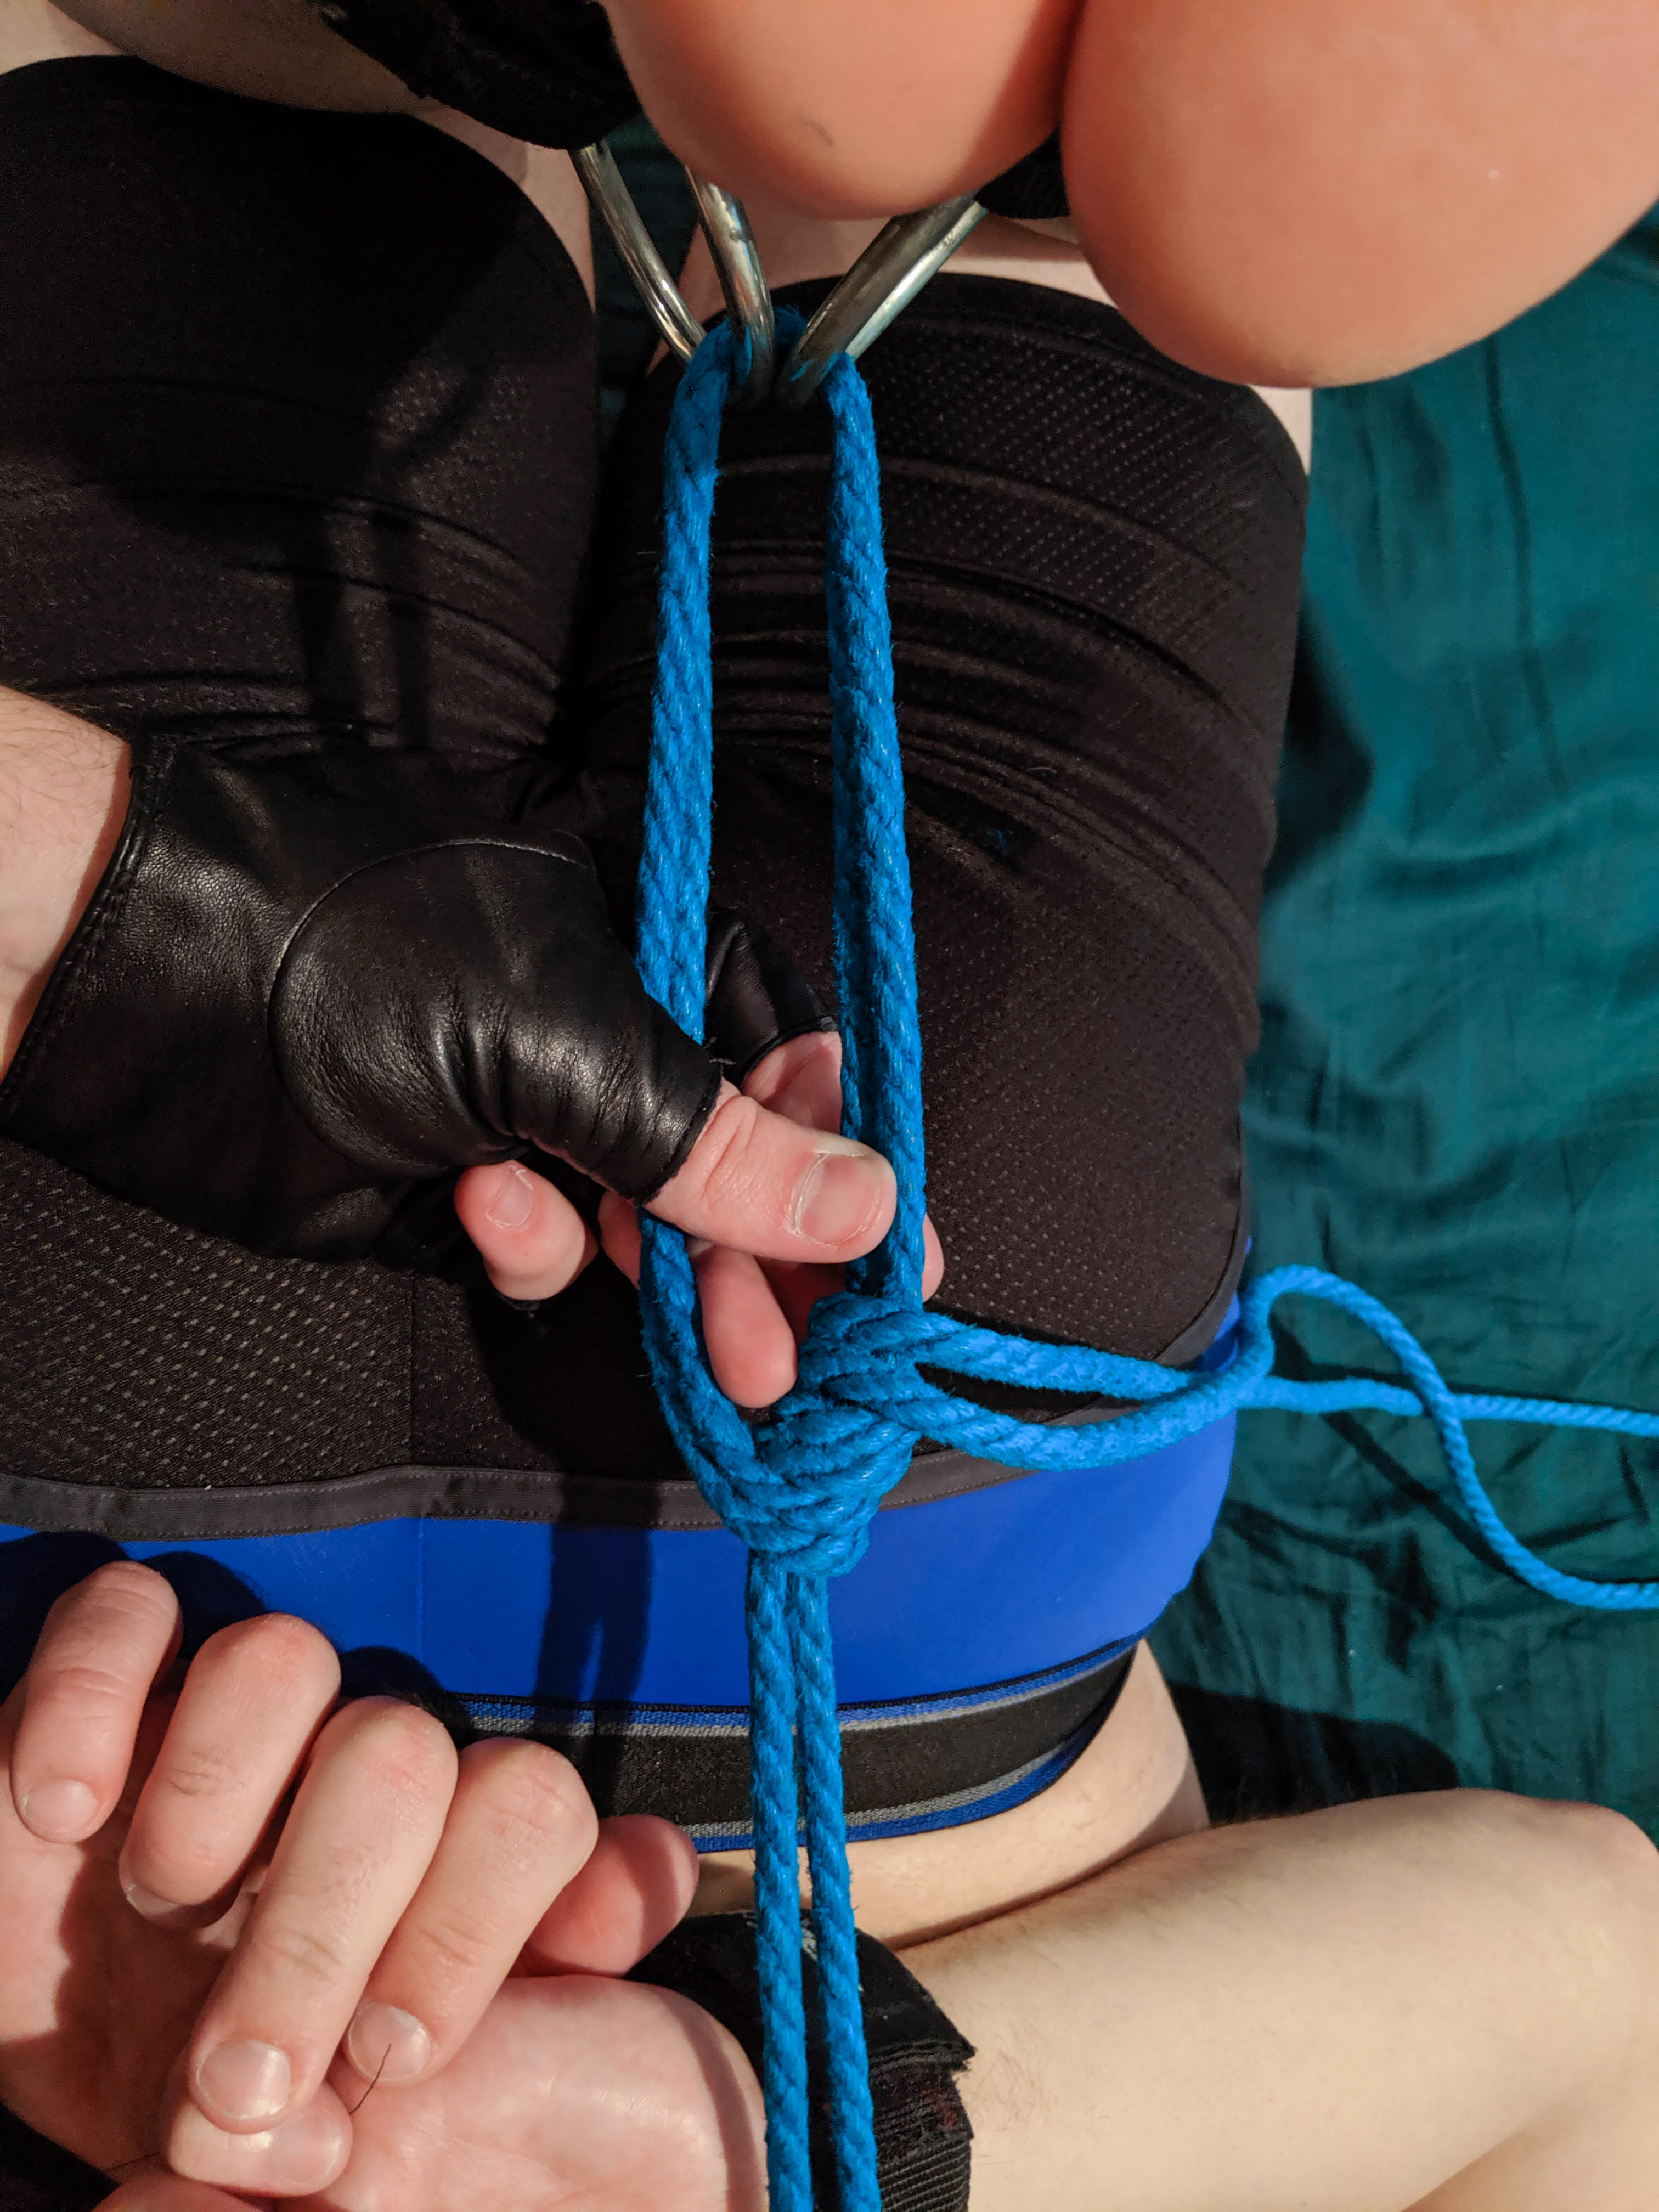
Bring the tail end around the front
So it crosses with the other rope. We're going to put another munter hitch here.
Just like before, bring the rope over and back under
Then over and back under again
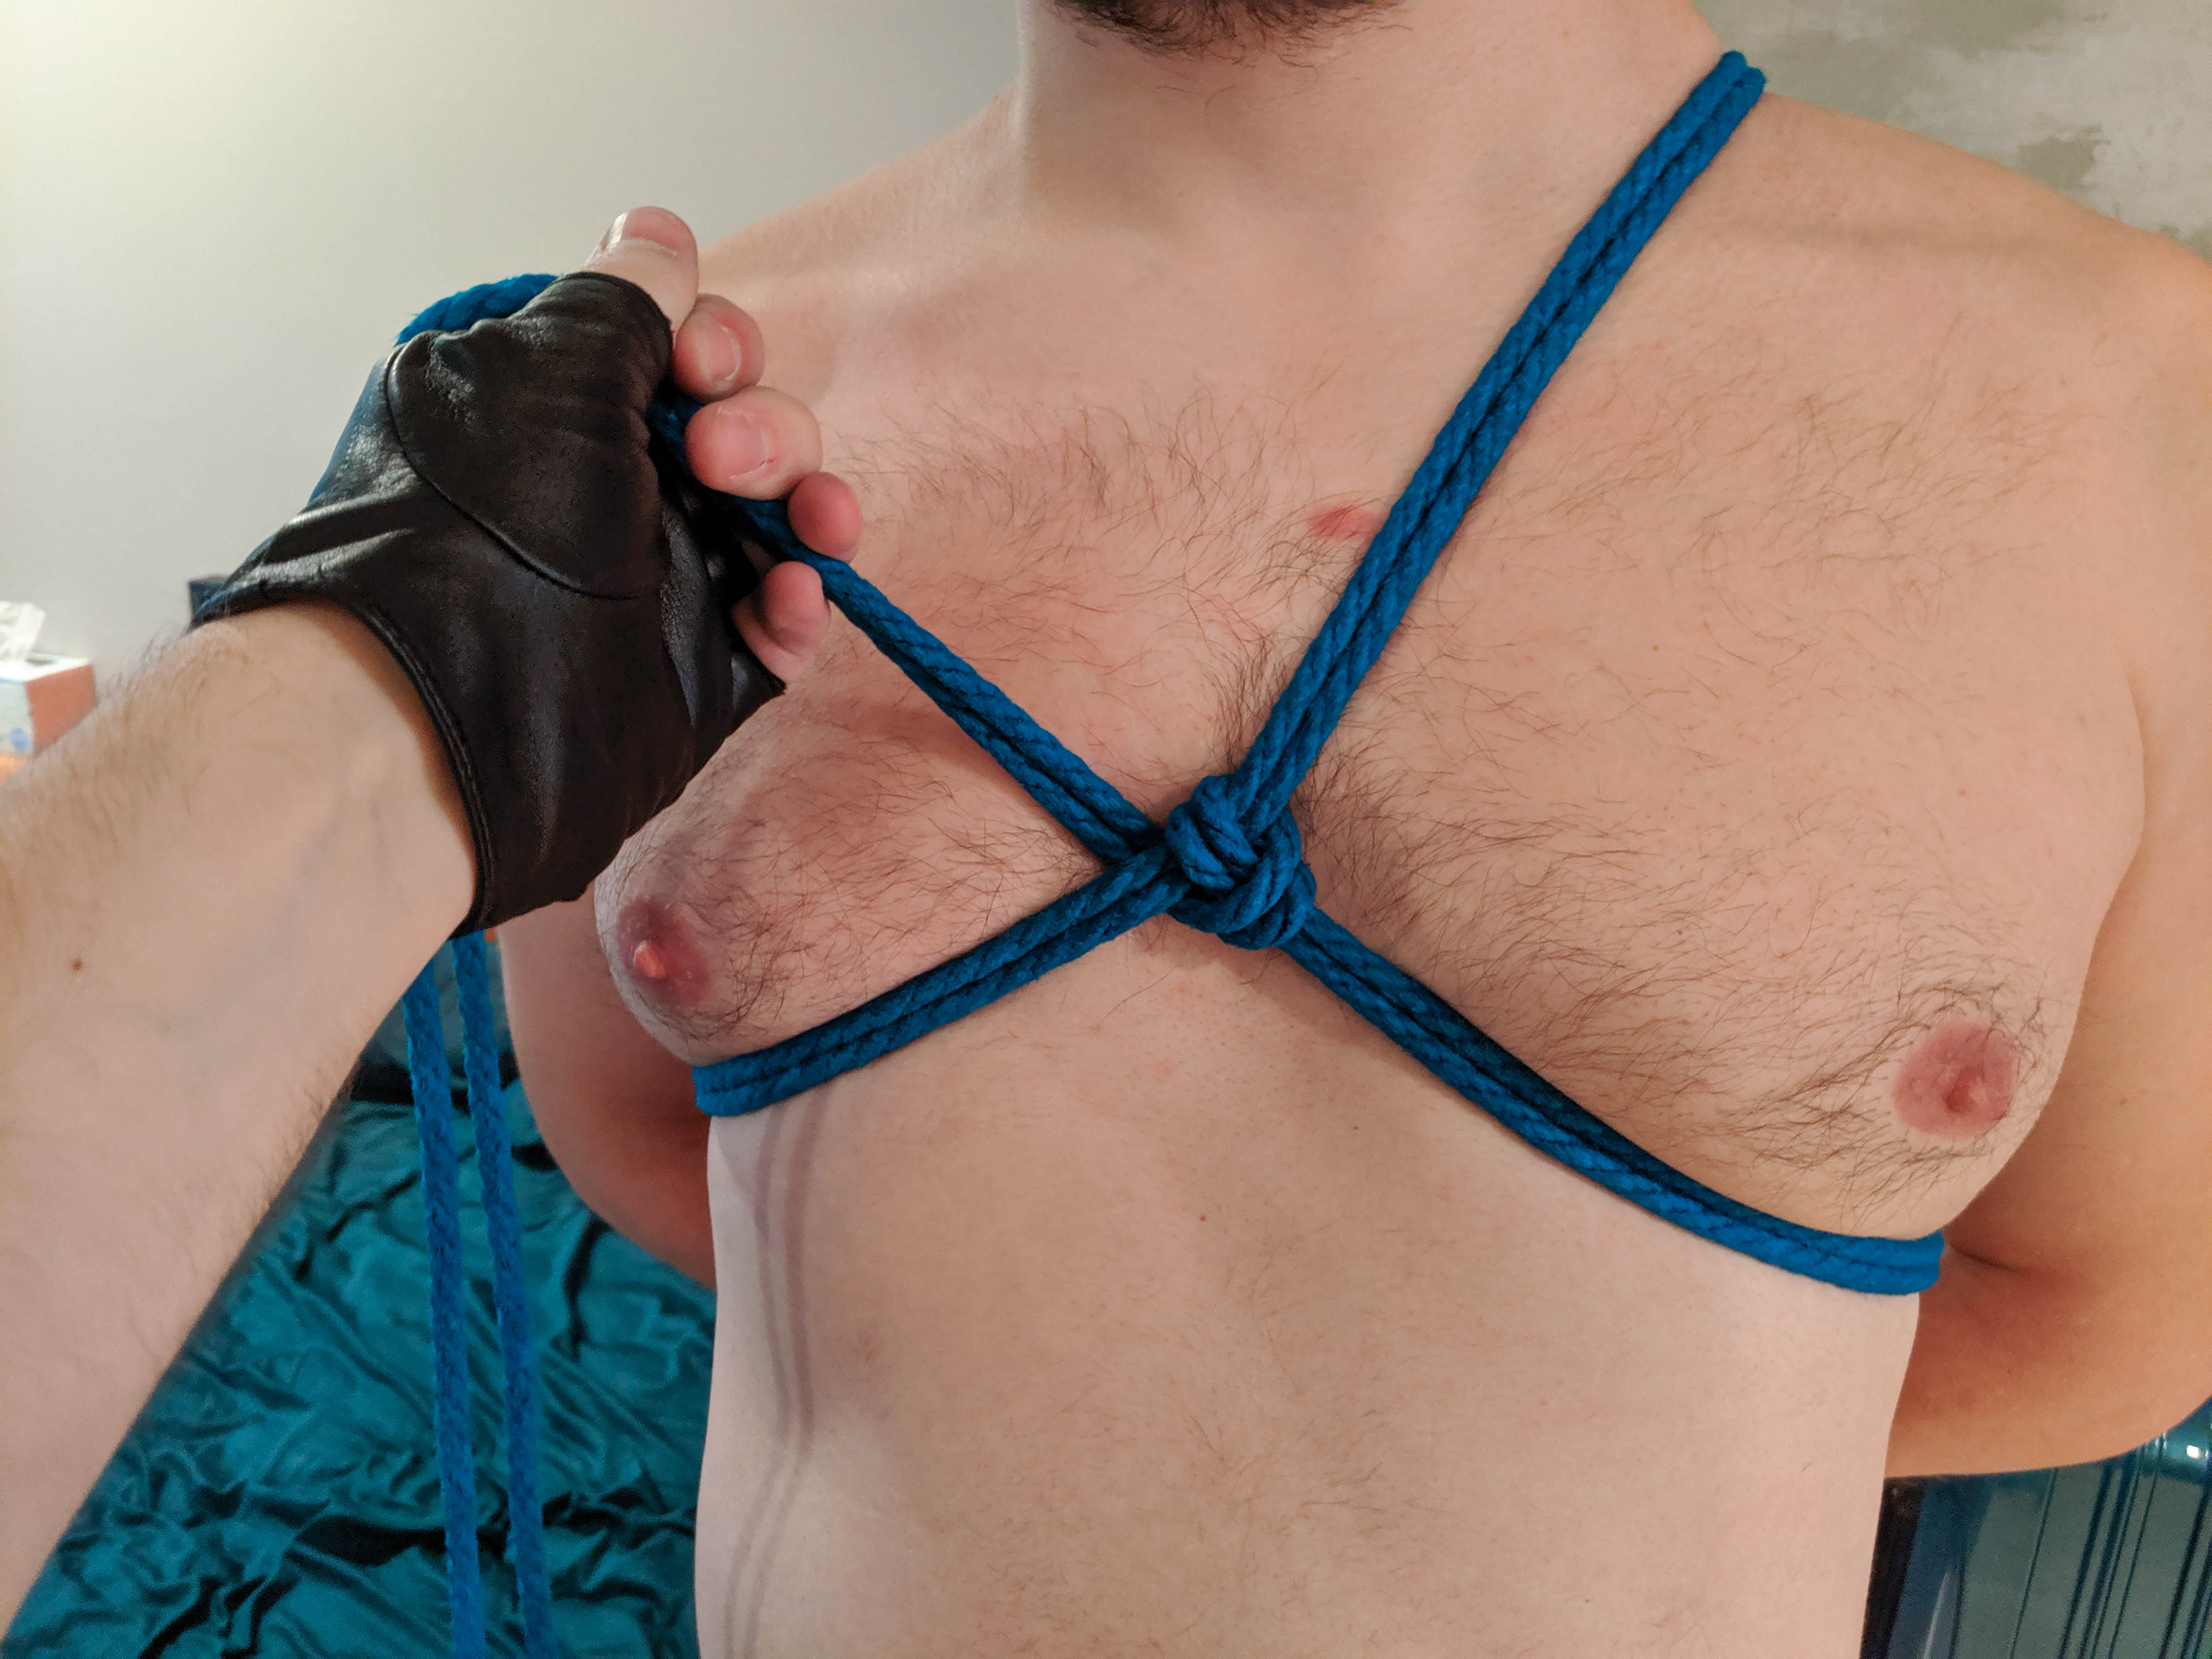
It should look like this when you're done.

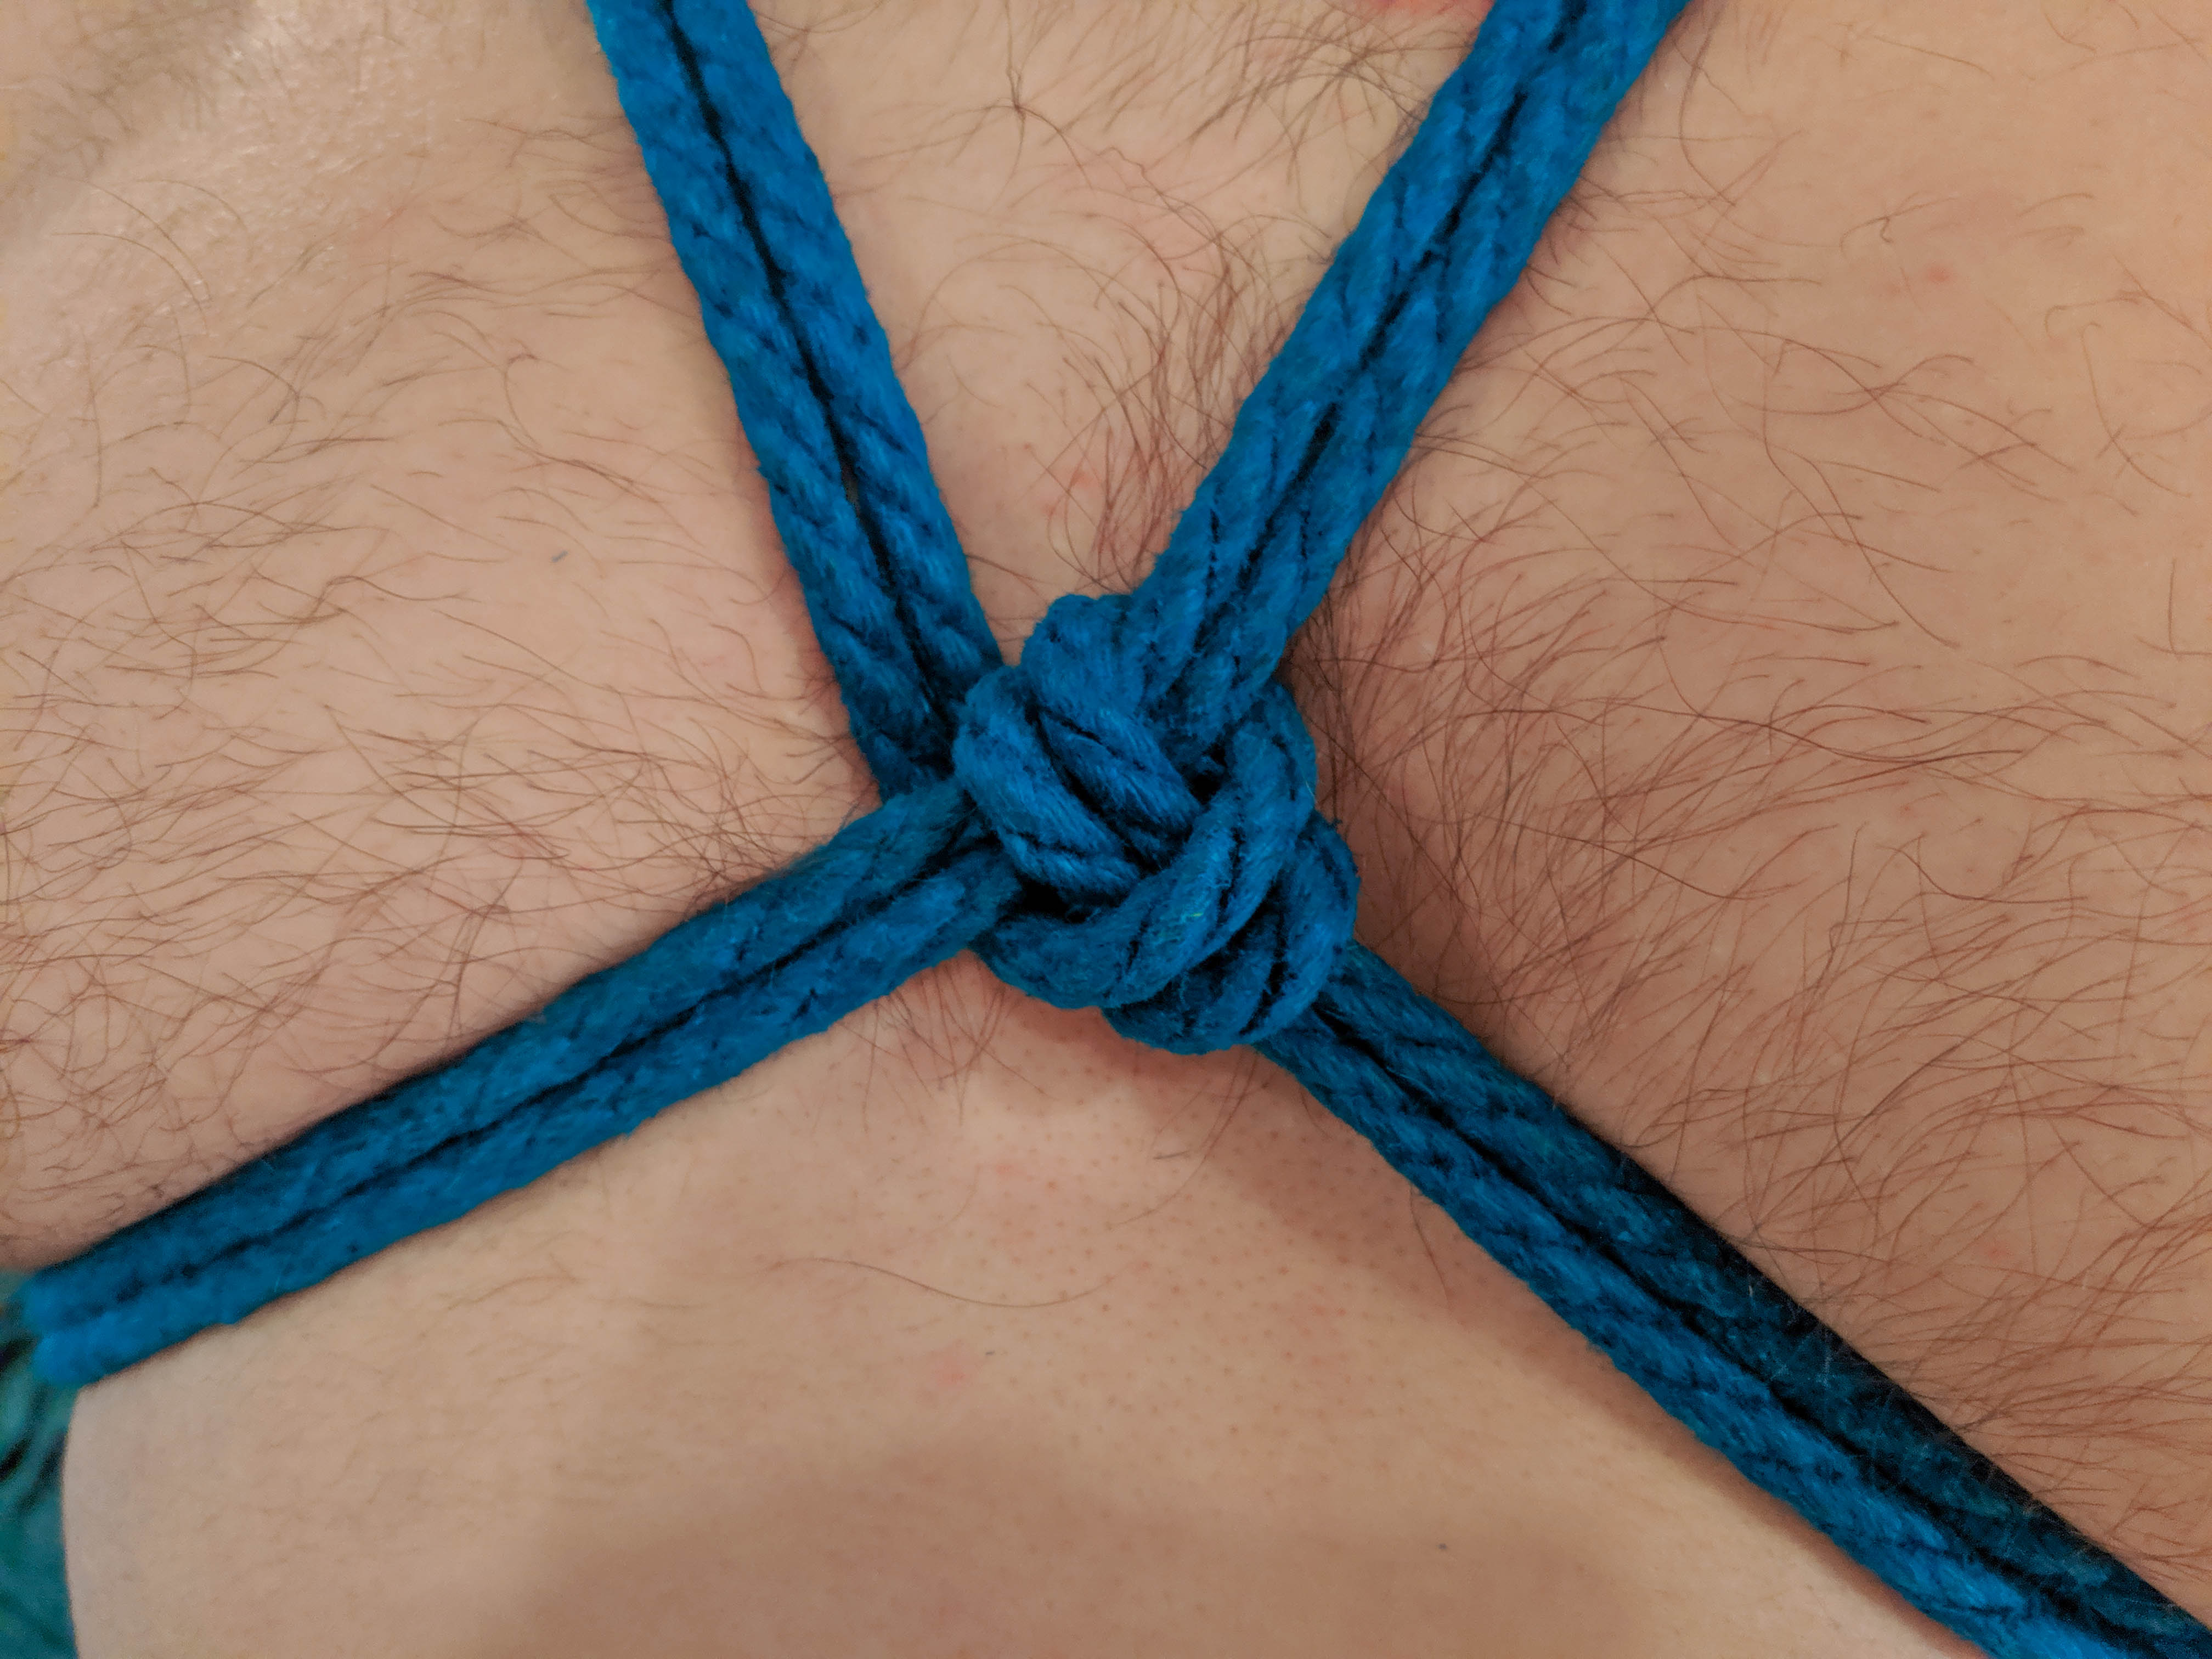
Close up of the munter hitch:
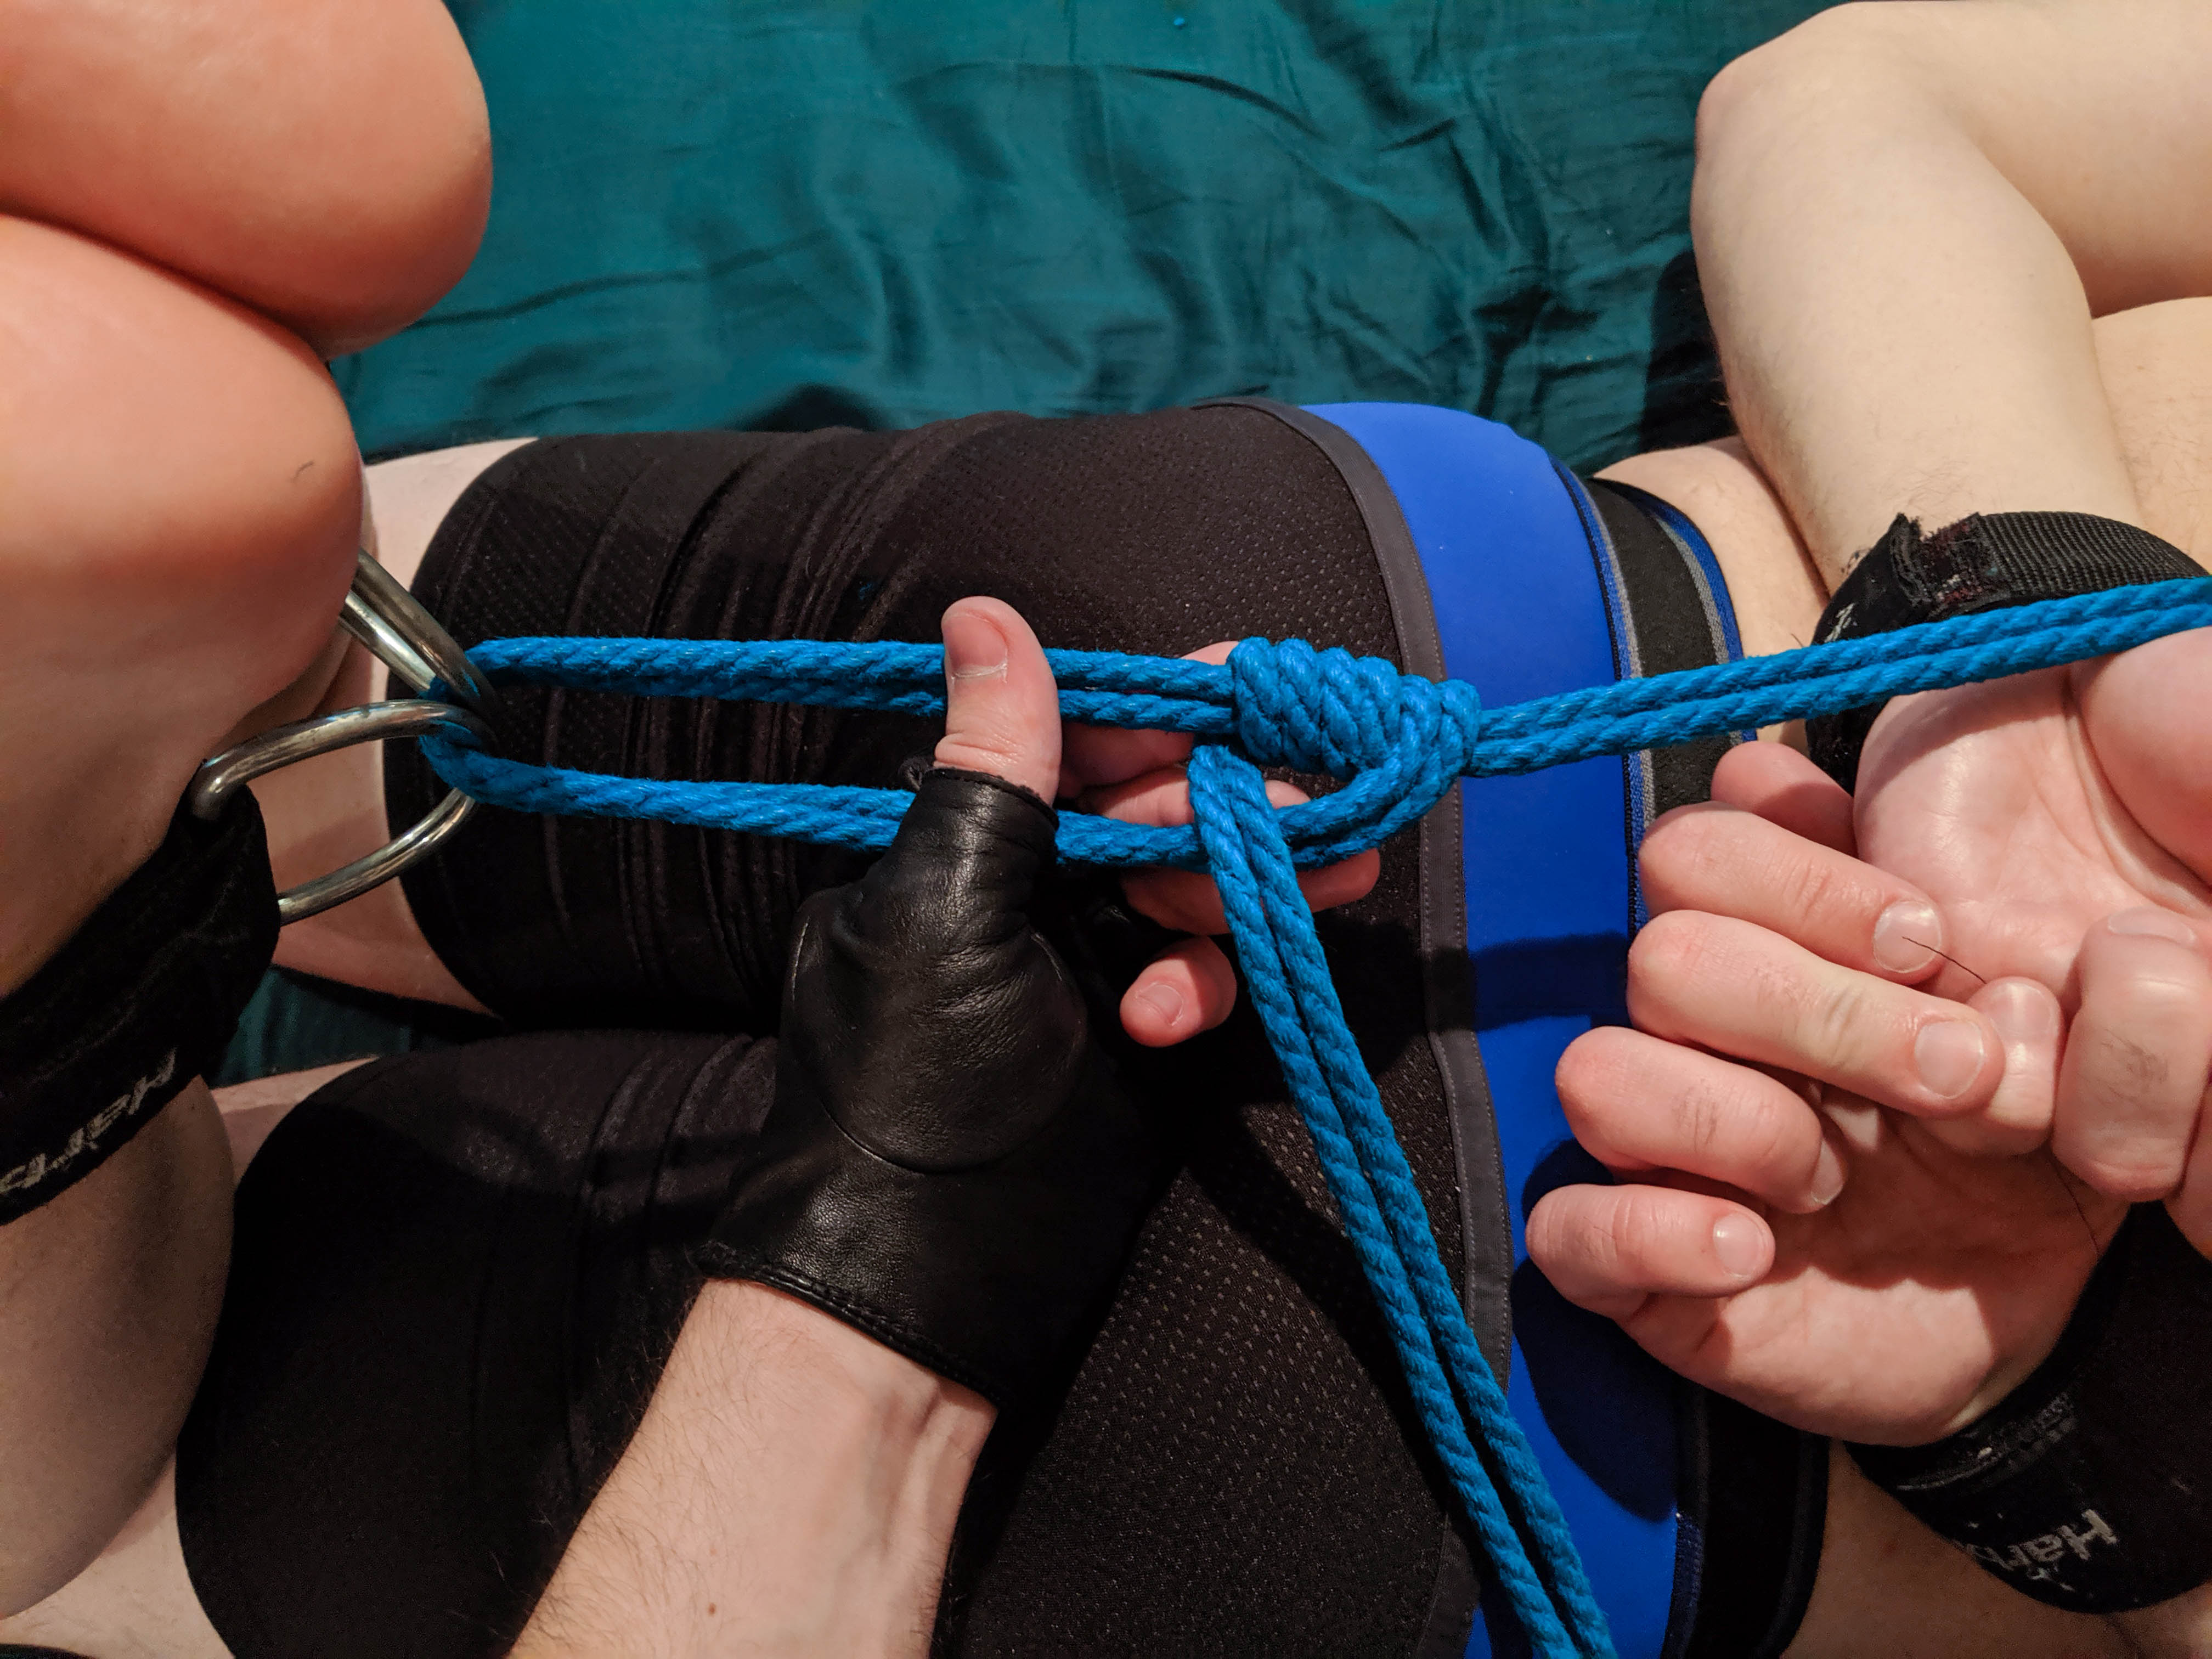
Bring the working end up over the shoulder
and back over so it crosses with the horizontal rope
Bring it over and back under to make a third munter hitch
It will look like this when you're done.
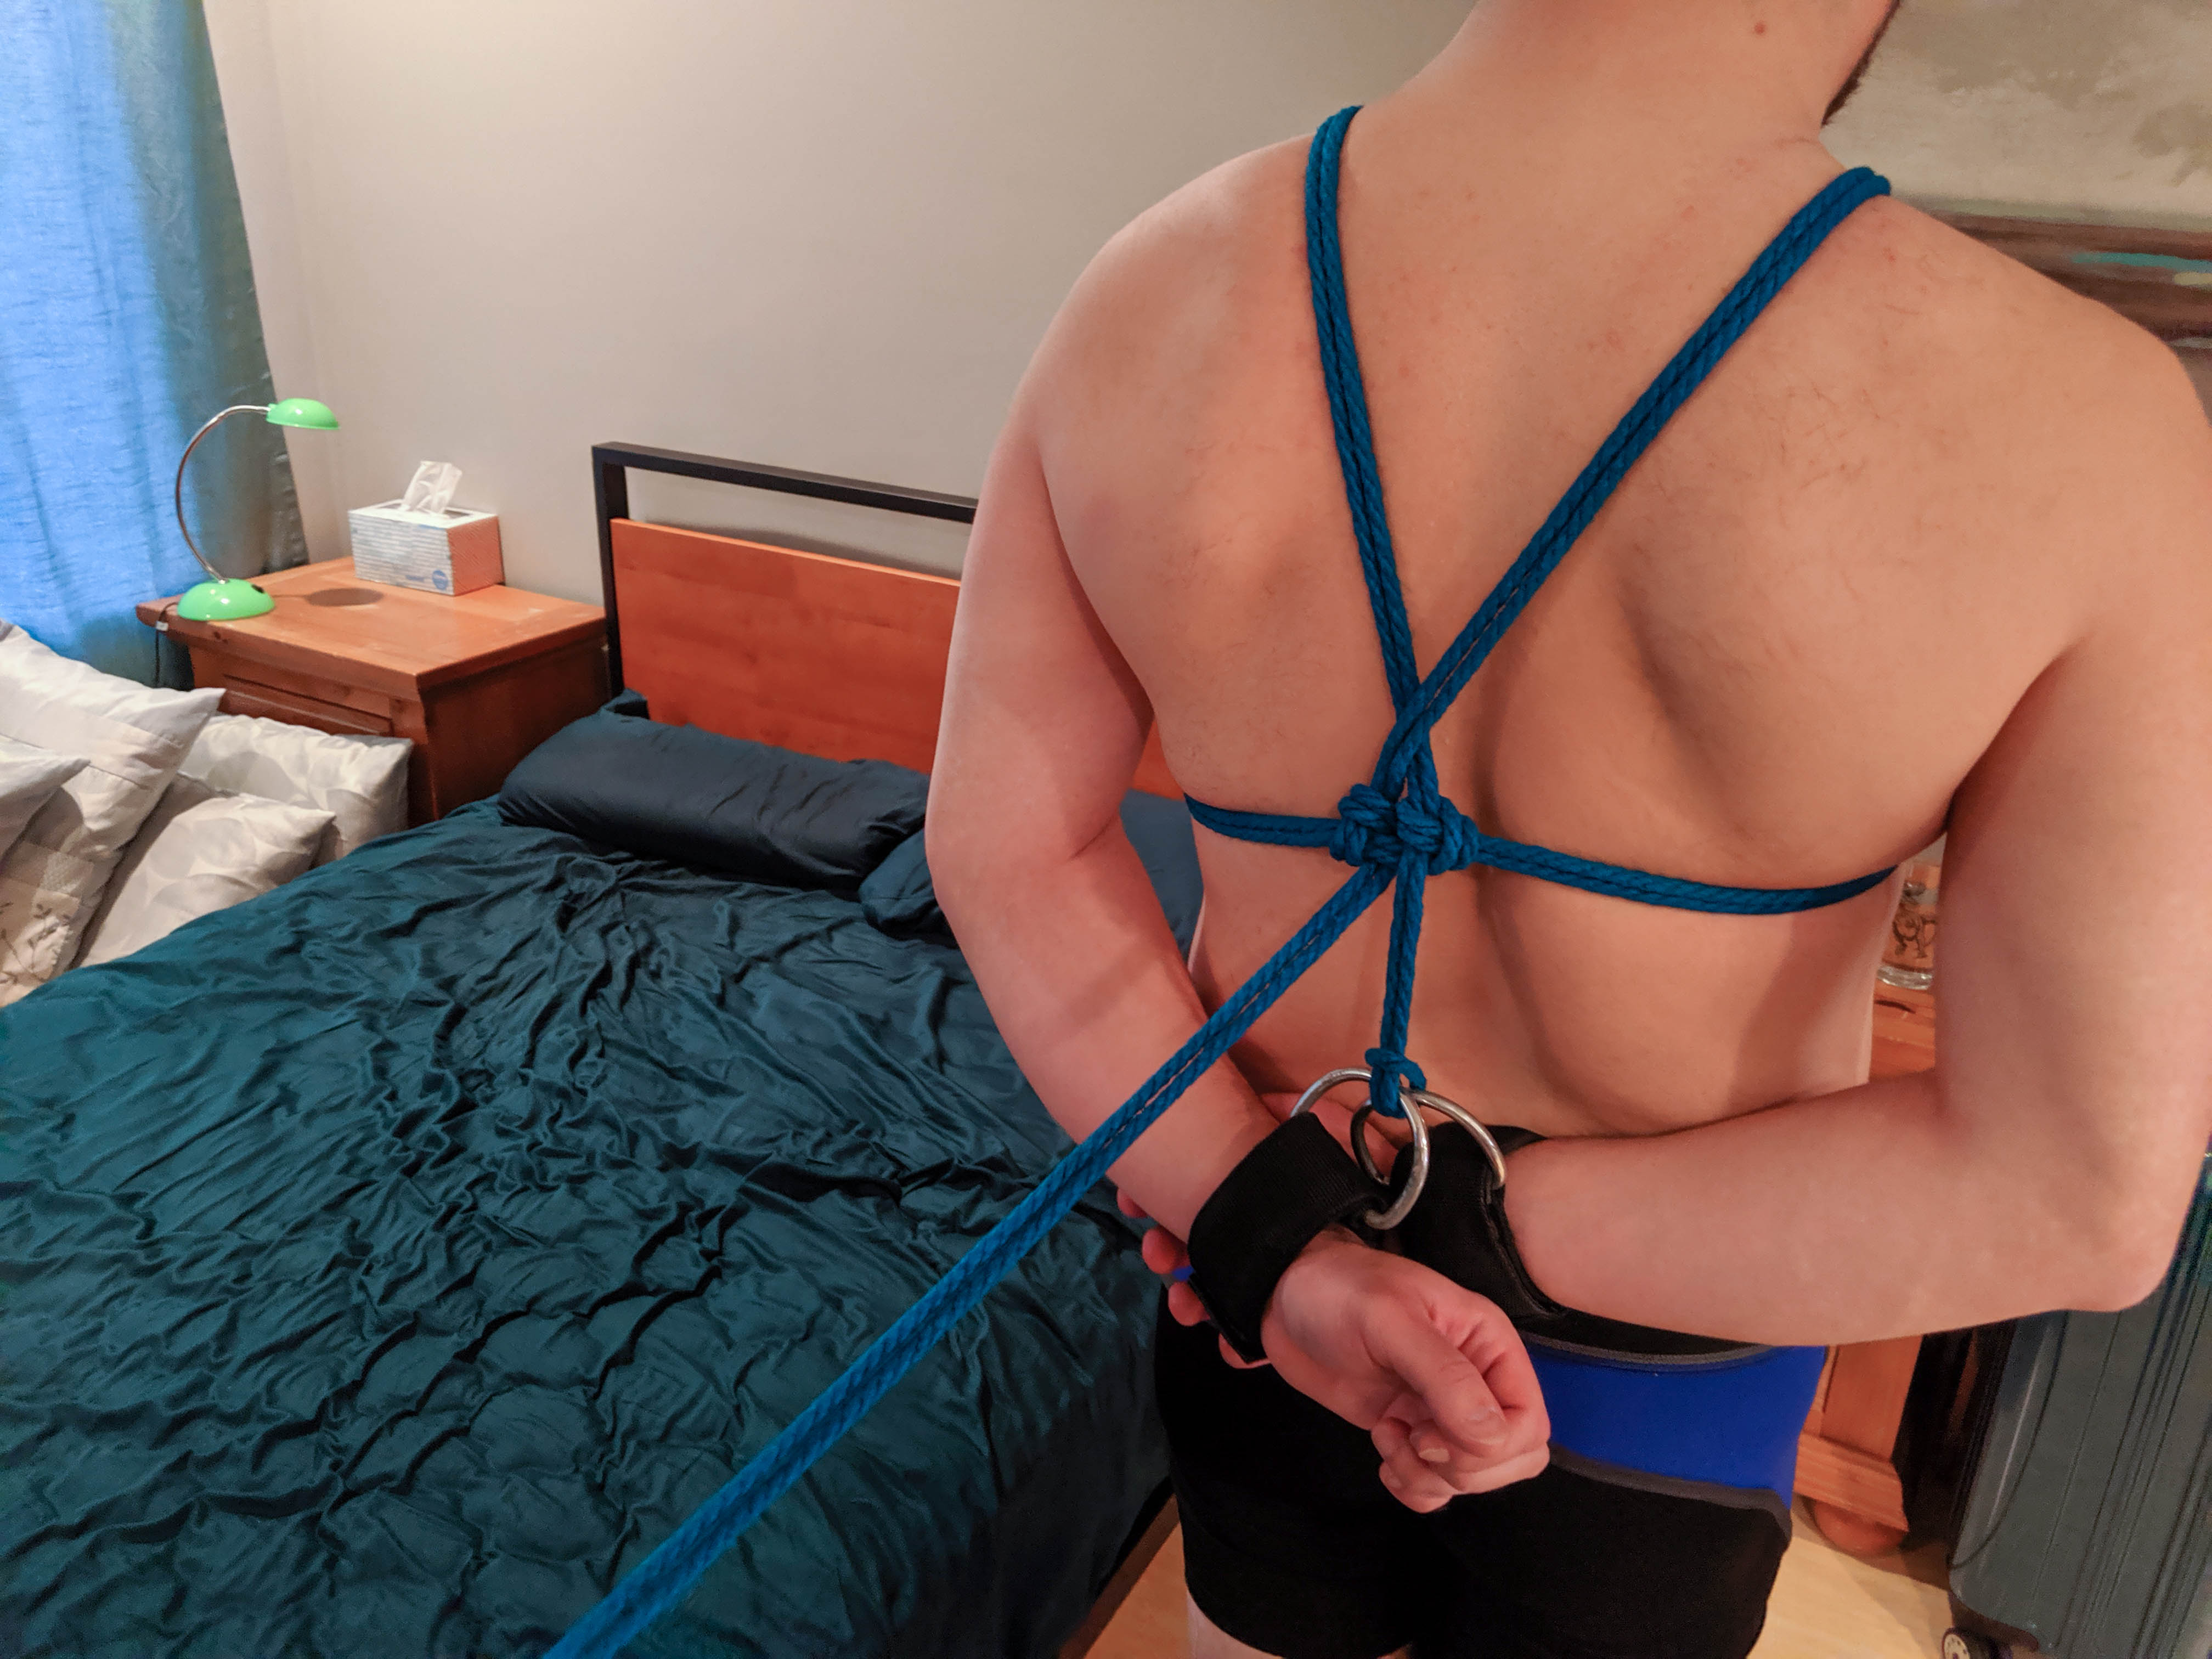
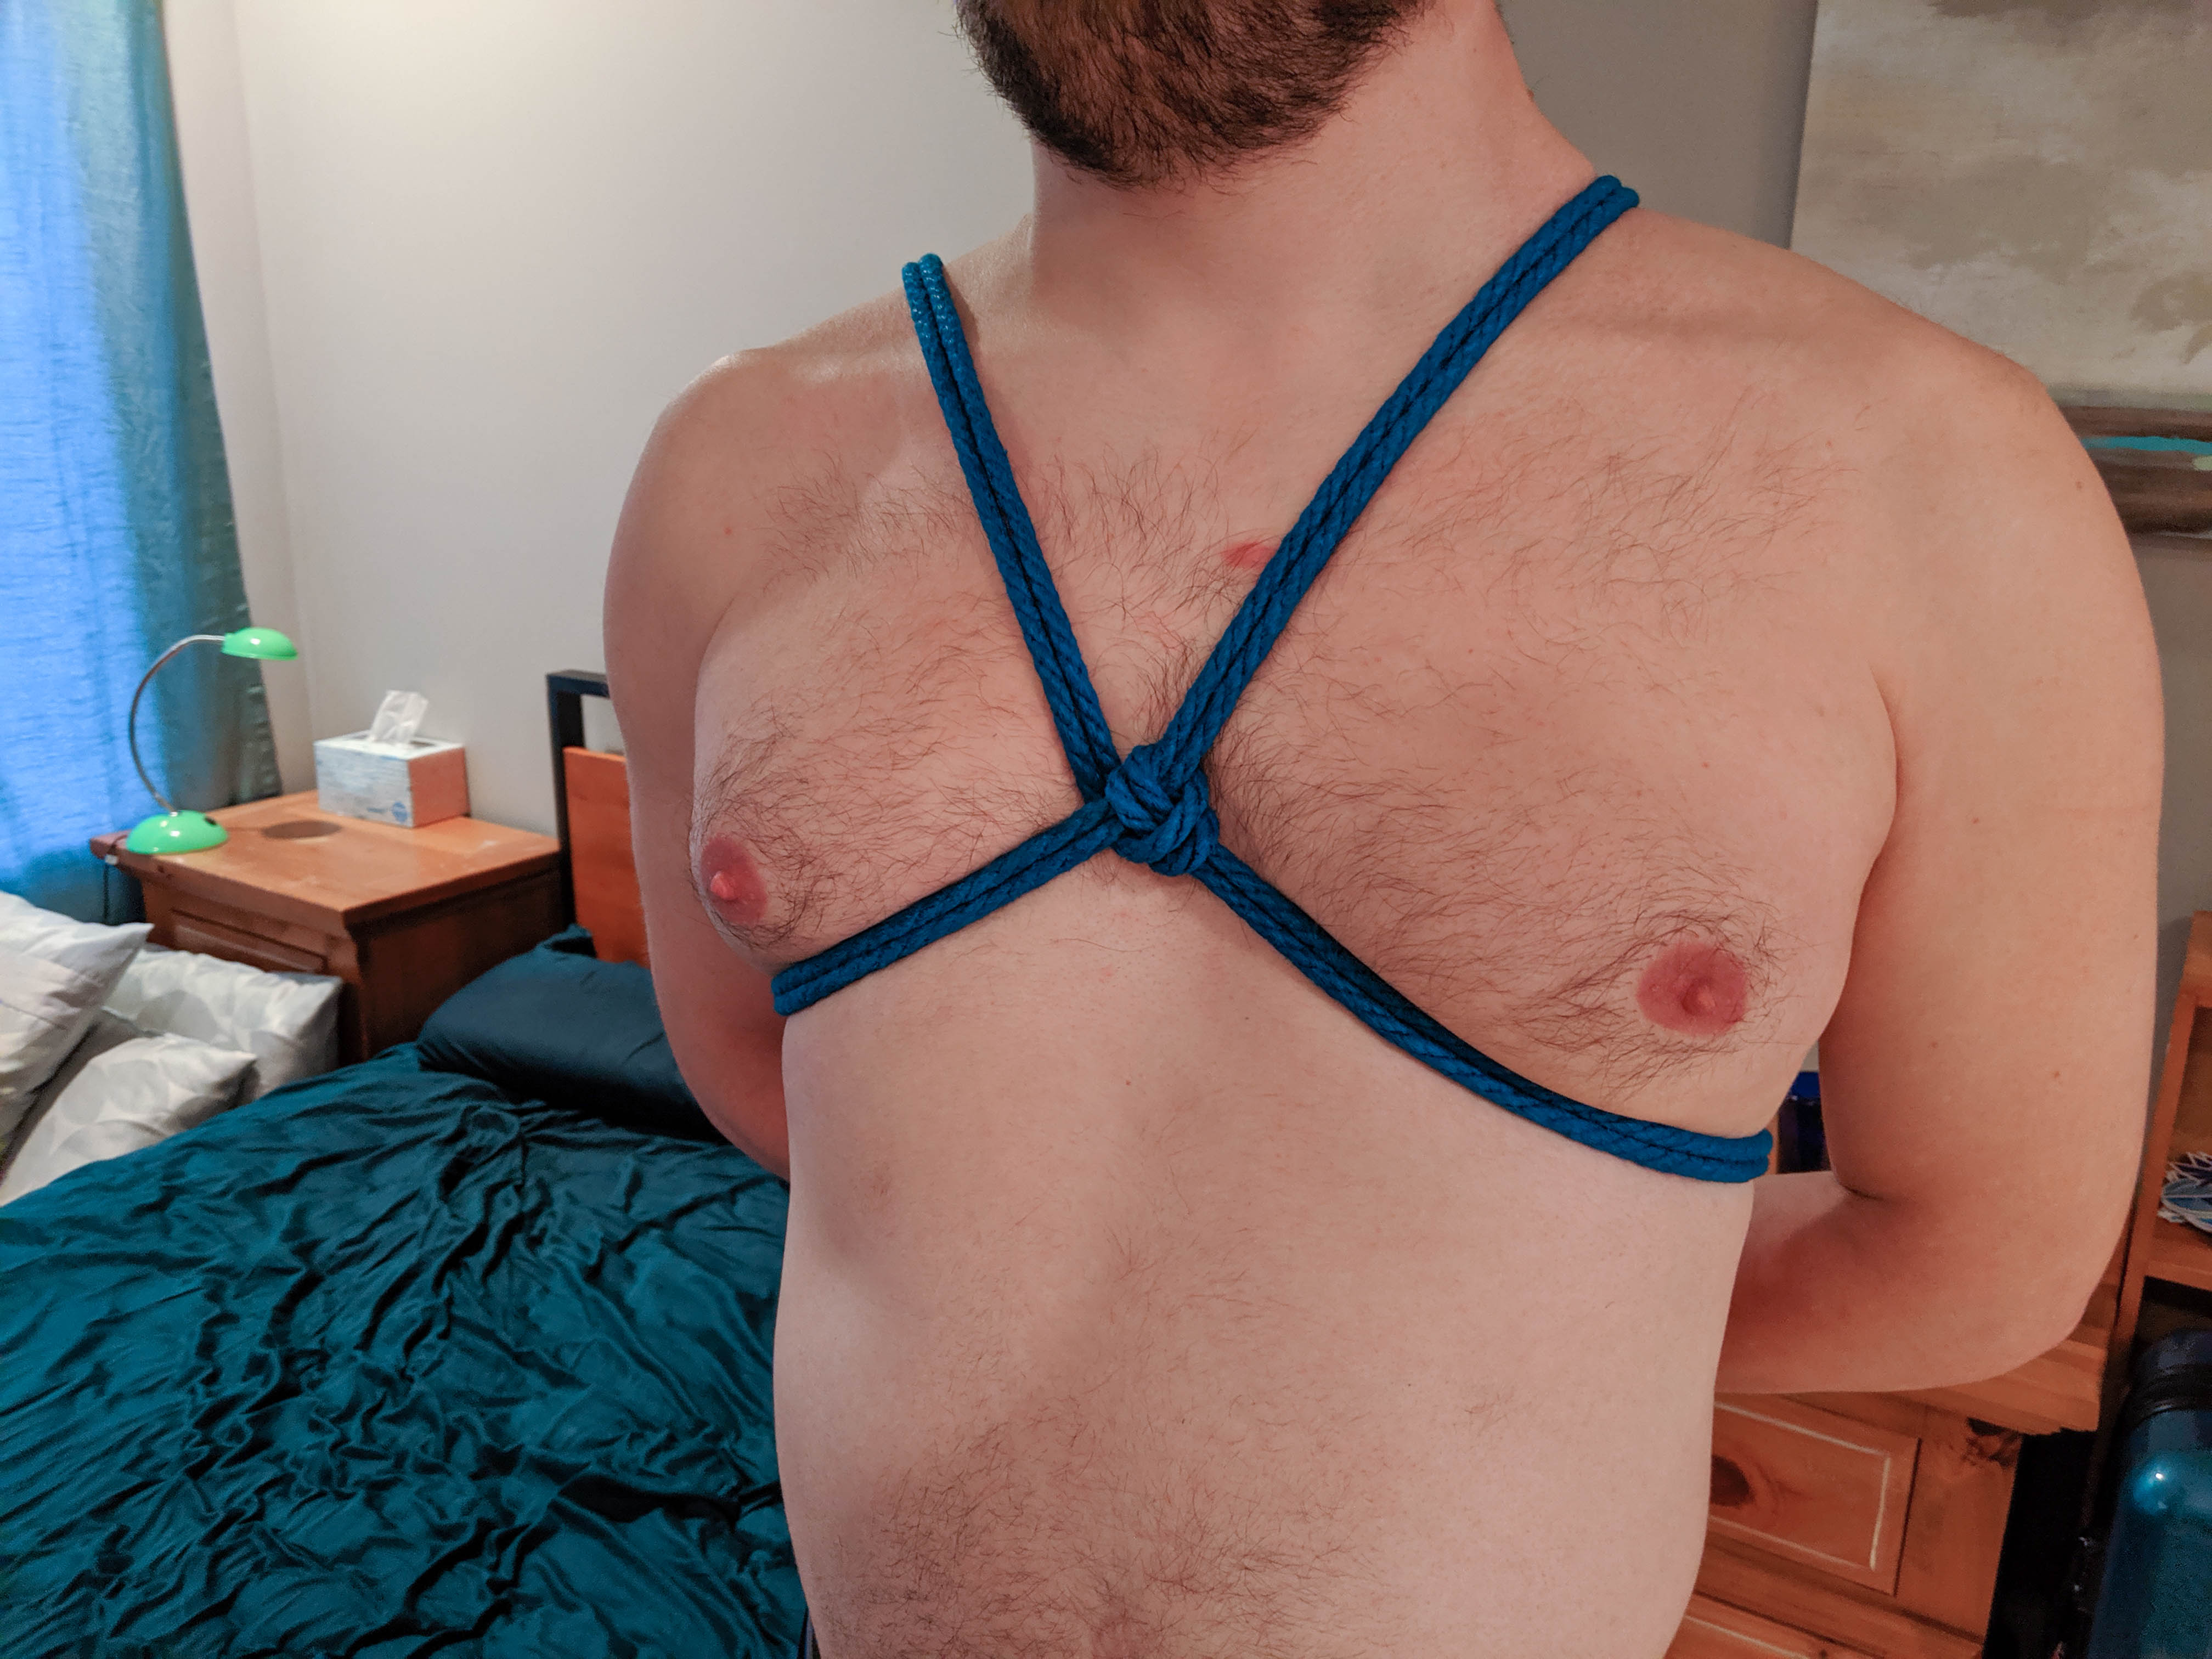
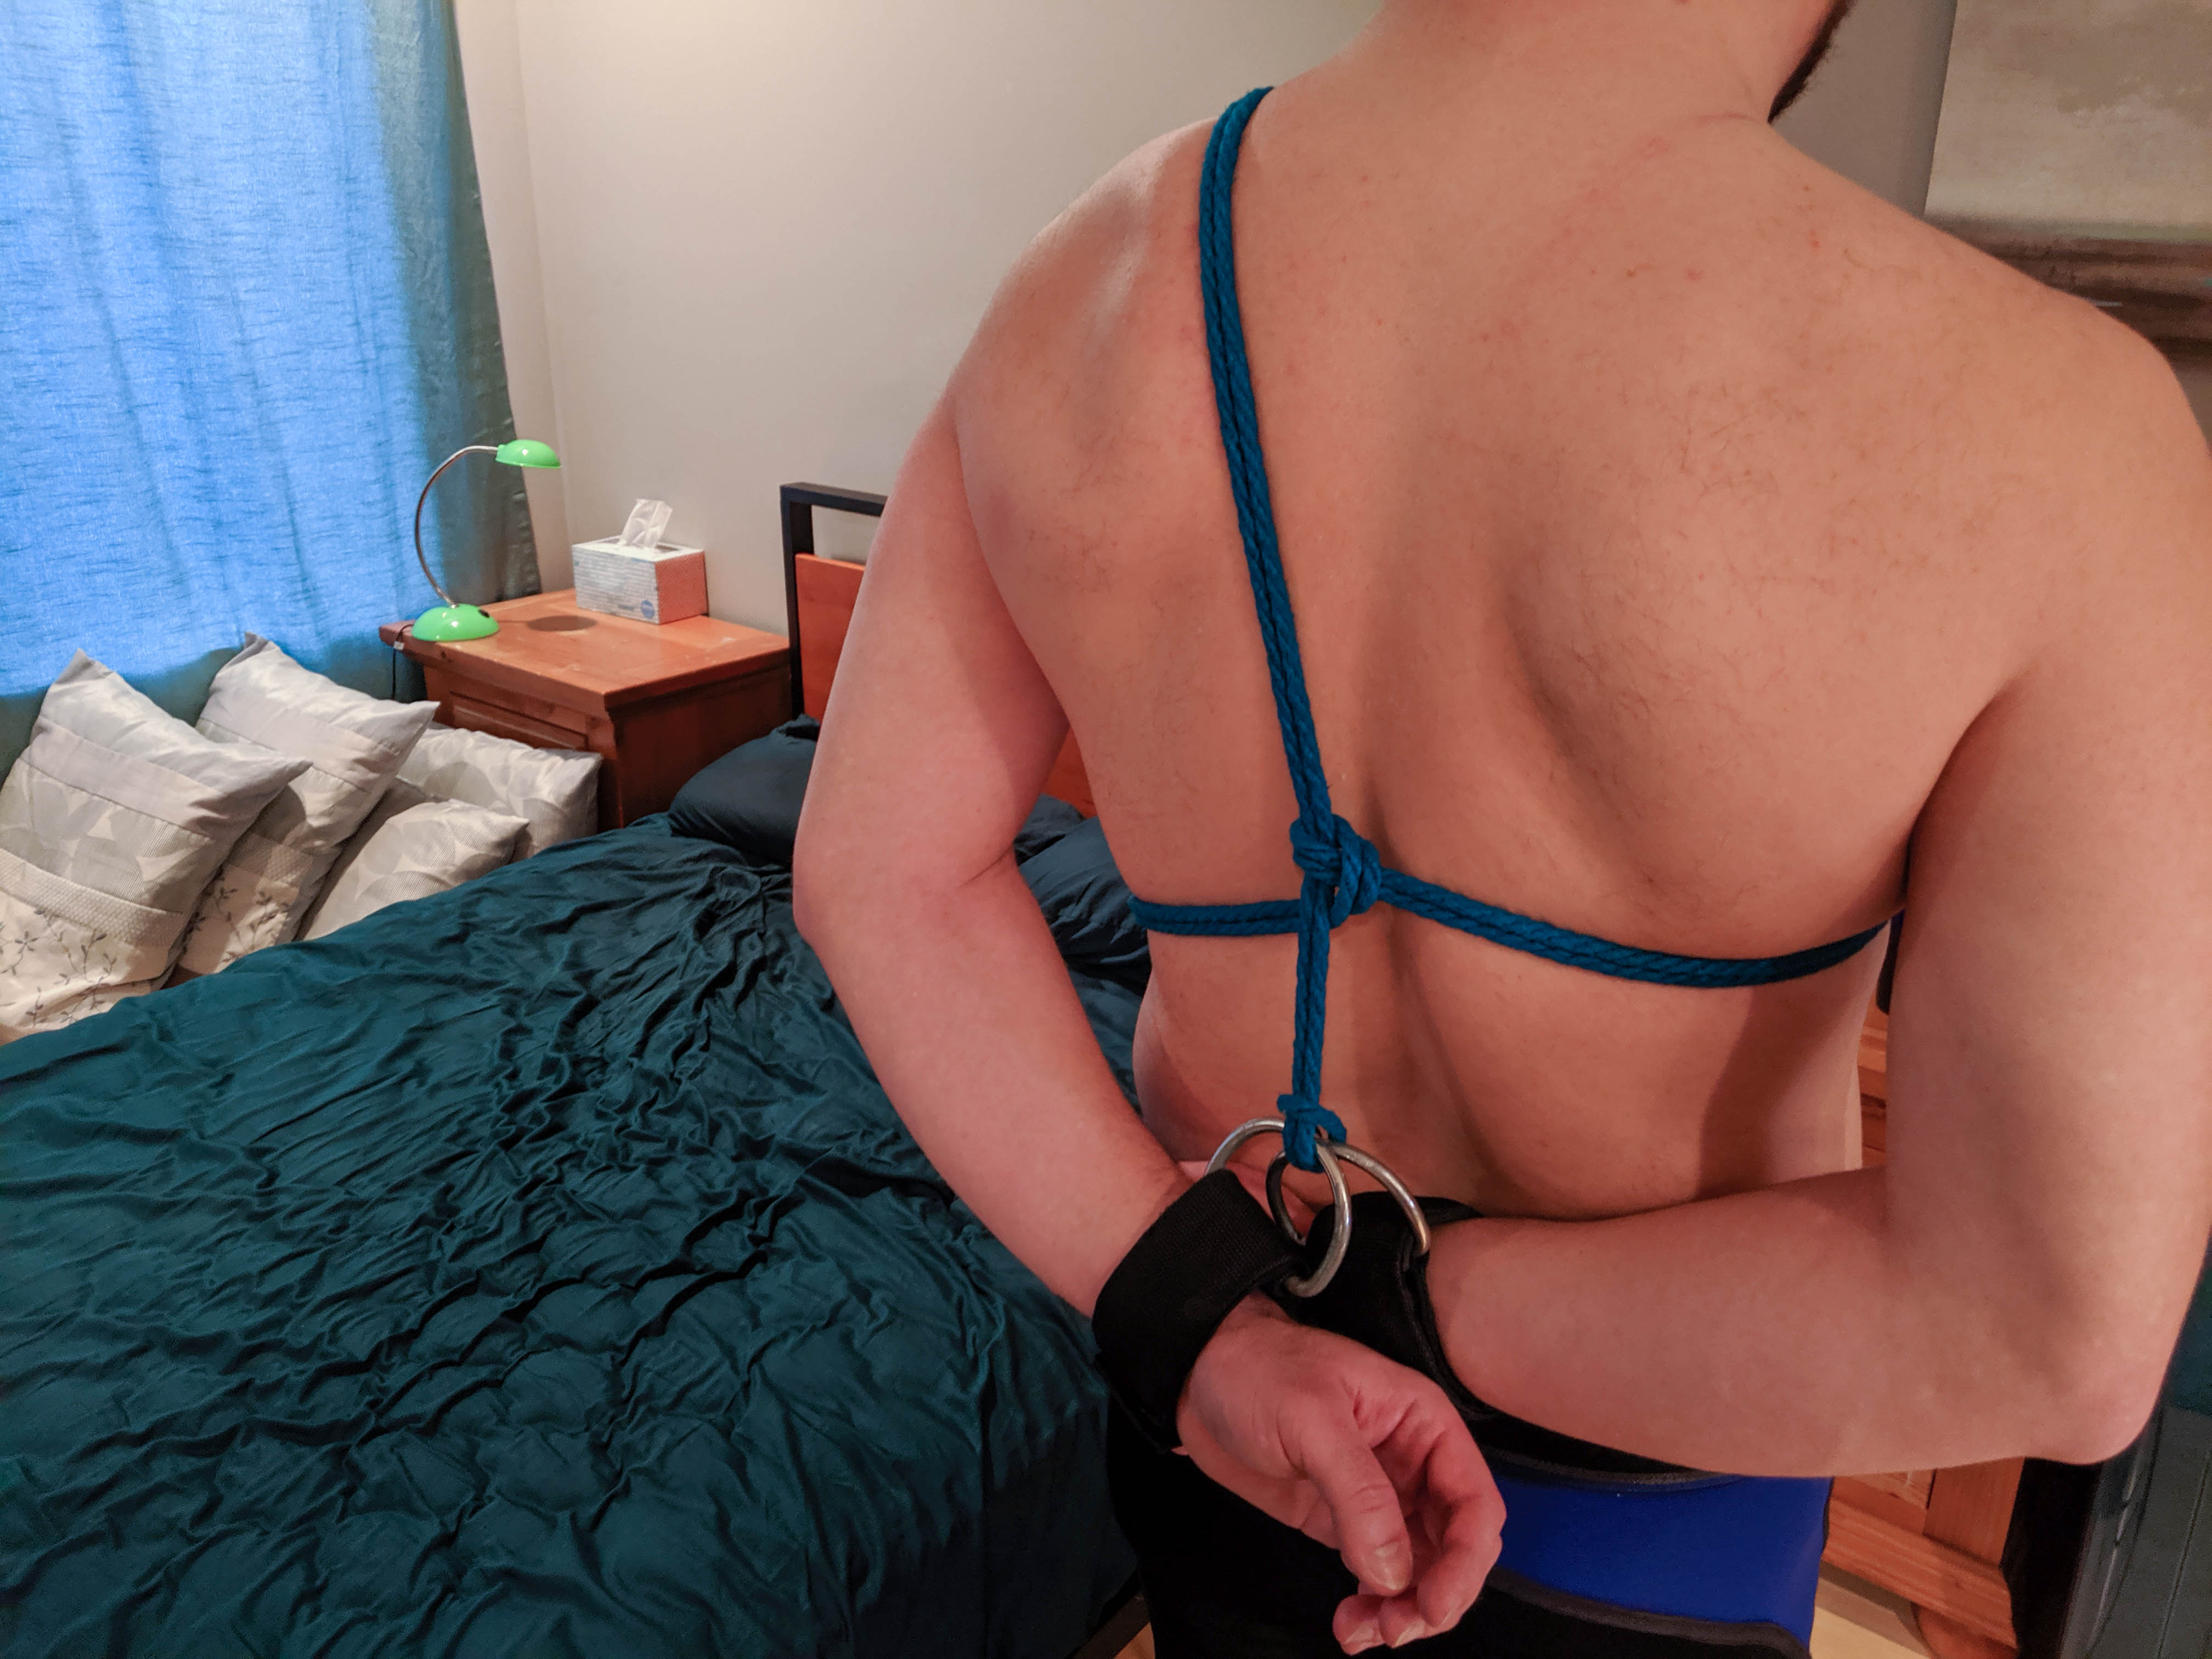
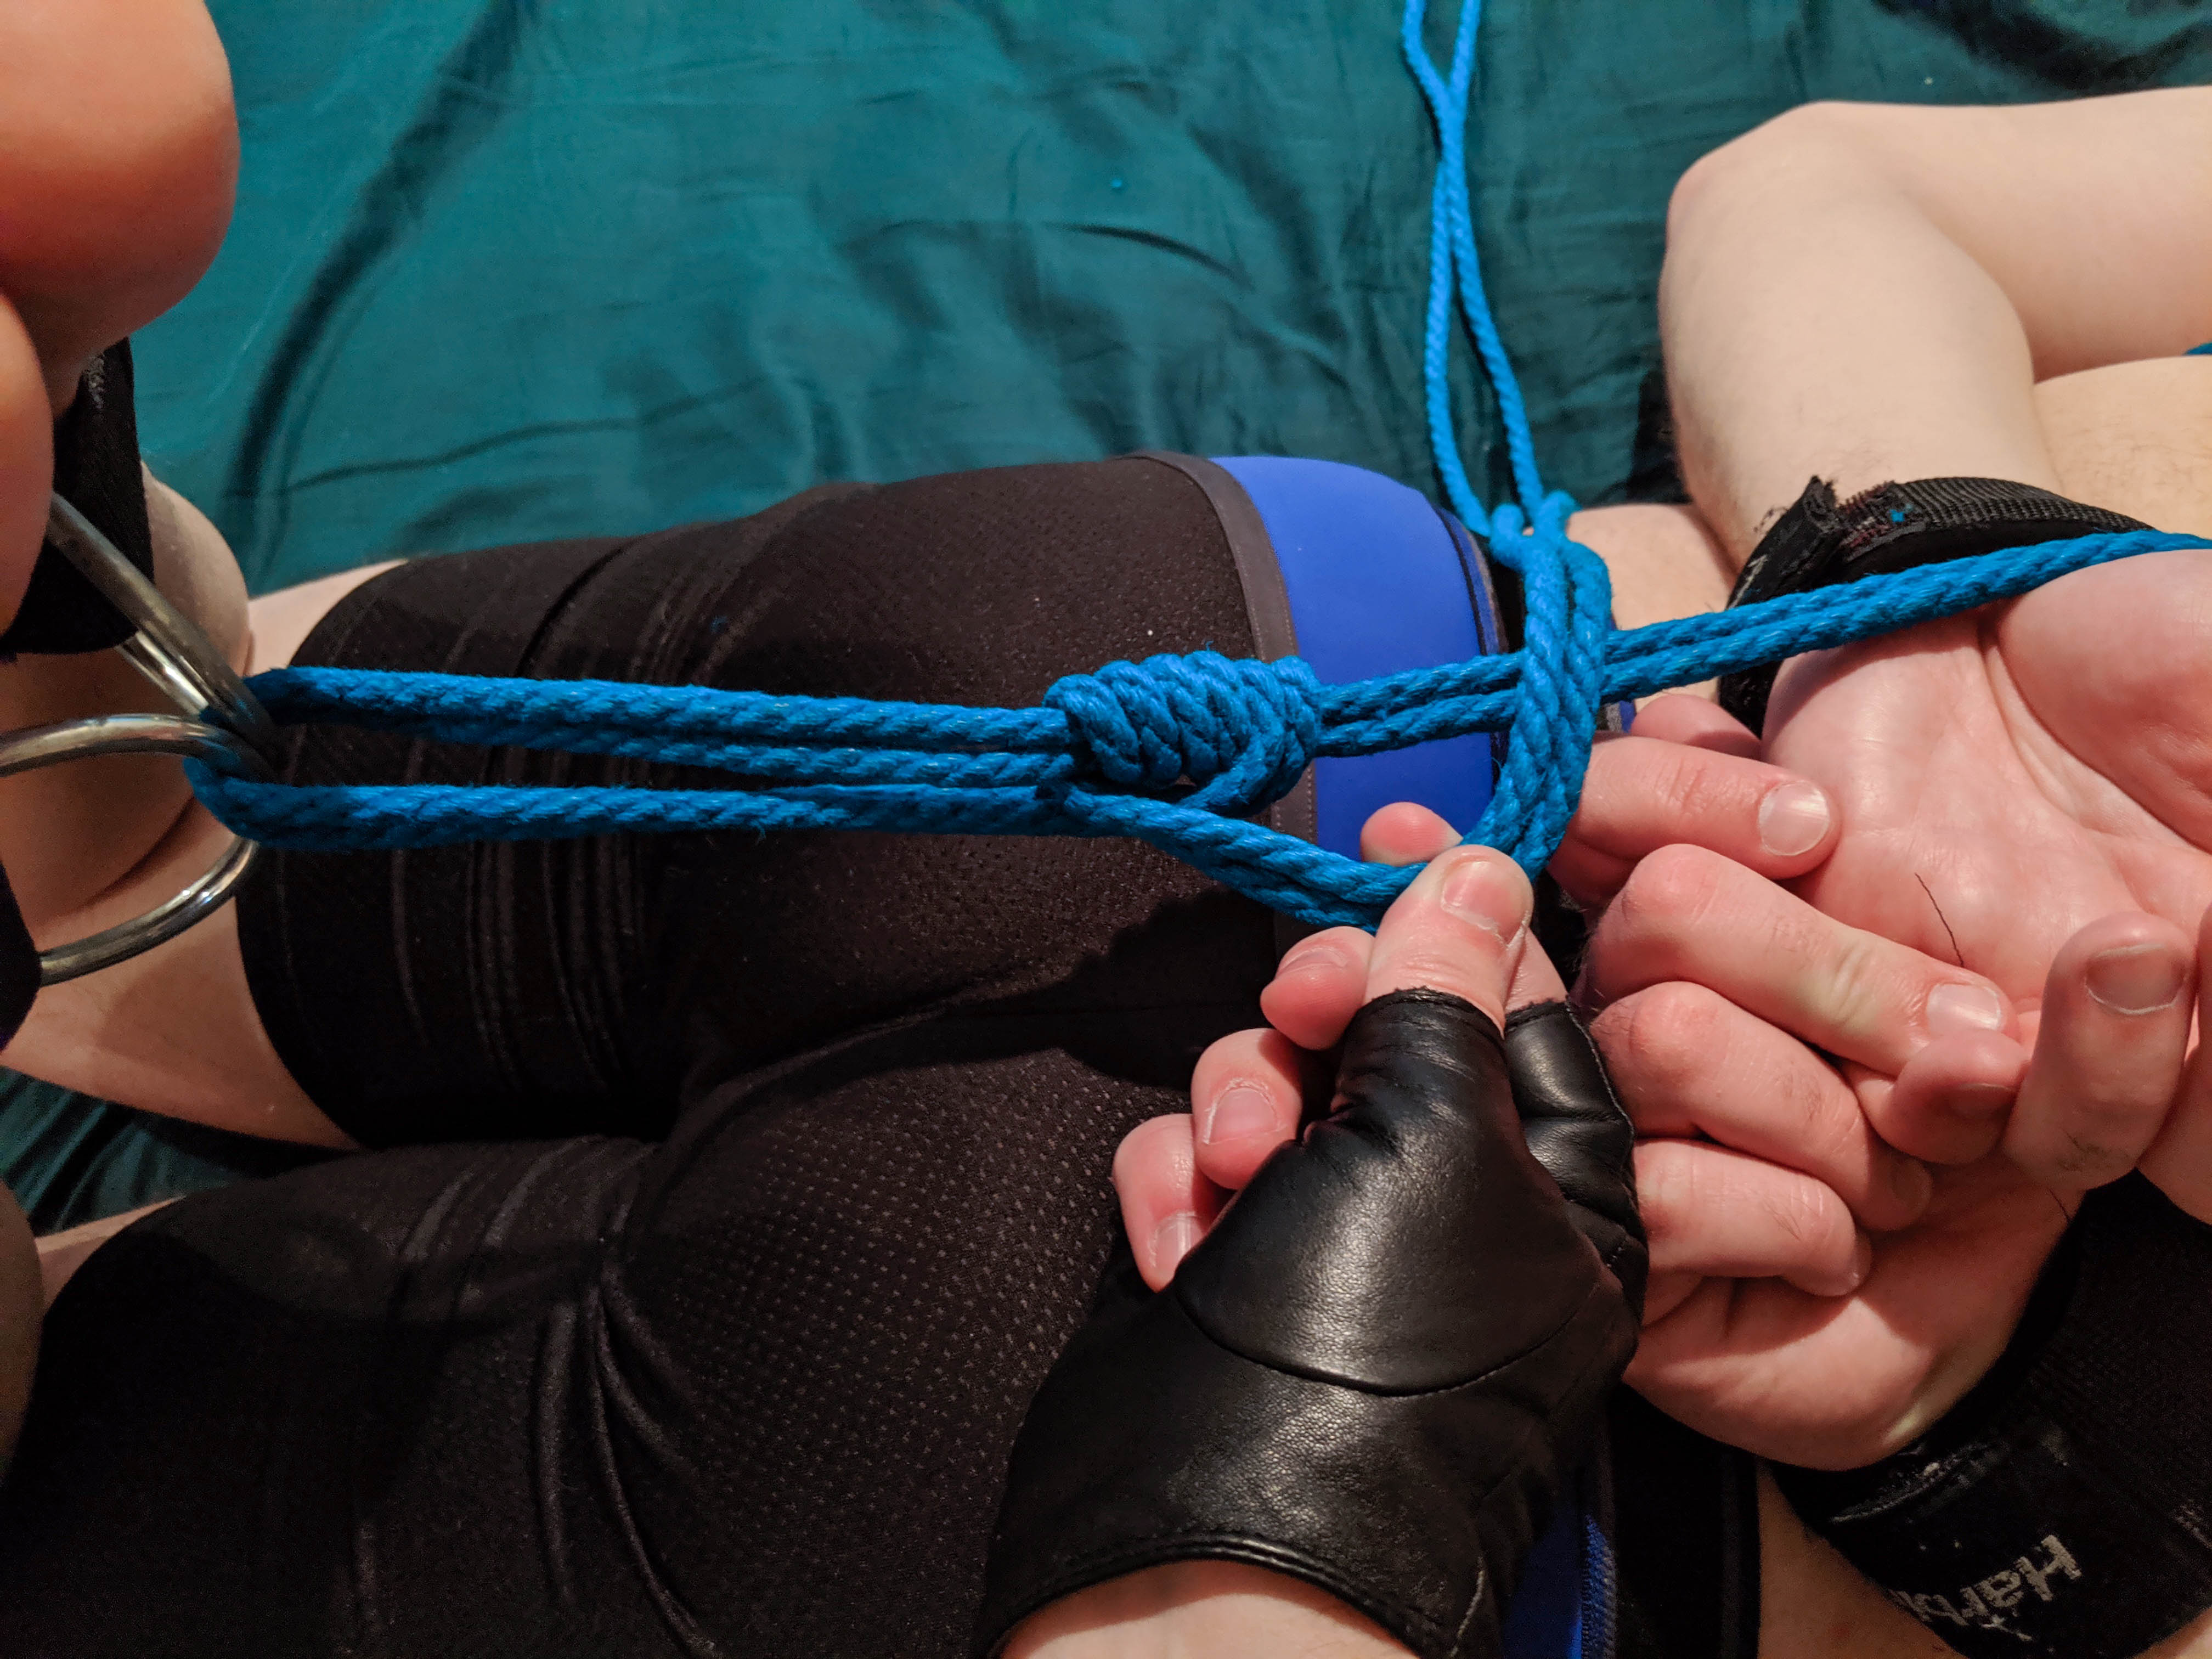
Almost done with the chest harness! The last step is to add a half hitch. This connects the ropes going over the left and right shoulders to distribute pressure and prevent the harness from deforming.
To start the half hitch make a shape that looks like a number 4
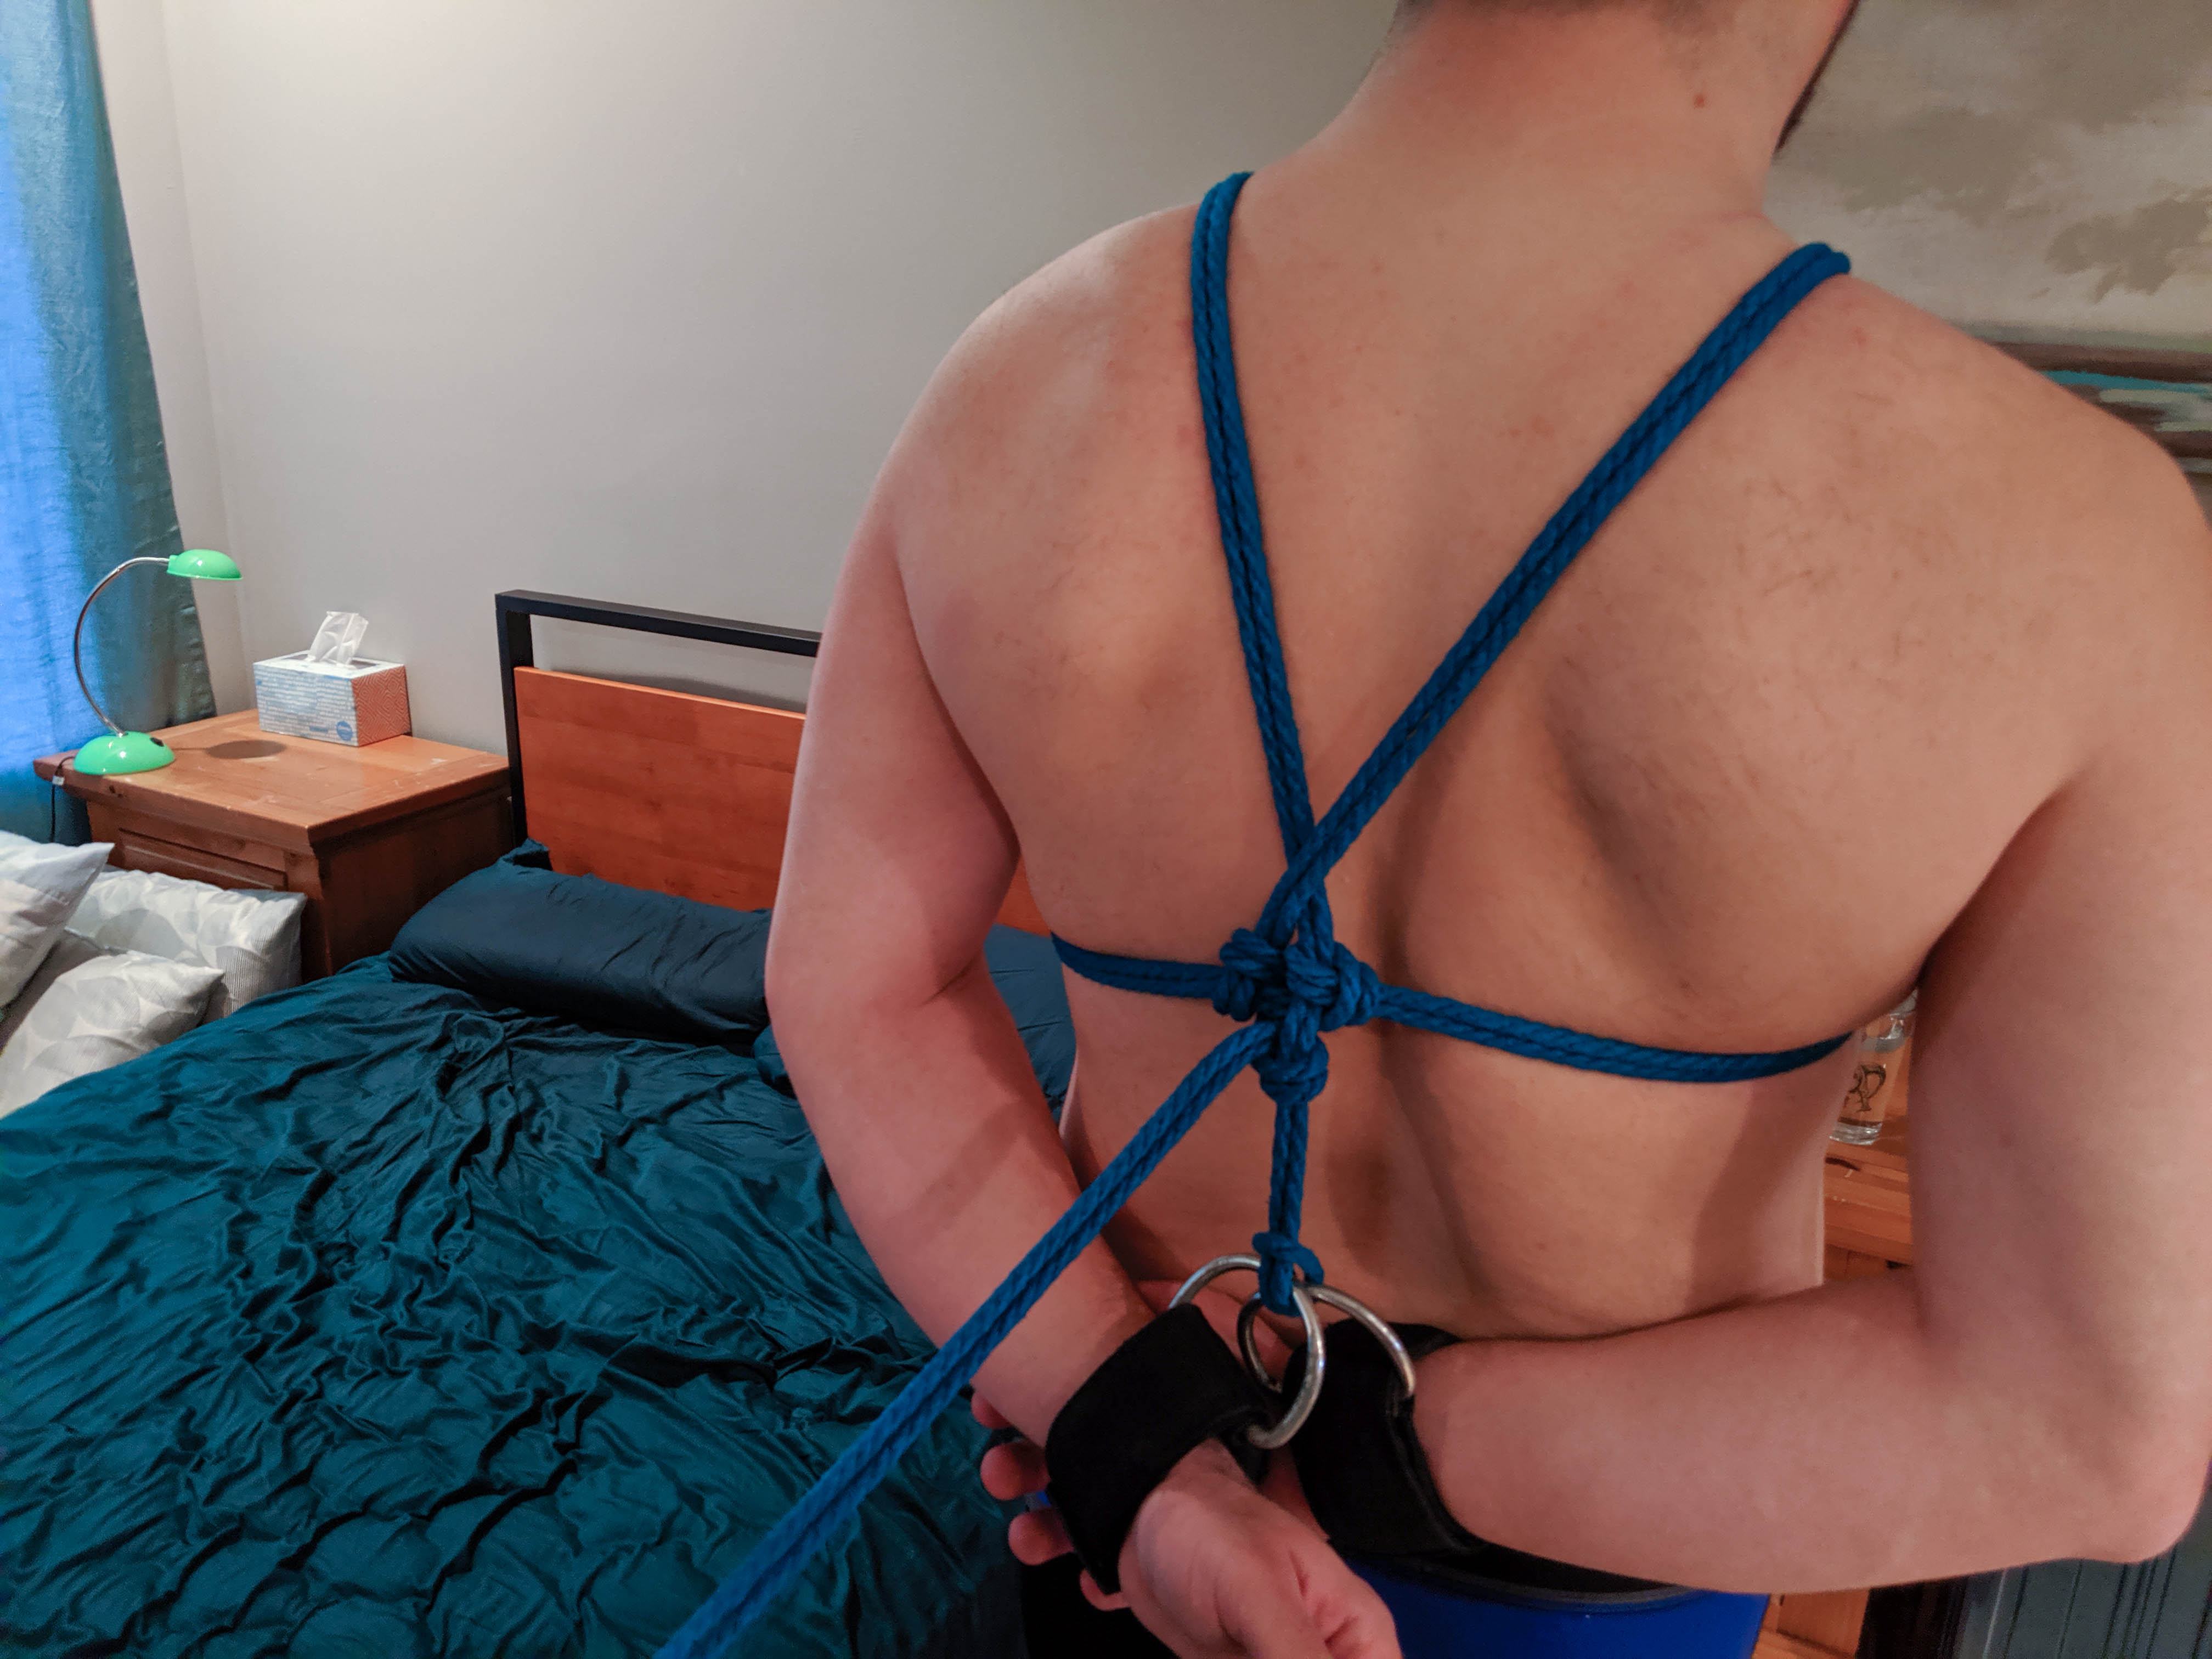
Pull the tail end through that hole so that the final hitch looks like this:

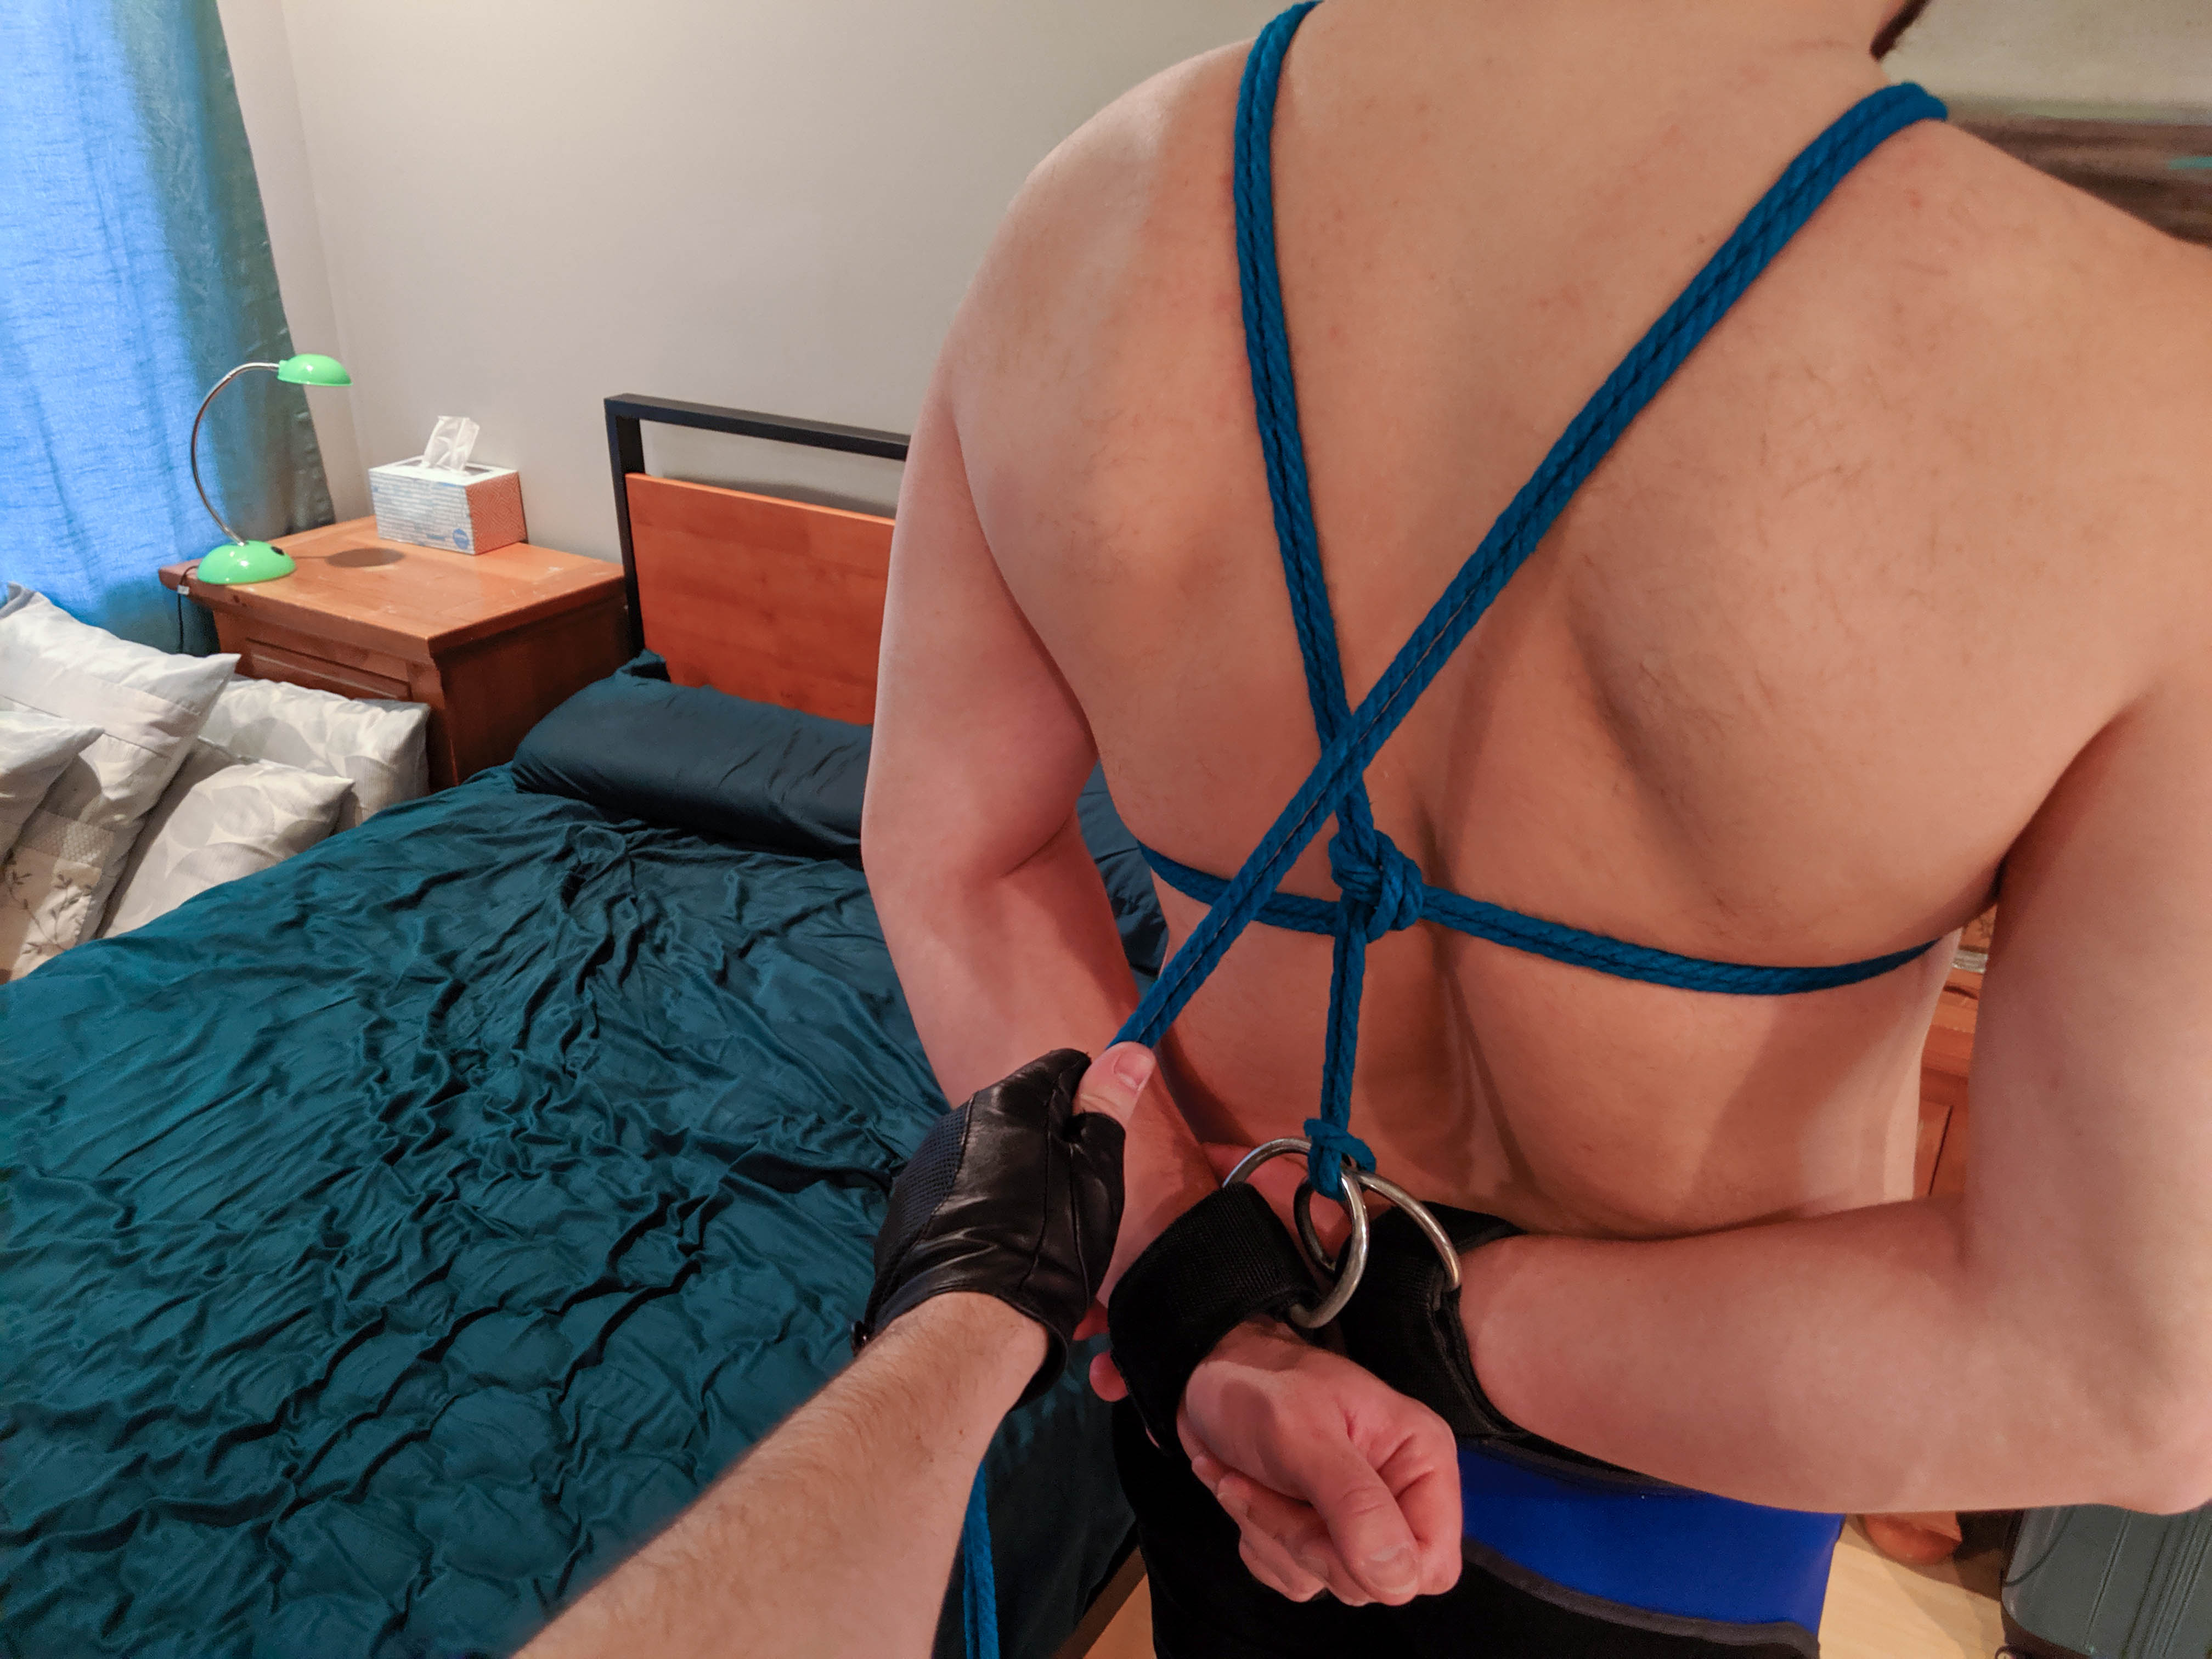
This is the complete chest harness! This is a great place to goof off and have some fun since the arms are firmly attached. Next step is to add the legs.
Guide your partner to the bed. This can be awkward with their arms tied behind their back, but it helps to have them start by sitting on the edge of the bed.
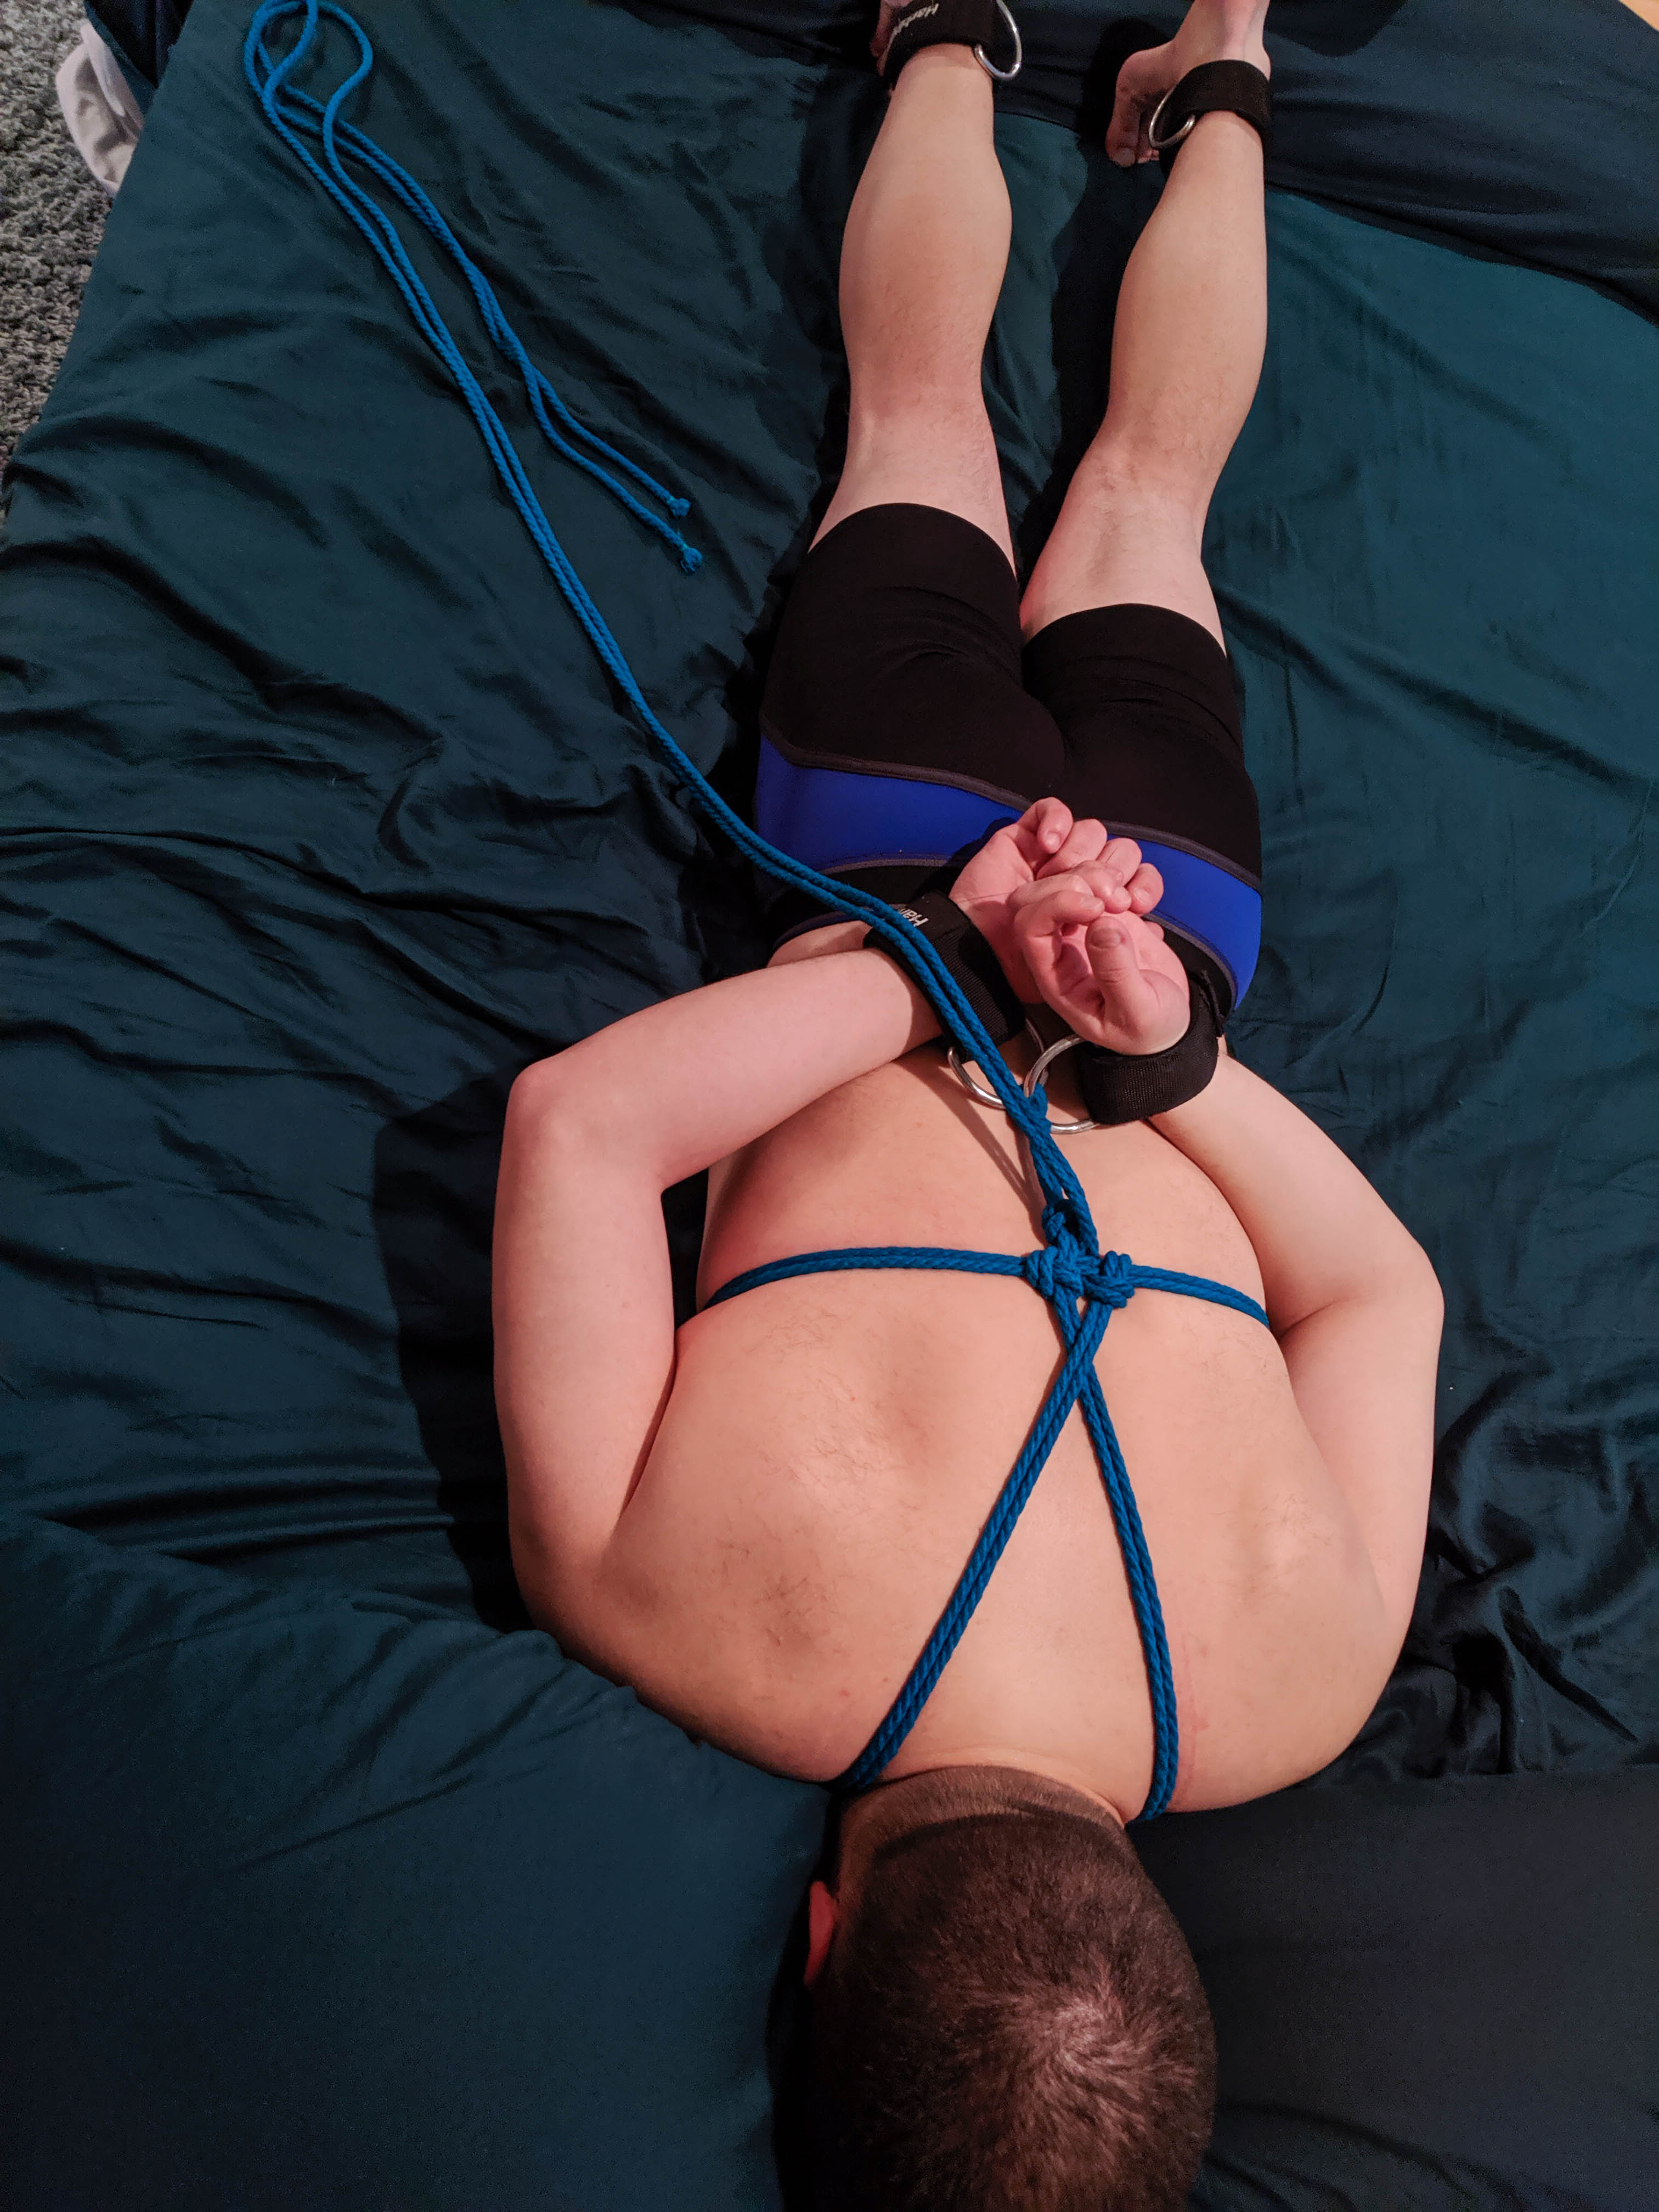
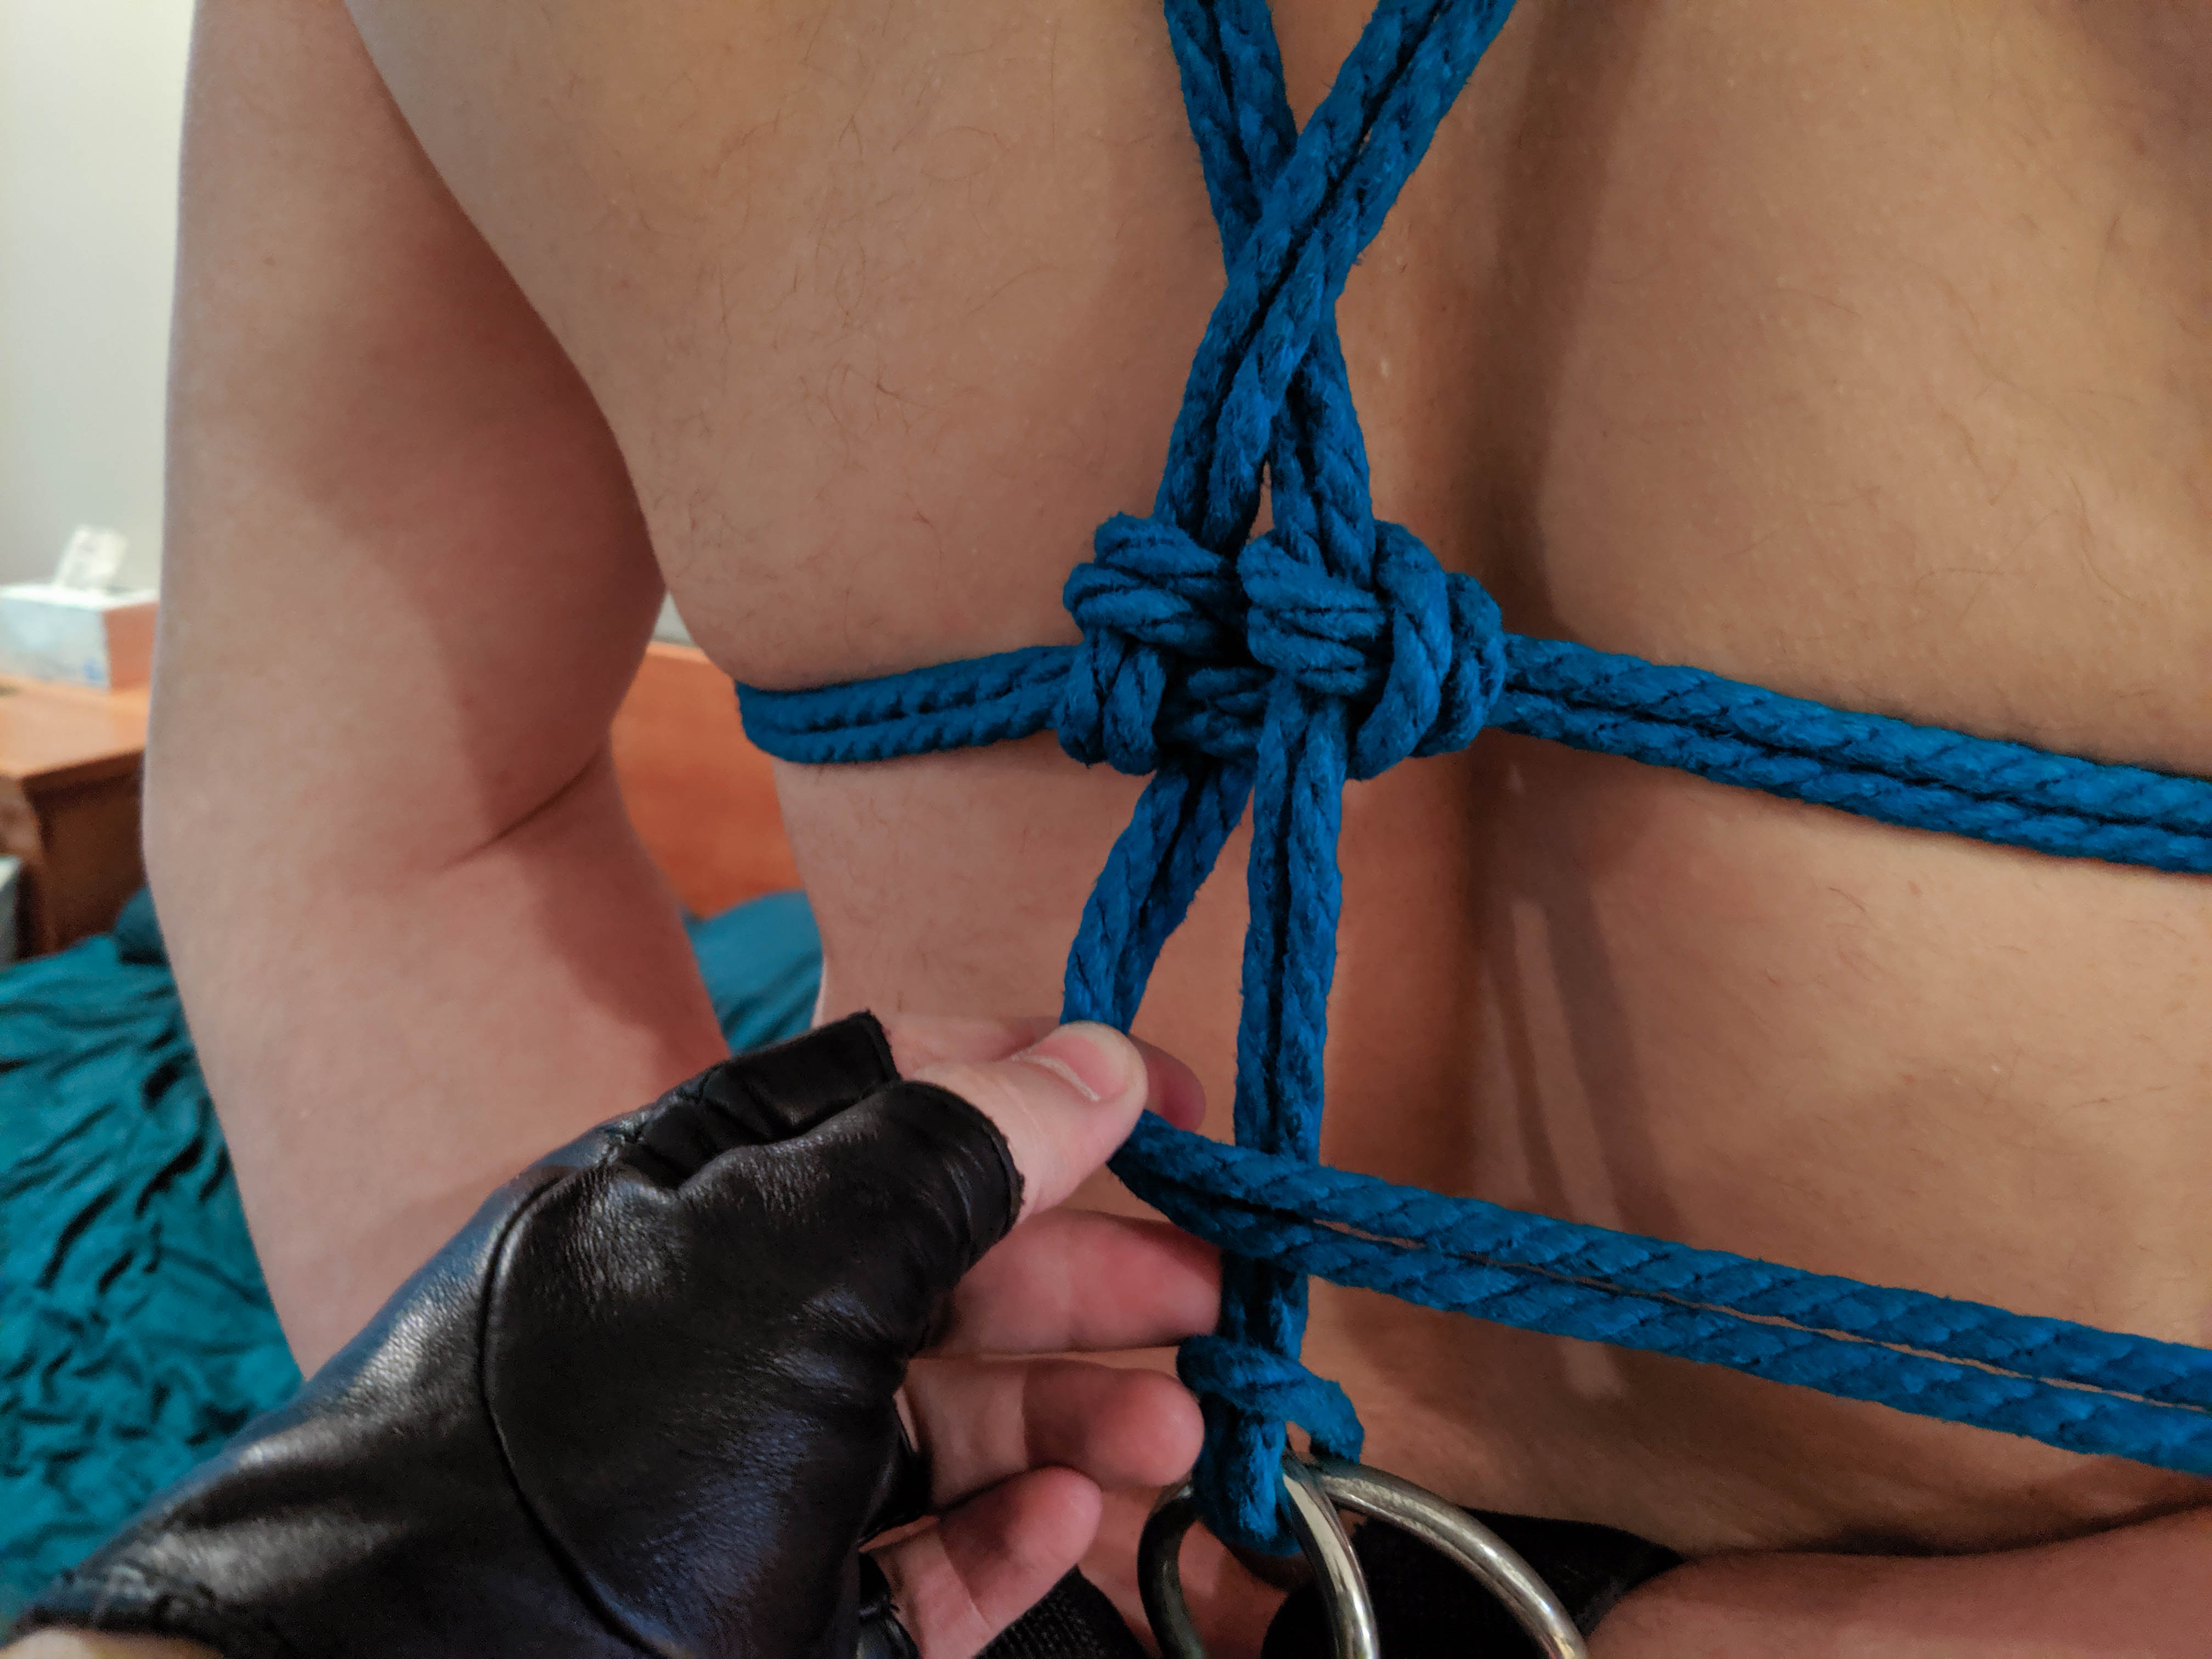
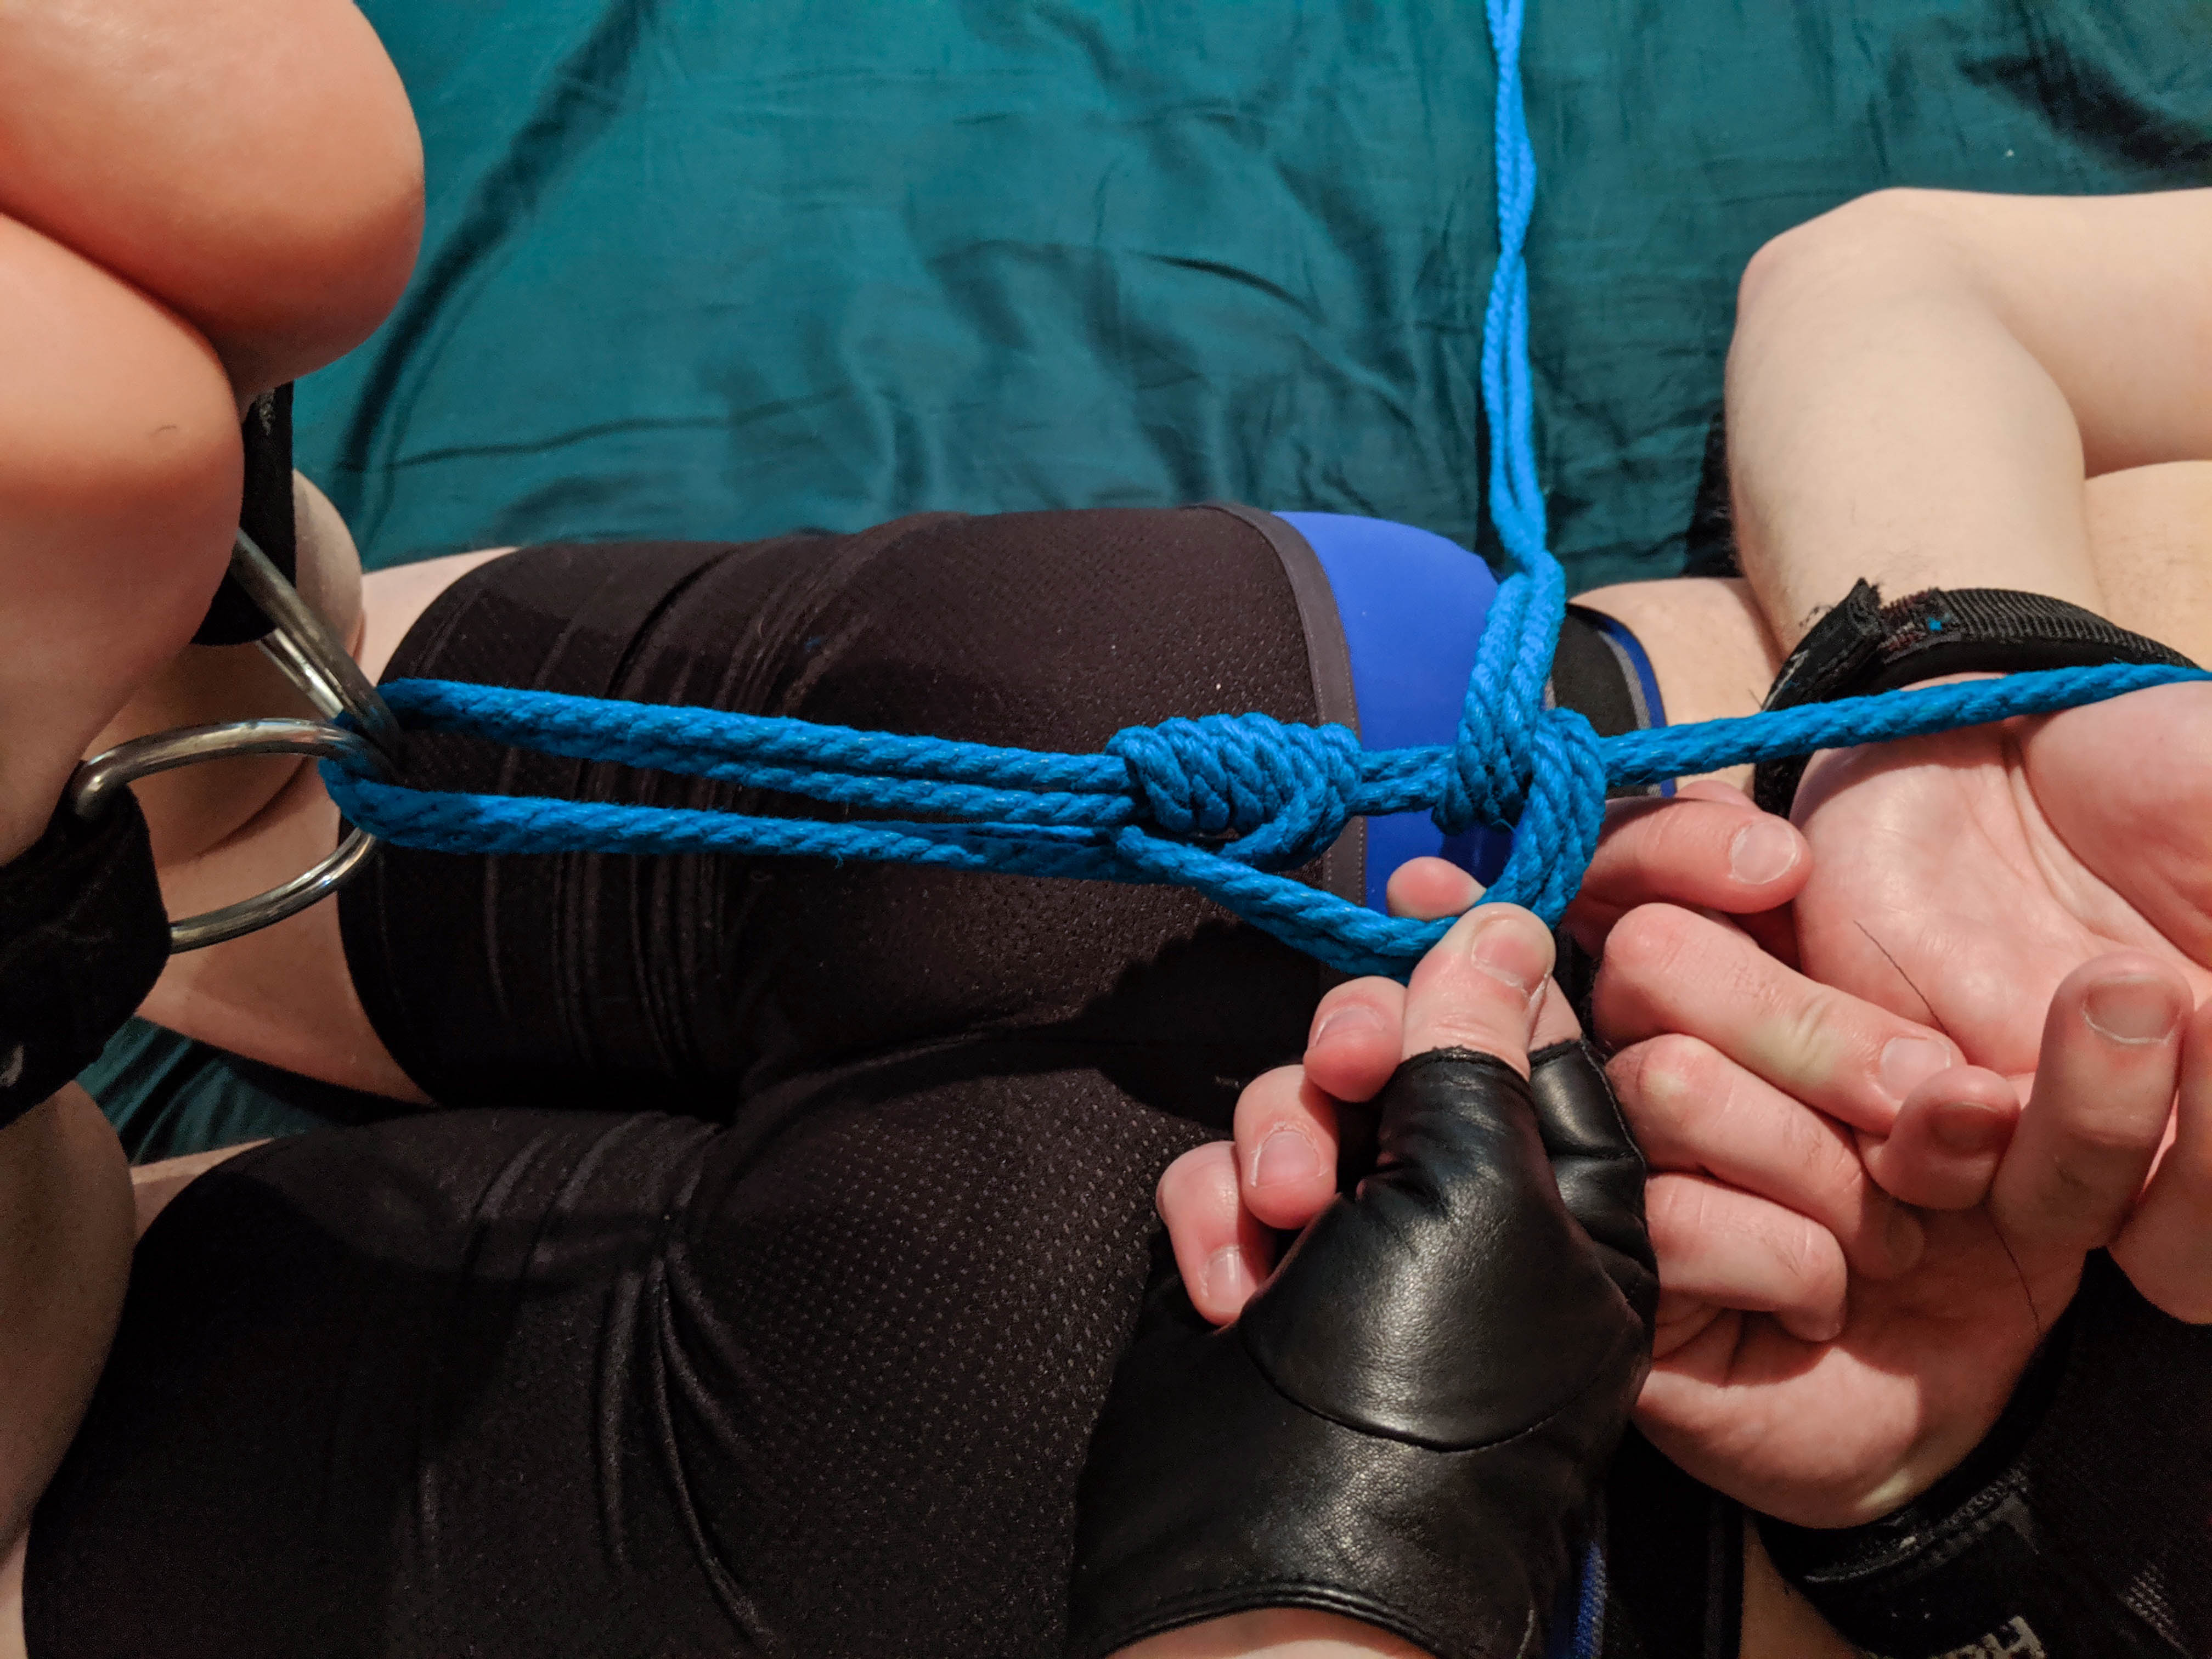
Pull the tail end through the two rings in the ankle cuffs.
Gently pull the legs up and find where there's resistance. Also, talk to your partner! Ask how it feels and how tight they like it.
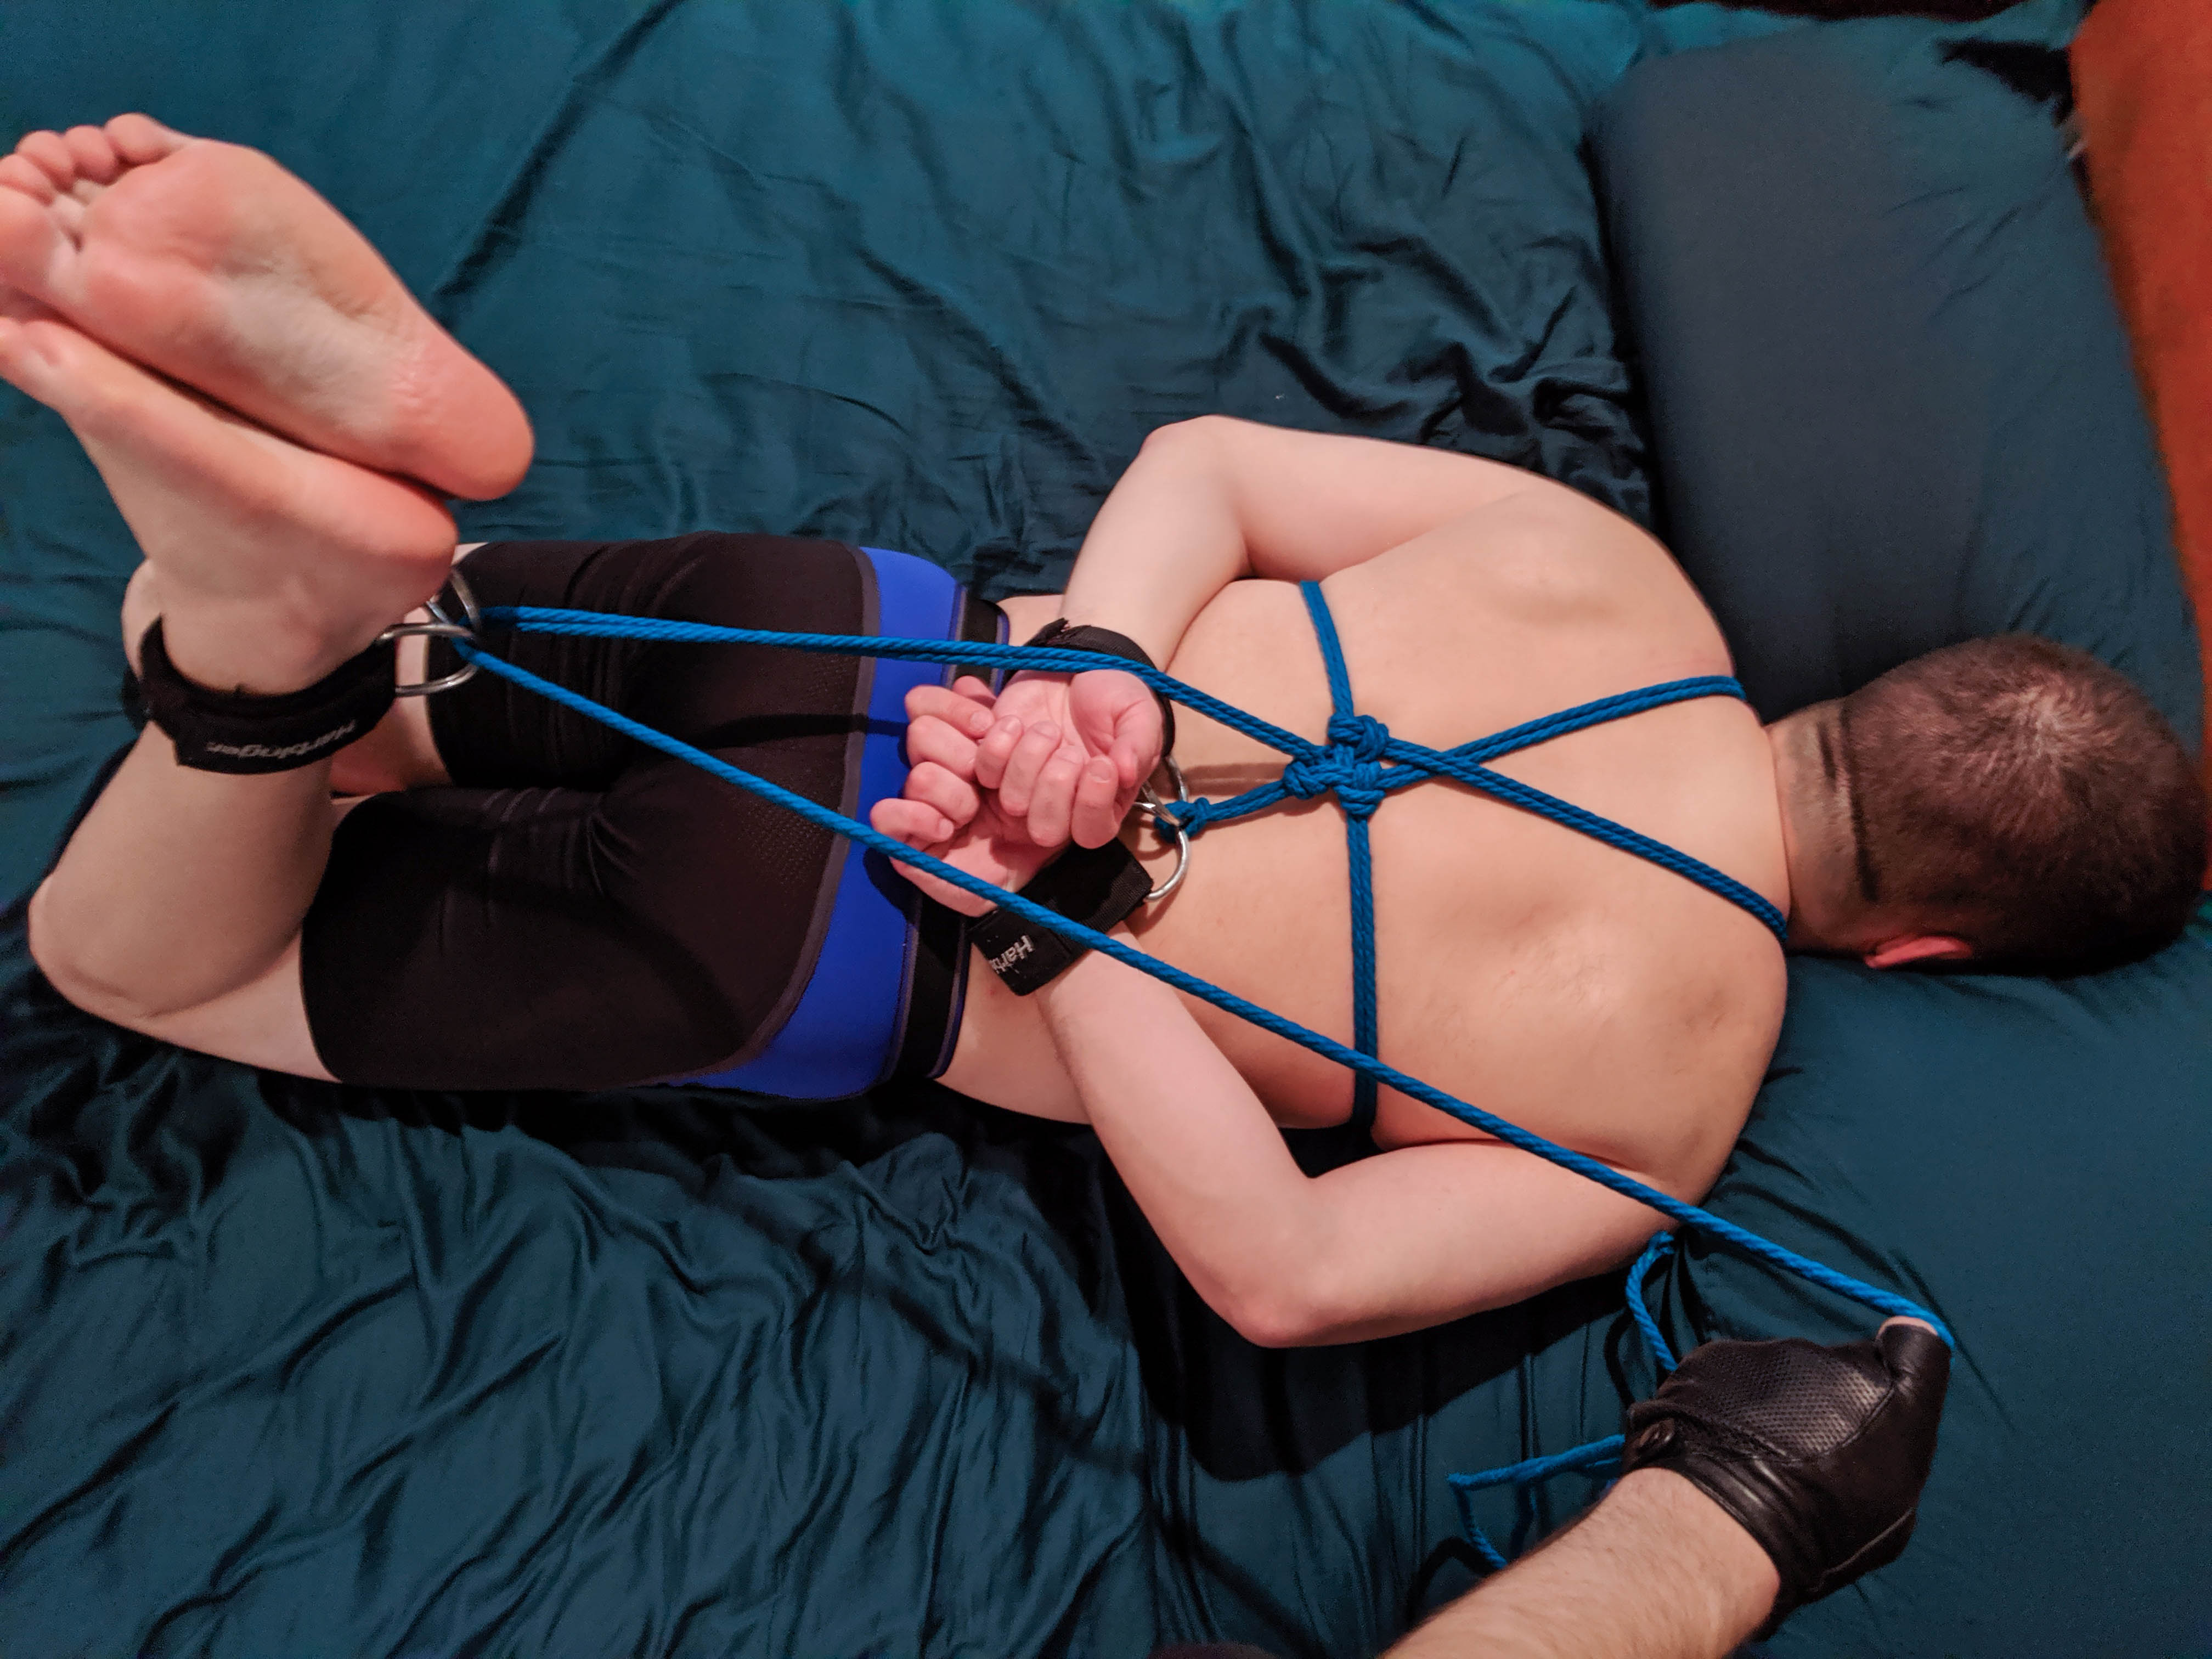
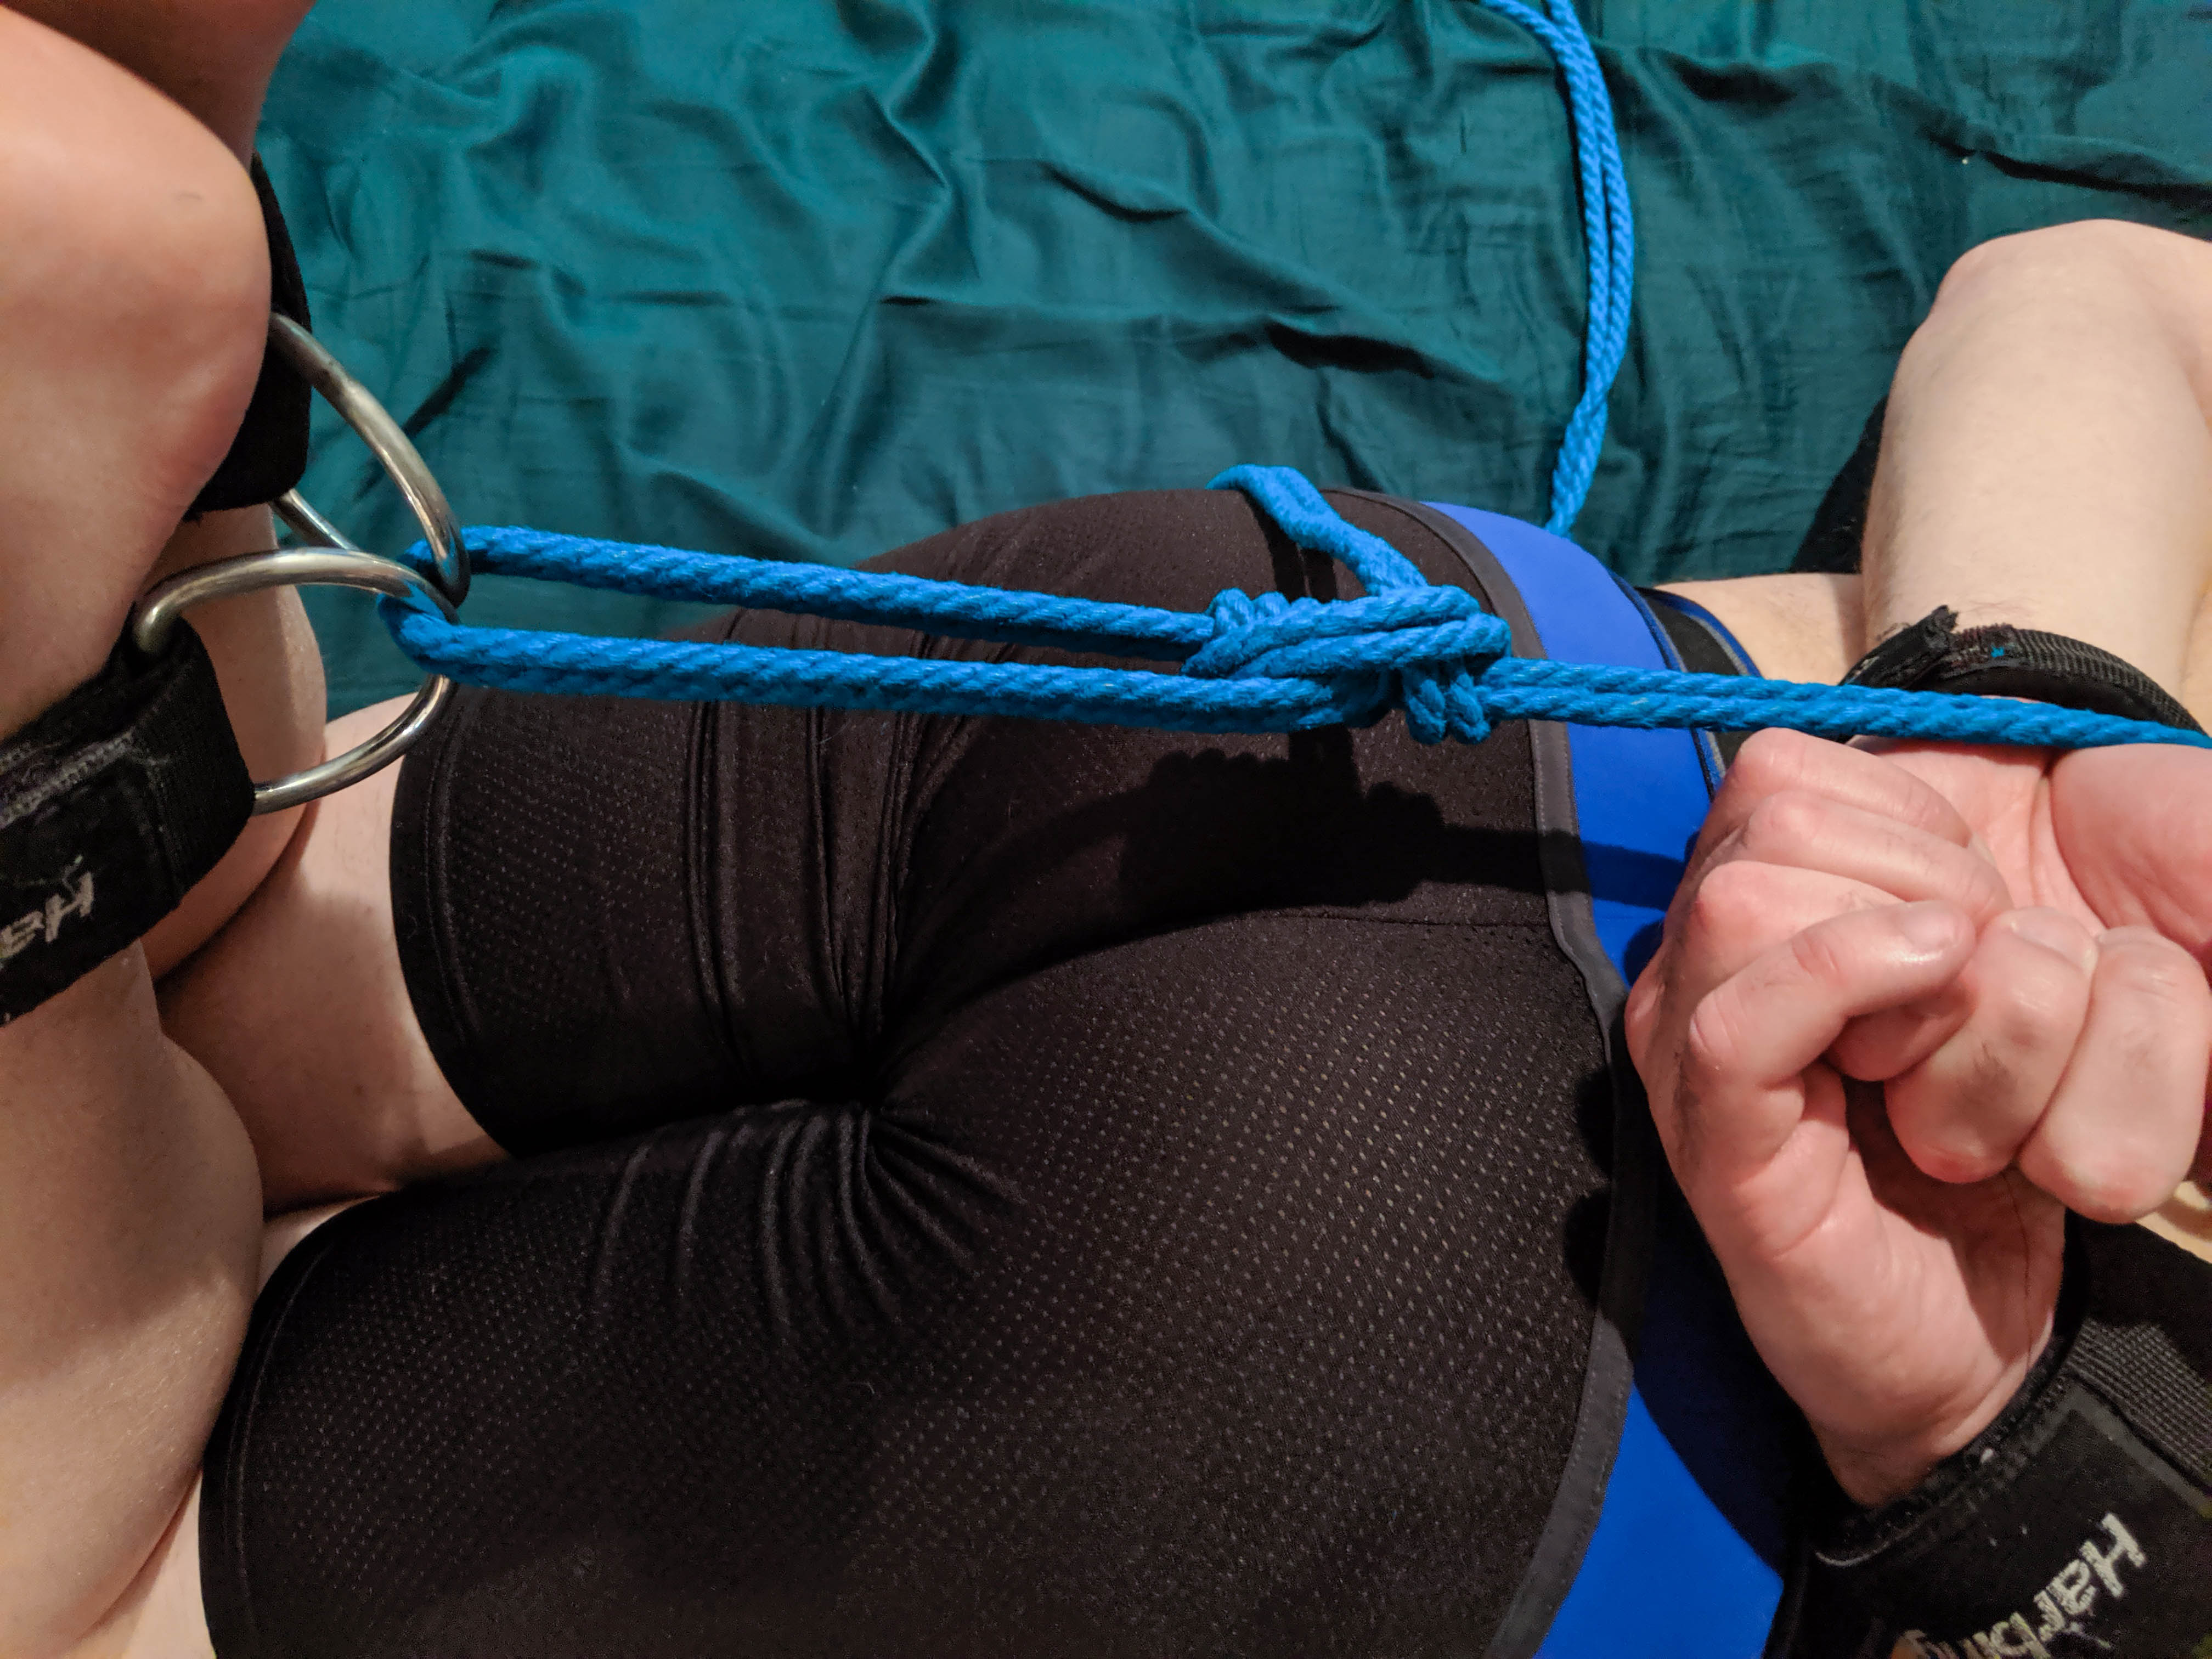
This is where we're going to start a midshipman's hitch which allows us to adjust the tightness of the legs. Pull the legs to somewhere that's tight but still comfortable and make the rope cross in the middle of the length betweeen their wrists and ankles. This will allow the adjustable knot to slide tighter and looser from here.
Begin coiling the rope (the coils featured in these pictues are actually backwards from a formal midshipman's hitch, but I found it doesn't matter much.)
The exact number of coils depends on the grip strength of the rope you're using. For grippy rope like this hemp I'm using two or three is plenty. For more slippery rope like MFP or nylon you may need 5 or more for this friction hitch to actually stick. You'll know you don't have enough if your partner tries to straighten out their legs and the knot slides all the way to their ankles.
To finish the midshipman's hitch, make one last coil on the other side
And pull it tight so it looks like this:
When you want to adjust the tension in their legs, use one hand to grab the knot and the other hand to hold the rope that goes through the knot. Moving the knot closer to their wrists tightens it, and moving it closer to their ankles loosens it.
That's it! Have fun, and remember to check in to see how your partner is feeling from time to time while you play.